Spread the love

There is a profound, universal human fascination with the sky. From the soft, cotton-candy hues of dawn to the deep indigo and golden constellations of midnight, celestial and atmospheric elements evoke a sense of limitless wonder, tranquility, and ethereal beauty. Integrating sky-inspired decor into your living space is more than a design choice; it is a lifestyle statement that transforms ordinary rooms into serene sanctuaries of peace and inspiration.

Whether you are looking to cultivate a cozy, cloud-filled bedroom retreat, a dreamy creative workspace, or a sophisticated living area touched by celestial elegance, this comprehensive guide explores 20 exquisite aesthetic sky decor ideas. Each concept includes a detailed introduction, an exploration of its core design philosophy, step-by-step guidance on how to create or style it, essential tips and variations, and the exact materials you will need. At the conclusion of this article, you will find a curated collection of high-resolution visual prompts to inspire your next creative interior design project.

1. Hand-Painted Celestial Ceiling Fresco

Introduction

The ceiling is often referred to as the “fifth wall” in interior design, yet it is frequently left stark white and neglected. Transforming your ceiling into a hand-painted celestial fresco brings the majesty of Renaissance-inspired observatories directly into your bedroom or study.

What This Idea Means

This concept celebrates classic artistic expression and immersive storytelling. By gazing upward into a hand-painted canopy of soft clouds, scattered gold-leaf stars, and subtle constellations, you create a deeply personal and meditative escape.

How to Make It

  1. Surface Prep: Sand your ceiling smooth, fill any hairline cracks, and apply a matte base coat in a deep midnight blue, dusky twilight lavender, or soft atmospheric gray-blue.
  2. Sketching Constellations: Lightly sketch your design with chalk or soft white pencil, mapping out major constellations, moon phases, or wispy cloud formations.
  3. Painting Clouds: Using a soft-bristle artist brush and sponges, dab layers of thinned acrylic paint in white and soft gray to create luminous, translucent cumulus clouds.
  4. Gold Leaf Detailing: Apply size (adhesive) to selected star points and press genuine or imitation gold leaf sheets onto the surface, brushing away excess flakes for a radiant metallic finish.

Tips and Variations

  • Tip: Work in sections while lying on an adjustable rolling mechanic’s creeper or scaffolding to prevent neck strain during the painting process.
  • Variation: If hand-painting feels daunting, use high-quality peel-and-stick ceiling wallpaper featuring a watercolor night sky.

Needs to Make That Thing

  • Matte ceiling paint in midnight blue and white
  • Artist brushes, sea sponges, and chalk pencils
  • Gold leaf sheets and gold leaf sizing adhesive
  • Protective matte clear varnish seal

2. Cloud-Resin Floating Coffee Table

Introduction

Merging modern resin artistry with ethereal nature, the Cloud-Resin Floating Coffee Table mimics the look of fluffy, translucent cumulus clouds suspended in mid-air beneath a crystal-clear expanse of sky.

What This Idea Means

This design concept represents captured moments in time and fluid modern sculpture. It brings sculptural wonder into functional furniture, acting as an instant conversation piece.

How to Make It

  1. Building the Mold: Construct a custom wooden casting mold sealed with silicone caulk to ensure a watertight container for the epoxy resin pour.
  2. Shaping the Clouds: Pull apart synthetic polyfill batting or cotton wool to form organic, wispy cloud shapes, treating them lightly with spray adhesive to hold their form.
  3. First Resin Pour: Pour a clear layer of deep-pour epoxy resin into the mold, submerging the cloud elements and allowing them to float naturally at varying depths. Curing takes 48 to 72 hours.
  4. Sanding and Polishing: Demold the cured resin block, trim excess edges with a table saw, and sand through progressive grits up to 3000-grit before buffing to a glass-like polish. Attach sleek hairpin legs.

Tips and Variations

  • Tip: Wear a respirator mask and work in a well-ventilated space when mixing and pouring deep-pour epoxy resin.
  • Variation: Add a faint touch of mica powder tint (sky blue or twilight pink) to the resin layer for a colored atmospheric glow.

Needs to Make That Thing

  • Deep-pour clear epoxy resin and hardener
  • Synthetic polyfill or cotton batting for cloud simulation
  • Wooden mold-making materials and silicone sealant
  • Electric sander, polishing compound, and hairpin metal legs

3. Starlight Fiber-Optic Canopy Headboard

Introduction

Bring the romance of a clear starlit night directly to your bed with a custom starlight fiber-optic canopy headboard. Tiny points of twinkling light mimic distant stars against a dark, enveloping backdrop.

What This Idea Means

This concept focuses on nocturnal tranquility and sensory comfort. It creates a calming, low-light environment that lulls the mind into restful sleep while providing enchanting visual depth.

How to Make It

  1. Constructing the Base: Build a tall wooden headboard panel upholstered in dark navy or charcoal acoustic felt fabric.
  2. Mapping Star Constellations: Drill hundreds of micro-holes through the fabric and wood backing, arranging them into realistic constellations or a random galaxy scatter.
  3. Threading Fiber Optics: Thread individual fiber-optic strands through each hole from the back, securing them with a dab of hot glue and trimming them flush with the front surface.
  4. Connecting the Illuminator: Gather the base of all fiber-optic cables into an LED light engine box hidden behind the headboard, connecting it to a remote control with twinkling mode options.

Tips and Variations

  • Tip: Use varying thicknesses of fiber-optic strands to create the illusion of brighter, closer stars versus faint, distant galaxies.
  • Variation: Extend the fiber-optic starfield from the headboard up onto the ceiling directly above the bed for an immersive full-canopy effect.

Needs to Make That Thing

  • Upholstered wooden headboard panel in dark fabric
  • Fiber-optic star light engine kit with remote control
  • Drill with micro-drill bits and hot glue gun
  • Acoustic felt backing material

4. Minimalist Moon Phase Brass Wall Hanging

Introduction

Sleek, sophisticated, and deeply rooted in celestial symbolism, a minimalist moon phase brass wall hanging adds subtle metallic elegance and astronomical grace to any empty wall.

What This Idea Means

This design celebrates cyclical time, balance, and understated metallic warmth. It introduces refined geometry that catches the ambient room light gracefully.

How to Make It

  1. Designing the Phases: Cut out circular and crescent moon shapes from thin brass sheets using heavy-duty metal shears, or source pre-cut brass blanks representing the lunar cycle from new moon to full moon.
  2. Polishing and Finishing: Sand the edges smooth and polish the brass faces with metal polish until they achieve a mirror-like or brushed satin sheen.
  3. Connecting the Chain: Link the moon phases vertically using delicate brass jump rings and fine brass cable chain, ensuring even spacing between each lunar phase.
  4. Hanging: Attach the completed vertical chain to a sturdy brass wall hook centered above your bed, sofa, or mantelpiece.

Tips and Variations

  • Tip: Apply a thin coat of clear lacquer or Renaissance micro-crystalline wax to the brass to prevent tarnishing and fingerprints over time.
  • Variation: Hammer subtle texture into the brass surfaces to catch light from multiple angles.

Needs to Make That Thing

  • Thin brass sheet metal or pre-cut brass moon blanks
  • Metal shears, jeweler’s file, and fine sandpaper
  • Brass jump rings, cable chain, and connecting pliers
  • Brass wall mounting hooks and metal polish

5. Glowing Nebula Resin Wall Art Panel

Introduction

Capture the explosive, colorful beauty of deep-space nebulae in a vibrant wall art panel. Swirls of cosmic purple, magenta, teal, and gold leaf create a mesmerizing focal point that glows softly in dim lighting.

What This Idea Means

This concept embraces cosmic exploration and vivid color theory. It brings dynamic energy and emotional resonance to interior spaces through rich, saturated hues.

How to Make It

  1. Preparing the Canvas: Use a deep wooden art cradle board primed with a matte black background coat to make vibrant pigments pop.
  2. Mixing Resin Colors: Mix batches of casting resin tinted with mica powder pigments in cosmic shades—deep violet, electric blue, rose pink, and metallic gold.
  3. Pouring and Swirling: Pour the colored resins onto the board and use a heat gun or silicone sticks to gently swirl and feather the colors together, mimicking celestial gas clouds.
  4. Adding Star Dust: Sprinkle fine holographic glitter or gold leaf flakes across the wet resin to create twinkling star clusters before allowing the panel to cure fully.

Tips and Variations

  • Tip: Warm your mixed resin bottles slightly in a warm water bath before mixing to eliminate air bubbles and ensure smooth working time.
  • Variation: Embed addressable LED strip lights behind a semi-translucent resin panel to make the nebula glow from within.

Needs to Make That Thing

  • Wooden artist cradle canvas board
  • Epoxy casting resin and color mica powder pigments
  • Gold leaf flakes and holographic glitter
  • Heat gun, mixing cups, and stir sticks

6. Floating Cloud Pendant Lamp Installation

Introduction

Transform ordinary overhead lighting into a breathtaking atmospheric sculpture by crafting a cluster of glowing, ethereal floating cloud pendant lamps suspended at varying heights.

What This Idea Means

This design focuses on diffused ambient illumination and playful fantasy. It turns functional lighting into an enchanting art installation that softens harsh architectural lines.

How to Make It

  1. Selecting the Core: Use lightweight paper lanterns or wireframe globes as the structural base for your cloud formations.
  2. Applying the Fluff: Layer clusters of flame-retardant synthetic cotton wool or polyfill batting around the lantern, securing them with spray adhesive or hot glue in organic, puffy clusters.
  3. Hanging the Cluster: Suspend the cloud pendants from sturdy ceiling hooks at varied heights over a dining table or reading corner using clear monofilament fishing line.
  4. Lighting: Insert smart, color-changing LED smart bulbs inside the lanterns so you can shift your clouds from warm sunlight to sunset orange or stormy indigo.

Tips and Variations

  • Tip: Always use cool-running LED bulbs inside fabric or cotton cloud fixtures to prevent fire hazards.
  • Variation: Integrate tiny fairy string lights tucked within the outer fluff layers to make the cloud bodies sparkle from inside.

Needs to Make That Thing

  • Round paper lanterns or wireframe globes
  • Flame-retardant synthetic polyfill batting
  • Spray adhesive and hot glue gun
  • Smart RGB LED light bulbs and hanging cords

7. Sunset Gradient Ombre Accent Wall

Introduction

Capture the fleeting magic of a golden hour sunset permanently indoors with a hand-painted sunset gradient ombre accent wall, featuring warm coral, dusty peach, and soft golden-yellow tones.

What This Idea Means

This concept celebrates warmth, emotional well-being, and circadian harmony. Soft gradient transitions trick the eye into perceiving expanded space and continuous, comforting sunlight.

How to Make It

  1. Base Coating: Paint your entire accent wall in the lightest color of your gradient (such as pale cream or soft butter yellow).
  2. Dividing Horizontal Zones: Lightly mark horizontal sections down the wall to map your transition zones from top to bottom (e.g., violet sky fading to orange, then peach).
  3. Applying Paint Bands: Roll on distinct bands of color from lightest at the bottom to deepest twilight hue at the top.
  4. Blending the Edges: While the paint is still wet, use a clean, dry wide brush or a damp sponge to feather and blend the overlapping color lines together until the transition is seamless.

Tips and Variations

  • Tip: Work quickly or use a slow-drying paint additive (retarder) to keep the paint workable long enough to achieve a smooth gradient blend.
  • Variation: Paint a glowing geometric sun or minimalist horizon line cutting across the center of the gradient ombre wall.

Needs to Make That Thing

  • Interior wall paints in sunset gradient shades (lavender, peach, coral, yellow)
  • High-density paint rollers and trays
  • Wide feathering blending brushes and natural sponges
  • Painter’s tape and laser level

8. Holographic Prism Window Suncatchers

Introduction

Turn ordinary sunlight streaming through your windows into dancing rainbows and celestial light shows across your floors and walls using holographic prism window suncatchers.

What This Idea Means

This concept represents natural magic, optical play, and mindful joy. It harnesses natural light to animate static rooms with shifting prisms of color throughout the day.

How to Make It

  1. Selecting Decals: Choose static-cling window film cut into aesthetic celestial shapes—crescent moons, stars, sunbursts, and crystals.
  2. Cleaning the Glass: Clean your south-facing or west-facing window glass thoroughly with glass cleaner and wipe dry to remove dust and oils.
  3. Applying the Film: Peel the backing off the static-cling suncatcher decal, spray the window with a light mist of water with a drop of dish soap, and smooth the decal onto the glass.
  4. Squeegeeing Bubbles: Use a credit card or rubber squeegee to push out any trapped water and air bubbles from beneath the film.

Tips and Variations

  • Tip: Place suncatchers on windows that receive direct, unfiltered sunlight during peak morning or afternoon hours for maximum rainbow dispersion.
  • Variation: Hang small glass prism crystal balls from fine chains in the center of the window frame for a classic Victorian-meets-modern aesthetic.

Needs to Make That Thing

  • Holographic static-cling window suncatcher decals (celestial shapes)
  • Spray bottle with water and mild dish soap
  • Microfiber cleaning cloth and squeegee card

9. Astrological Constellation Tapestry Banner

Introduction

Anchor a gallery wall or fill an awkward vertical space with a large, hand-embroidered or printed astrological constellation tapestry banner suspended on a natural wooden dowel.

What This Idea Means

This design honors ancient cartography, astronomy, and tactile textile arts. It adds organic softness to walls while celebrating personal identity and zodiac alignment.

How to Make It

  1. Selecting Fabric: Choose heavy natural linen, raw canvas, or dark indigo cotton duck cloth as your durable tapestry base.
  2. Transferring the Map: Stamp or lightly trace vintage astronomical star charts or your favorite zodiac constellation map onto the fabric using chalk transfer paper.
  3. Embroidering Stars: Stitch the major star points using French knots and metallic gold or silver embroidery floss, connecting them with delicate backstitches.
  4. Hanging Hardware: Fold and sew a sleeve at the top edge of the fabric, sliding a natural oak dowel through it, and hang with a braided leather cord.

Tips and Variations

  • Tip: Use a light box underneath your fabric to easily trace intricate constellation maps onto thick linen.
  • Variation: Paint the constellation map using metallic gold fabric paint instead of embroidery for a sleeker, faster DIY project.

Needs to Make That Thing

  • Heavy natural linen or raw canvas fabric
  • Metallic gold and silver embroidery floss and needles
  • Natural oak wooden dowel and leather hanging cord
  • Tracing paper and chalk transfer pen

10. Floating Acrylic Cloud Shelves

Introduction

Combine practical wall storage with whimsical design by installing laser-cut floating acrylic cloud shelves that appear to hover weightlessly against your walls.

What This Idea Means

This concept emphasizes playful minimalism and functional art. It provides display space for small treasures while adding a light, airy visual element to room perimeters.

How to Make It

  1. Sourcing or Cutting: Purchase clear or frosted acrylic cloud-shaped shelves, or cut them out from thick acrylic sheets using a scroll saw or laser cutter.
  2. Mounting Brackets: Attach heavy-duty concealed floating shelf brackets or clear acrylic support ledges securely into wall studs.
  3. Securing the Shelf: Mount the cloud shelf onto the brackets, ensuring it sits completely level and stable to hold lightweight books, crystals, or small plants.
  4. Styling: Style the acrylic cloud shelf with miniature glass terrariums, crystal clusters, and framed cloud photography prints.

Tips and Variations

  • Tip: Use edge-lit LED brackets beneath clear acrylic shelves to make the entire cloud profile glow with ethereal light.
  • Variation: Tint the acrylic in pastel pink or soft baby blue for a dreamy sunset cloud palette.

Needs to Make That Thing

  • Custom acrylic cloud shelves (clear or frosted)
  • Concealed floating shelf hardware and wall anchors
  • Stud finder and power drill
  • Microfiber cloth for acrylic care

11. Ethereal Silk Cloud Mobile

Introduction

Gentle, mesmerizing, and weightless, an ethereal silk cloud mobile suspended from a ceiling hook bops and sways gracefully with the natural air currents in the room.

What This Idea Means

This design celebrates kinetic movement and delicate textile art. It brings a calming, meditative focal point to nurseries, bedrooms, or meditation corners.

How to Make It

  1. Constructing the Base: Form a circular mobile frame using a brass wire ring or bent natural willow branch.
  2. Crafting Silk Clouds: Wrap handfuls of soft wool batting inside translucent white silk or organza fabric scraps, tying the bases securely with invisible thread to form fluffy cloud pouches.
  3. Adding Stars: Suspend tiny brass star charms or crystal beads on fine monofilament lines hanging below each silk cloud.
  4. Balancing the Mobile: Tie your silk clouds and stars to the brass ring at varying heights, adjusting placement until the mobile hangs perfectly balanced.

Tips and Variations

  • Tip: Hang the mobile near a gentle air vent or window where subtle drafts will keep the silk clouds in perpetual, gentle motion.
  • Variation: Incorporate tiny felted raindrops hanging beneath the silk clouds for a gentle rain shower aesthetic.

Needs to Make That Thing

  • Brass wire ring or natural branch hoop
  • Translucent white silk or organza fabric and wool batting
  • Brass star charms and crystal beads
  • Clear monofilament fishing line

12. Velvet Starry Night Curtains

Introduction

Frame your windows in nocturnal luxury with deep indigo or midnight black velvet curtains scattered with metallic gold foil stars and moon motifs.

What This Idea Means

This concept focuses on dramatic framing, tactile richness, and light control. It creates a cozy, cocoon-like atmosphere that blocks out the harsh world outside.

How to Make It

  1. Selecting Fabric Panels: Purchase luxury velvet curtain panels in dark midnight blue, deep plum, or charcoal gray.
  2. Applying Gold Motifs: Use celestial iron-on gold foil vinyl decals (moons, stars, constellations) or paint them by hand using metallic gold fabric paint and stencils.
  3. Heat Pressing: If using vinyl decals, apply them carefully across the velvet panels using a household iron or heat press on low setting with a protective pressing cloth.
  4. Hanging: Mount a sleek matte black or brushed brass curtain rod high above the window frame to emphasize vertical elegance.

Tips and Variations

  • Tip: Velvet absorbs light beautifully; line your curtains with blackout lining to ensure complete darkness for restful sleep.
  • Variation: Sew or glue warm white fairy light curtains behind sheer panels for a glowing starry window backdrop.

Needs to Make That Thing

  • Luxury velvet curtain panels (midnight blue or charcoal)
  • Gold foil iron-on celestial vinyl decals or fabric paint
  • Heat press or household iron
  • Matte black or brass curtain rod set

13. Celestial Brass and Glass Terrarium

Introduction

House your favorite air plants, crystals, and moss inside a geometric brass and glass terrarium shaped like a pentagon star, half-moon, or diamond geodesic orb.

What This Idea Means

This concept bridges botanical life with astronomical geometry. It creates a miniature living ecosystem housed within a celestial architectural vessel.

How to Make It

  1. Selecting the Vessel: Choose a stained-glass style geometric brass and glass terrarium container with an open access panel.
  2. Layering the Base: Layer the bottom with activated charcoal, small river pebbles, and nutrient-rich terrarium soil to ensure proper drainage.
  3. Planting: Nestle air plants (Tillandsia), preserved moss, and small succulents inside the soil bed.
  4. Adding Celestial Accents: Place raw quartz crystal points, polished moonstones, and tiny brass star figurines amongst the greenery.

Tips and Variations

  • Tip: Mist air plants and moss lightly once a week with a spray bottle, avoiding over-saturation to prevent root rot.
  • Variation: Hang the geometric terrarium from a ceiling hook using a macrame plant hanger near a bright window.

Needs to Make That Thing

  • Geometric brass and glass celestial terrarium container
  • Horticultural activated charcoal and drainage pebbles
  • Air plants, preserved moss, and succulent varieties
  • Raw quartz crystals and miniature brass stars

14. Glowing Crescent Moon Wall Sconce

Introduction

Cast a warm, atmospheric halo across your walls with a sculptural crescent moon wall sconce that diffuses golden backlighting like a lunar eclipse.

What This Idea Means

This design celebrates indirect ambient lighting and sculptural wall art. It provides functional accent lighting while serving as a stunning artistic statement by day.

How to Make It

  1. Sculpting the Moon: Shape a crescent moon body out of lightweight modeling clay, carved wood, or hammered brass sheeting with a raised center.
  2. Integrating Lighting: Mount a low-profile LED strip light or puck light to the recessed back of the crescent moon chassis.
  3. Wall Mounting: Hang the sconce securely on the wall using heavy-duty drywall anchors, leaving a small gap between the wall and the fixture for the light to spill backward.
  4. Testing the Glow: Turn on the backlight to reveal a soft, radiant halo that mimics a glowing moon against the wall surface.

Tips and Variations

  • Tip: Use a smart warm-white LED bulb with adjustable brightness to customize the intensity of your lunar halo.
  • Variation: Pair the crescent moon sconce with smaller circular star sconces for a complete celestial lighting constellation.

Needs to Make That Thing

  • Sculptural crescent moon wall fixture (brass or carved wood)
  • Low-profile LED backlighting strip or puck light
  • Wall mounting hardware and drywall anchors
  • Battery-operated or plug-in power source

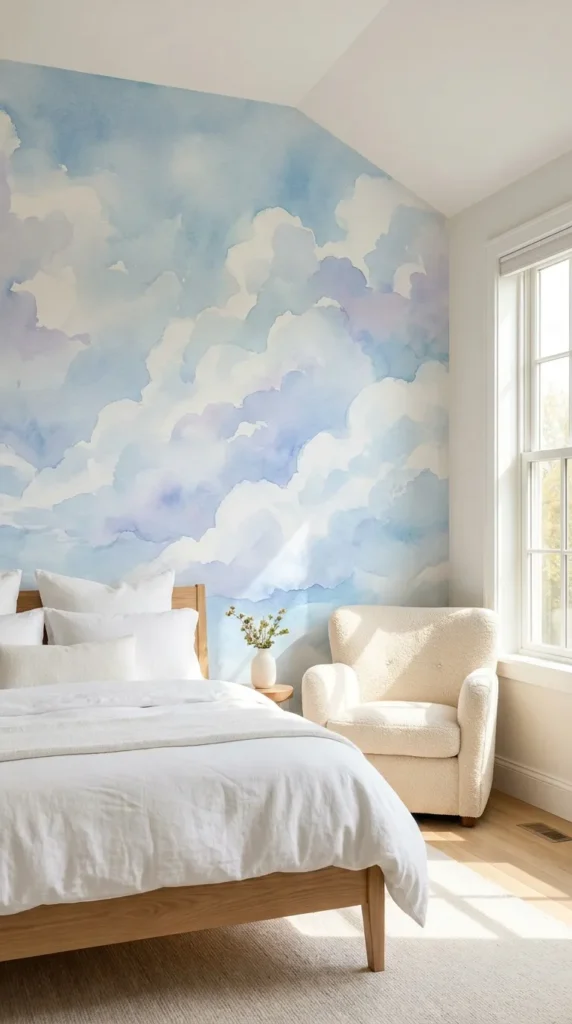
15. Watercolor Cloudy Sky Wallpaper Mural

Introduction

Wrap an entire room or feature wall in a breathtaking watercolor cloudy sky wallpaper mural, blurring the boundaries between interior space and the open heavens.

What This Idea Means

This concept represents immersive escapism and expansive serenity. It dissolves walls visually, making small rooms feel wide, airy, and deeply peaceful.

How to Make It

  1. Wall Preparation: Prime and smooth your wall surface thoroughly to ensure seamless wallpaper adhesion without bumps or bubbles.
  2. Measuring and Ordering: Measure wall height and width accurately, ordering a custom-scaled peel-and-stick watercolor cloud mural panel set.
  3. Applying Panels: Start from one corner, aligning the watercolor cloud patterns precisely panel by panel using a laser level.
  4. Smoothing: Smooth each panel down firmly with a plastic wallpaper smoother to eliminate air bubbles, trimming excess paper at the baseboards with a utility knife.

Tips and Variations

  • Tip: Peel-and-stick wallpaper is renter-friendly and easy to remove, making it ideal for temporary bedroom updates.
  • Variation: Choose a mural featuring a stormy, dramatic twilight cloudscape for moody, romantic ambiance.

Needs to Make That Thing

  • Custom watercolor cloudy sky peel-and-stick wallpaper mural panels
  • Laser level and chalk line
  • Plastic smoothing squeegee tool
  • Sharp utility knife and metal straightedge

16. Floating Glass Orb Solar System Chandelier

Introduction

Suspend a mesmerizing solar system chandelier featuring glowing glass globes representing the sun and planets orbiting at the center of your dining room or living area.

What This Idea Means

This design celebrates astronomical wonder, grand scale, and sophisticated craftsmanship. It is an awe-inspiring statement piece for science enthusiasts and art lovers alike.

How to Make It

  1. Choosing the Fixture: Source a custom multi-pendant brass chandelier featuring varied-sized blown glass or milky quartz spheres.
  2. Arranging the Orbs: Hang each glass sphere at calibrated heights to represent planetary distances or a harmonious artistic constellation cluster.
  3. Ceiling Canopy Installation: Mount the heavy-duty brass ceiling canopy securely into ceiling joists to support the weight of the glass globe array.
  4. Bulb Selection: Use amber-tinted Edison LED bulbs inside each glass orb to cast a warm, vintage planetary glow.

Tips and Variations

  • Tip: Ensure professional electrical installation, as multi-pendant glass chandeliers require secure weight-bearing ceiling boxes.
  • Variation: Use frosted white glass globes for a clean, minimalist celestial aesthetic.

Needs to Make That Thing

  • Multi-pendant brass and glass orb chandelier fixture
  • Rated ceiling junction box and mounting hardware
  • Amber-tinted Edison LED bulbs
  • Ladder and wire strippers

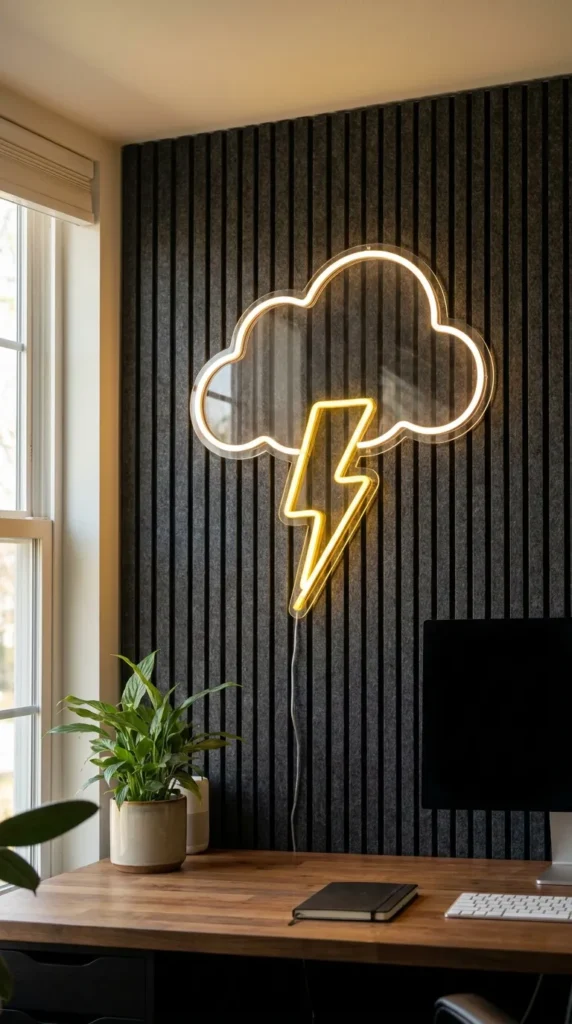
17. Custom Neon Cloud and Lightning Sign

Introduction

Inject a touch of playful, modern pop-art energy into your space with a custom LED neon sign depicting a fluffy cloud striking a vibrant lightning bolt.

What This Idea Means

This concept represents modern urban aesthetics, dynamic contrast, and playful illumination. It adds an electric, vibrant burst of color to neutral or moody rooms.

How to Make It

  1. Selecting the Design: Choose an acrylic-backed LED neon flex sign shaped like a cloud with a contrasting yellow or pink lightning bolt.
  2. Mounting: Hold the acrylic backing against the wall, mark your screw points, and secure the sign using standoff wall mounts.
  3. Power Connection: Plug the USB or wall adapter power cord into a discreet outlet, routing the clear cord cleanly along the wall baseboard.
  4. Dimmer Control: Use the included inline dimmer switch to adjust the neon glow from party brightness down to soft ambient nightlight levels.

Tips and Variations

  • Tip: LED neon flex is cool to the touch, energy-efficient, and shatterproof compared to traditional glass neon tubing.
  • Variation: Pair the cloud-and-lightning neon sign with a dark charcoal acoustic slat wood wall panel for ultimate contrast.

Needs to Make That Thing

  • LED neon flex cloud and lightning sign on clear acrylic backing
  • Acrylic wall standoff mounting kit and screws
  • Inline dimmer switch and power adapter
  • Cable clips for clean wire management

18. Dreamy Aurora Borealis Acrylic Canvas

Introduction

Bring the magical, undulating ribbons of the Northern Lights indoors with a large-scale fluid acrylic canvas painting capturing electric greens, violets, and deep magnetic blues.

What This Idea Means

This design honors natural wonder, rare atmospheric phenomena, and abstract color expression. It creates a hypnotic, calming focal point that draws the eye and sparks daydreams.

How to Make It

  1. Stretching the Canvas: Prepare a large rectangular or square stretched cotton canvas with a black gesso primer base.
  2. Fluid Paint Pouring: Mix fluid acrylic paints in aurora colors—electric emerald green, violet purple, and cyan blue—with pouring medium.
  3. Creating Aurora Ribbons: Pour and swipe the paints across the canvas using a palette knife or damp paper towel to mimic the dancing, ribbon-like curtains of the aurora borealis.
  4. Finishing: Allow the canvas to dry completely for several days, then seal with a high-gloss or satin varnish to make the colors shimmer.

Tips and Variations

  • Tip: Add a touch of interference green or gold paint to catch ambient room light and create a shimmering aurora shift.
  • Variation: Frame your aurora canvas in a slim floating black wooden gallery frame for a polished, museum-quality finish.

Needs to Make That Thing

  • Large stretched cotton artist canvas and black gesso
  • Fluid acrylic paints (emerald green, violet, cyan, black)
  • Acrylic pouring medium and palette knives
  • Gloss or satin protective varnish spray

19. Stained Glass Sun and Moon Panel

Introduction

Hang a traditional stained glass sun and moon panel in your window to catch morning rays, casting dazzling pools of colored amber, cobalt, and golden light across your room.

What This Idea Means

This concept celebrates traditional craftsmanship, sacred geometry, and artisanal heritage. It infuses rooms with timeless, glowing stained-glass warmth.

How to Make It

  1. Designing the Panel: Create or source a stained glass pattern featuring a smiling sun intertwined with a crescent moon.
  2. Glass Cutting and Foiling: Cut colored art glass pieces using a glass cutter, grind smooth edges, wrap copper foil around each piece, and solder them together with lead-free solder.
  3. Adding Reinforcement: Solder sturdy zinc framing around the perimeter of the panel and attach strong hanging loops at the top corners.
  4. Window Hanging: Hang the stained glass panel securely in your window using heavy-duty suction cup hooks with metal latches or a secured window chain.

Tips and Variations

  • Tip: Ensure your window hanging hardware is rated for the specific weight of the stained glass panel to prevent accidental falls.
  • Variation: Place a small LED backlit light box behind the stained glass panel if your window lacks sufficient natural sunlight.

Needs to Make That Thing

  • Stained glass sun and moon panel artwork
  • Copper foil tape, flux, and soldering iron with solder
  • Zinc framing channel and hanging loops
  • Heavy-duty window hanging chain and hooks

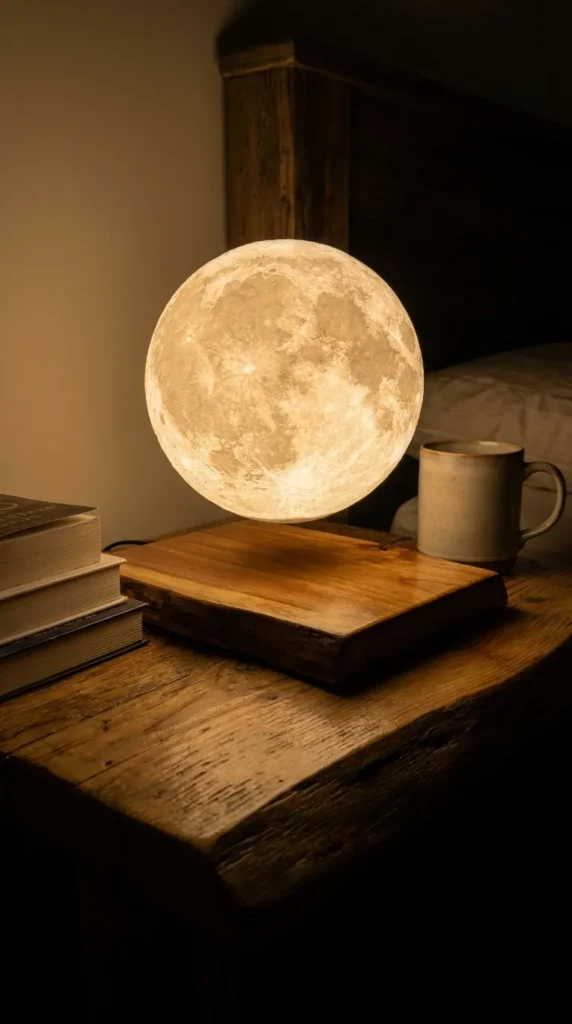
20. Levitating Magnetic Moon Lamp Centerpiece

Introduction

Defy gravity with a floating, rotating levitating magnetic moon lamp that hovers effortlessly above a natural wooden base, casting a realistic, crater-textured lunar glow.

What This Idea Means

This design concept merges futuristic technology with natural celestial wonder. It serves as a mesmerizing kinetic centerpiece for coffee tables, desks, or nightstands.

How to Make It

  1. Setting the Base: Place the natural wooden or sleek metallic power base on a flat, level surface and plug it into a wall outlet.
  2. Balancing the Moon: Hold the 3D-printed textured moon globe with both hands, gently lowering it toward the center of the magnetic field above the base.
  3. Finding the Sweet Spot: Feel for the magnetic equilibrium point where the upward magnetic pull balances gravity, then gently let go.
  4. Spinning and Lighting: Give the moon a gentle tap to start it spinning smoothly while touching the power sensor on the base to ignite the warm lunar LED glow.

Tips and Variations

  • Tip: Practice finding the magnetic balancing point a few times; once mastered, the floating suspension takes only seconds to set up.
  • Variation: Choose between warm yellow moonlight, cool white light, and soft sunset orange light settings via touch control.

Needs to Make That Thing

  • Levitating magnetic 3D-printed moon lamp globe
  • Electromagnetic wooden power base and AC adapter
  • Touch-control brightness and color temperature settings