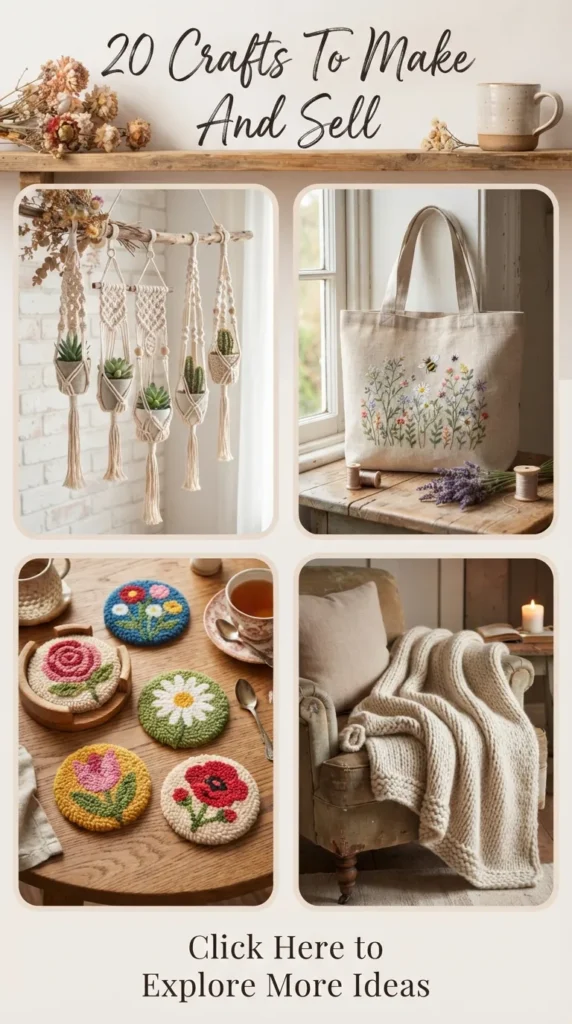
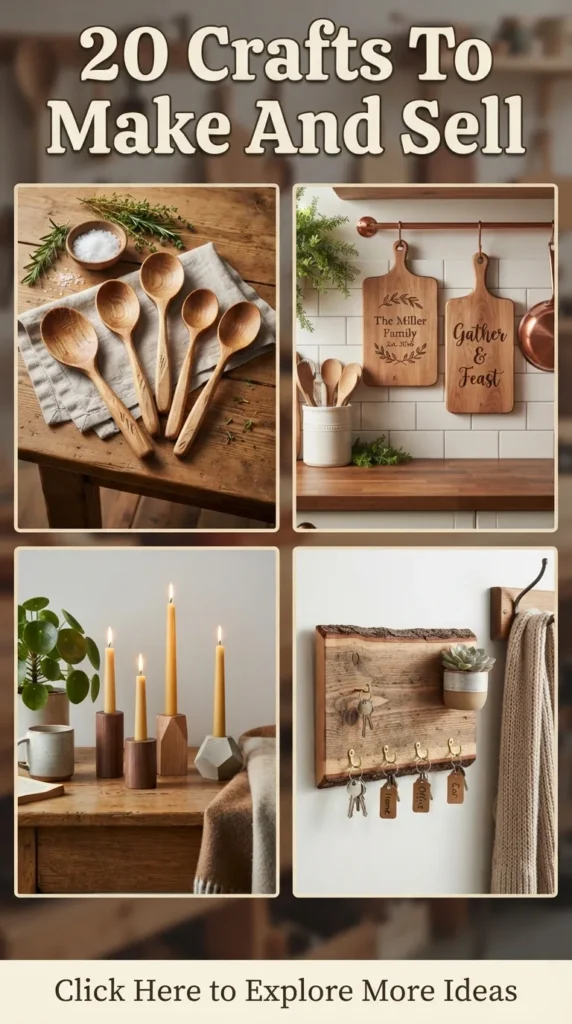
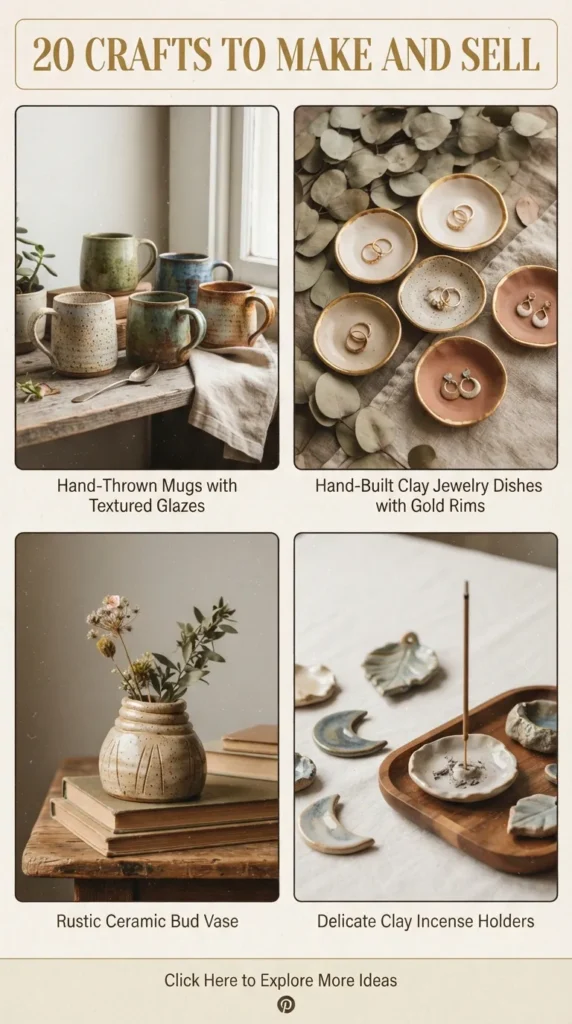
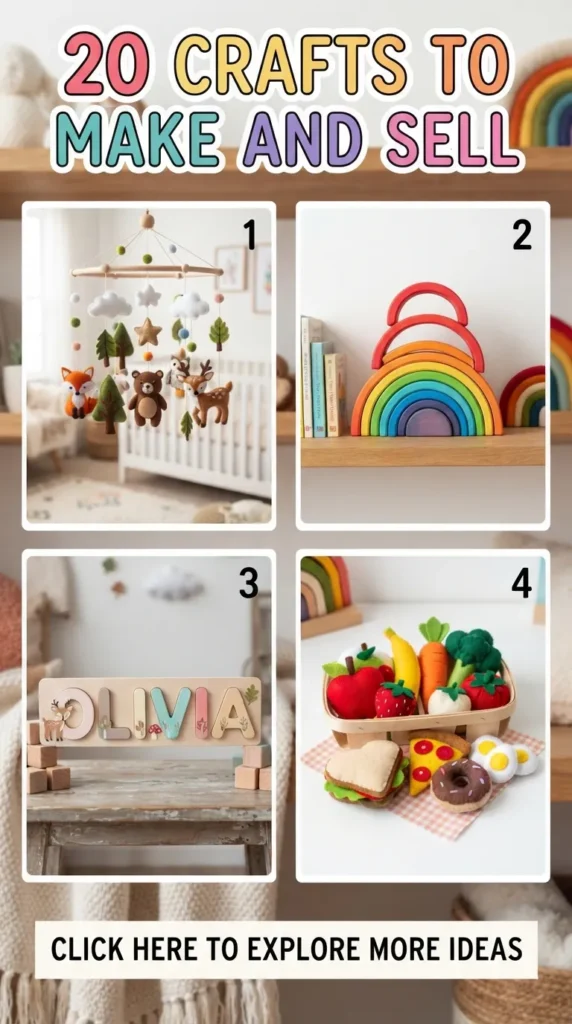
The handmade economy is flourishing, driven by a growing appreciation for artisanal home decor, sustainable lifestyle goods, and unique personal accessories. Creating high-demand, aesthetically driven crafts allows makers to turn tactile artistry into thriving small businesses.
Below is an extensive, step-by-step master guide covering 20 curated crafts engineered for high visual appeal, marketability, and strong profit margins.
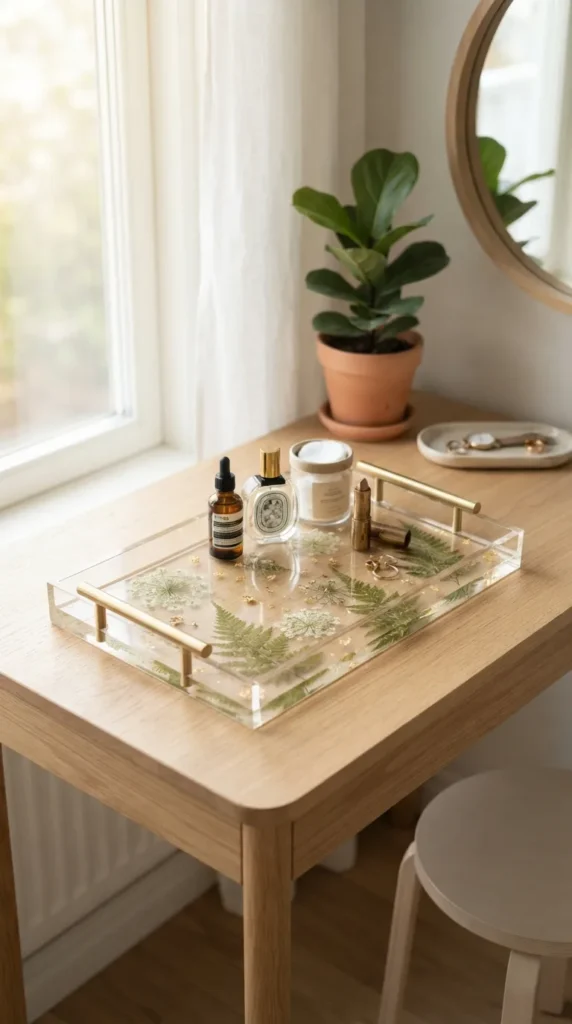
1. Botanical Pressed Flower Resin Trays
Botanical resin trays combine preserved nature with functional home decor. These display pieces use clear casting resin to encapsulate delicate ferns, petals, and gold leaf flakes inside an elegant serving or vanity tray, transforming raw botanical elements into durable heirloom art.
- Introduction & Concept: The modern botanical aesthetic focuses on earthy minimalism. Clear resin highlights the organic shapes and vibrant pigments of dried flora, creating a luminous, glass-like finish that fits modern, Scandinavian, and cottagecore interior spaces.
- Materials Needed: Epoxy resin kit (1:1 or 2:1 ratio), silicone tray molds with built-in handle slots, pre-pressed dried flowers and foliage, microfine gold leaf flakes, heat gun or butane torch, silicone mixing cups, nitrile gloves, wooden stir sticks, and 400-to-1200 grit wet/dry sandpaper.
- How to Make It:
- Clean the silicone mold thoroughly with isopropyl alcohol to remove lint and dust.
- Mix equal parts resin and hardener slowly for three full minutes to avoid introducing micro-bubbles.
- Pour a thin base layer (around 2–3 mm) into the mold and let it sit for 20 minutes until slightly tacky.
- Carefully place dried botanical elements onto the base layer using fine tweezers, gently pressing them down to eliminate trapped air pockets beneath the petals.
- Lightly scatter flakes of gold leaf around the botanicals to add depth.
- Pour the clear topcoat over the botanicals until the mold is filled to the brim.
- Pass a heat gun on low heat 6 inches above the surface in sweeping motions to pop all surface bubbles.
- Allow the tray to cure on a completely level surface for 24 to 48 hours before demolding, then sand the base edges smooth if necessary.
- Tips & Market Variations:
- Ensure botanicals are 100% dry; any residual moisture causes flowers to turn brown inside the resin.
- Variations: Offer custom bridal bouquet preservation trays, dark moody trays with tinted black resin and white baby’s breath, or minimalist eucalyptus desk catchalls.
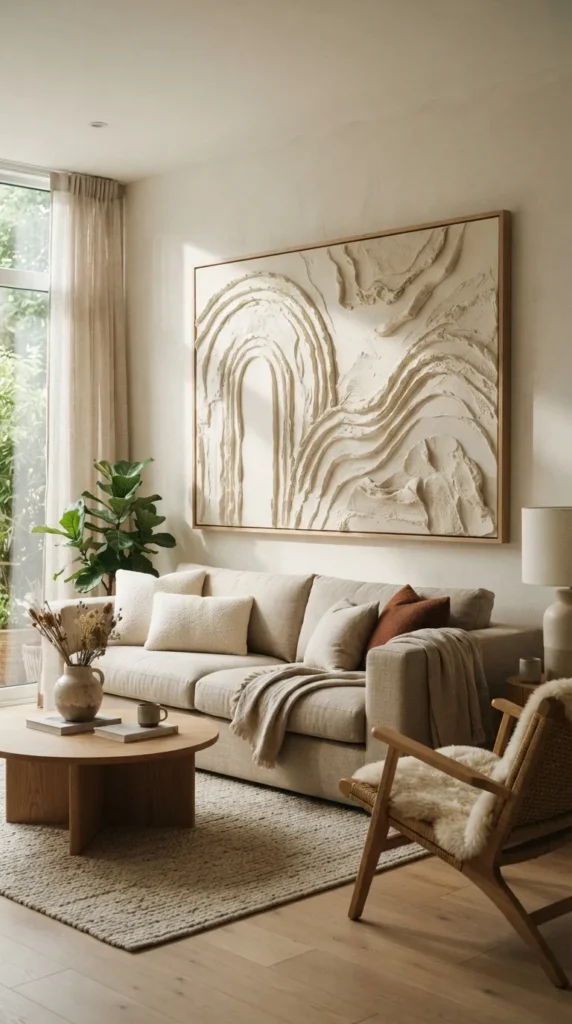
2. Textured Arch Wall Canvas Art
Textured arch canvases use joint compound or modeling paste to construct sculptural, minimalist relief patterns on stretched canvas. Inspired by Mediterranean architecture and Japandi minimalism, these statement pieces command high prices due to their tactile, gallery-grade presence.
- Introduction & Concept: Textured wall art moves beyond flat paint by adding dimensional depth. The interplay of light and shadow across raised plaster ridges gives modern living spaces an architectural focal point.
- Materials Needed: Heavy-duty stretched cotton canvas, premixed lightweight joint compound or acrylic modeling paste, notched drywall trowels (square and triangular teeth), palette knives, fine-grit sanding sponge, neutral acrylic paints (chalky white, taupe, terracotta, warm stone), and a matte acrylic spray sealer.
- How to Make It:
- Lay the stretched canvas flat on a sturdy, level workstation.
- Apply a generous, even layer of lightweight joint compound (about 1/4 inch thick) over the canvas using a broad taping knife.
- While the paste is wet, drag a notched trowel in a smooth, continuous semi-circular arching motion from base to crest.
- Use a thin palette knife to refine borders or slice geometric accents into the surrounding negative space.
- Let the compound dry undisturbed for 24 hours until fully hardened.
- Gently buff rough points with a sanding sponge to remove harsh burrs without flattening the ridges.
- Apply two coats of ultra-matte acrylic paint using a high-density foam roller or wide brush.
- Seal the piece with a clear matte protective finish to resist humidity and dust accumulation.
- Tips & Market Variations:
- Mix a small amount of PVA wood glue into standard joint compound to prevent cracking as thick layers cure.
- Variations: Produce multi-panel triptychs, integrate raw earth pigments like iron oxide, or experiment with intersecting organic wave patterns.
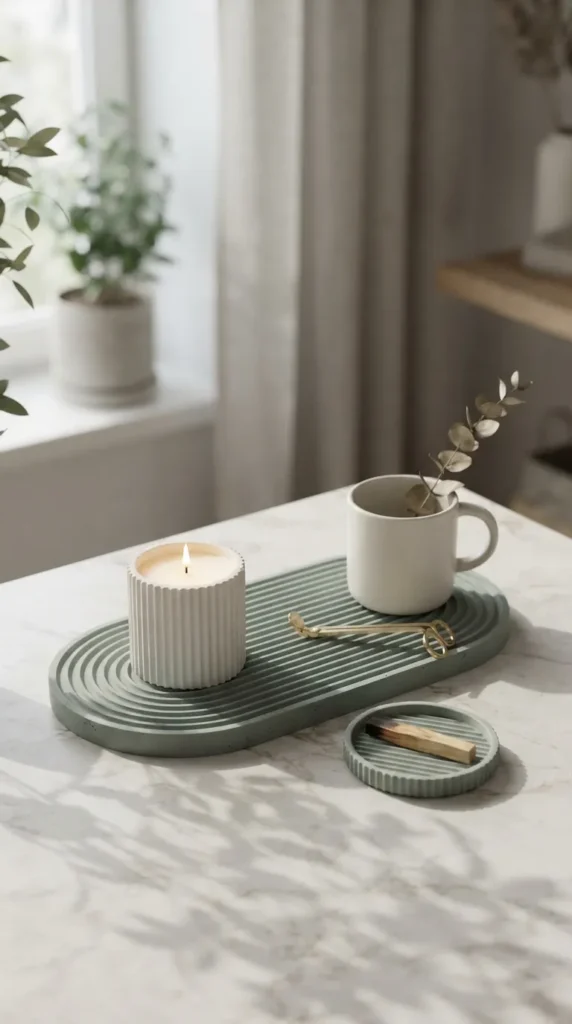
3. Scandi Ribbed Jesmonite Homeware
Jesmonite is an eco-friendly, water-based composite material that yields a smooth, stone-like aesthetic without the toxicity of traditional resins. Ribbed catchall trays, pillared arch vessels, and pedestal coasters fit seamlessly into clean, Nordic-inspired homes.
- Introduction & Concept: Jesmonite crafts mimic the luxurious weight and cool touch of polished marble or fine porcelain. Its fast curing time and velvety matte surface make it ideal for high-volume production of chic desk organizers, candle holders, and bathroom sets.
- Materials Needed: Jesmonite AC100 liquid and base powder, high-grade ribbed silicone molds, liquid pigment dispersions, digital scale, high-shear mixing blade or mechanical whisk, release wax, and food-safe acrylic water-based sealer.
- How to Make It:
- Weigh the Jesmonite liquid and powder strictly at the recommended 1:2.5 ratio by weight using your digital scale.
- Add chosen liquid pigments into the liquid component first and stir to achieve a uniform shade.
- Slowly add the powder to the liquid while mixing continuously with a whisk to prevent lumps.
- Pour a small amount of the mixed composite into the ribbed mold, using a brush to paint the mixture into every groove to prevent surface pinholes.
- Fill the rest of the mold to the top edge.
- Vigorously tap and vibrate the mold edges against the table for two minutes to bring trapped air bubbles to the surface.
- Allow it to set at room temperature for 30 to 45 minutes until the exothermic reaction cools down.
- Demold gently and allow the piece to dry completely for 24 hours before applying two thin coats of water-resistant sealer.
- Tips & Market Variations:
- Sand the cured piece under running water with 600-grit wet sandpaper to expose unique marbleized patterns or achieve an ultra-smooth finish.
- Variations: Create terrazzo styles with cured contrasting Jesmonite chips, two-tone split-pour designs, or delicate pastel ombré palettes.
4. Minimalist Raw Ceramic & Stoneware Mugs
Handmade stoneware ceramics emphasize organic contours, visible throwing rings, and tactile unglazed exteriors paired with glossy functional interiors. These artisanal mugs offer an earthy, grounded coffee-drinking experience that factory-made mugs cannot replicate.
- Introduction & Concept: Modern ceramic lovers appreciate the “perfectly imperfect” wabi-sabi aesthetic. Exposed speckled clay bodies combined with soft glaze dips create everyday functional art with high retail appeal.
- Materials Needed: Mid-fire speckled buff or stoneware clay, pottery wheel or hand-building slab tools, wire cutoff tool, loop trimming tools, scoring rib, food-safe ceramic glazes (satin matte white, oatmeal, sage), and access to a pottery kiln.
- How to Make It:
- Center 1 lb of clay on the wheel, open the base, and pull straight, even walls into a modern cylindrical or tapered belly shape.
- Use a metal rib to smooth the interior while leaving subtle, rhythmic wheel ridges on the exterior surface.
- Cut the mug from the bat with a wire tool and allow it to reach leather-hard consistency.
- Trim the bottom base cleanly, creating a subtle recessed foot ring.
- Pull an ergonomic handle from a small clay coil, curve it into an arch, score and slip both attachment points, and secure it firmly to the mug body.
- Allow the piece to dry slowly under plastic wrap for several days to prevent handle cracking.
- Bisque fire the piece to Cone 04.
- Wax the bottom and lower third of the outer body, dip the interior and rim into food-safe glaze, and glaze-fire to Cone 6.
- Tips & Market Variations:
- Ensure handles have balanced proportions and smooth attachment seams to maintain structural integrity during daily use.
- Variations: Produce large unglazed espresso cups, chunky handle statement mugs, or footed matcha bowls with pouring spouts.

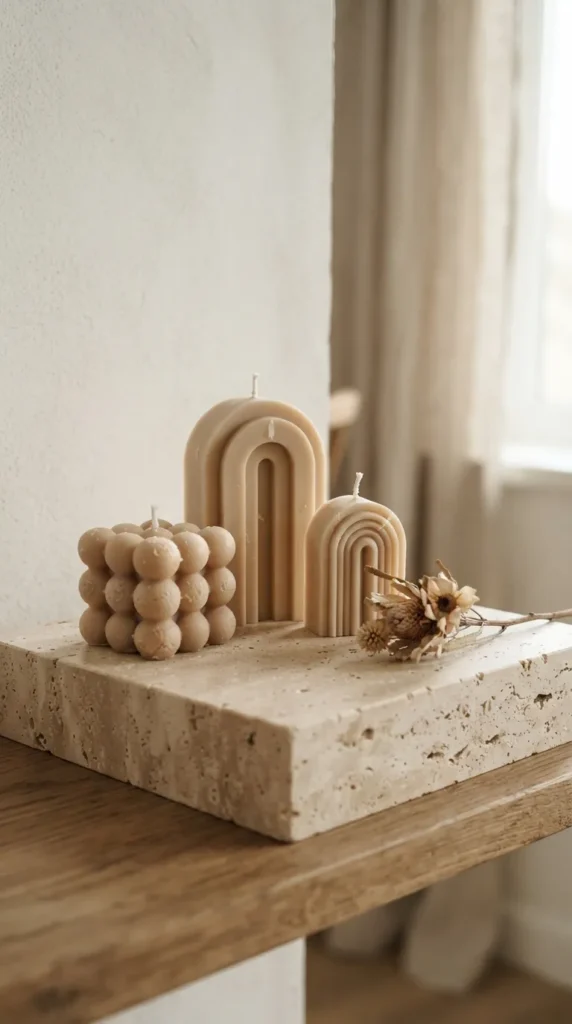
5. Architectural Soy Wax Sculptural Candles
Sculptural pillar candles shaped like geometric arches, cascading bubbles, and classical torsos serve primarily as standalone art pieces before they are ever lit. Formulated with natural soy wax, they provide clean aesthetics and sustainable home fragrance.
- Introduction & Concept: Architectural candles have transformed from simple utility items into sculptural interior accents. When displayed on marble trays or coffee tables, their geometric silhouettes add effortless contemporary style to any room.
- Materials Needed: Pillar-grade soy wax blend (such as soy-paraffin or soy-beeswax blend for firm release), architectural silicone molds, braided cotton wicks (sized for pillar diameters), wick centering needles, digital thermometer, stainless steel melting pitcher, and candle fragrance oils.
- How to Make It:
- Thread a cotton wick through the bottom hole of the silicone mold, sealing the base tightly with mold putty to prevent leaks.
- Secure the top end of the wick taut across the mold opening using a centering clip.
- Melt the pillar soy wax in a double boiler until it reaches 185°F (85°C).
- Stir in candle dye or concentrated fragrance oil gently for two minutes, keeping the pour temperature around 135°F–145°F (57°C–63°C) to prevent surface frosting.
- Pour the melted wax steadily into the prepared mold in a single, smooth motion.
- Gently tap the sides of the mold to dislodge internal air pockets.
- Let the candle cool completely at room temperature for 18 to 24 hours without disturbing.
- Carefully stretch the silicone mold away from the candle sides and ease the sculptural candle out; trim the wick to 1/4 inch.
- Tips & Market Variations:
- Use pillar-blend wax rather than container wax; container soy wax is too soft and will collapse or tear when demolding complex shapes.
- Variations: Create multi-wick wavy ribbons, knot candles, cascading pyramid tiers, or unfragranced neutral-toned sets.
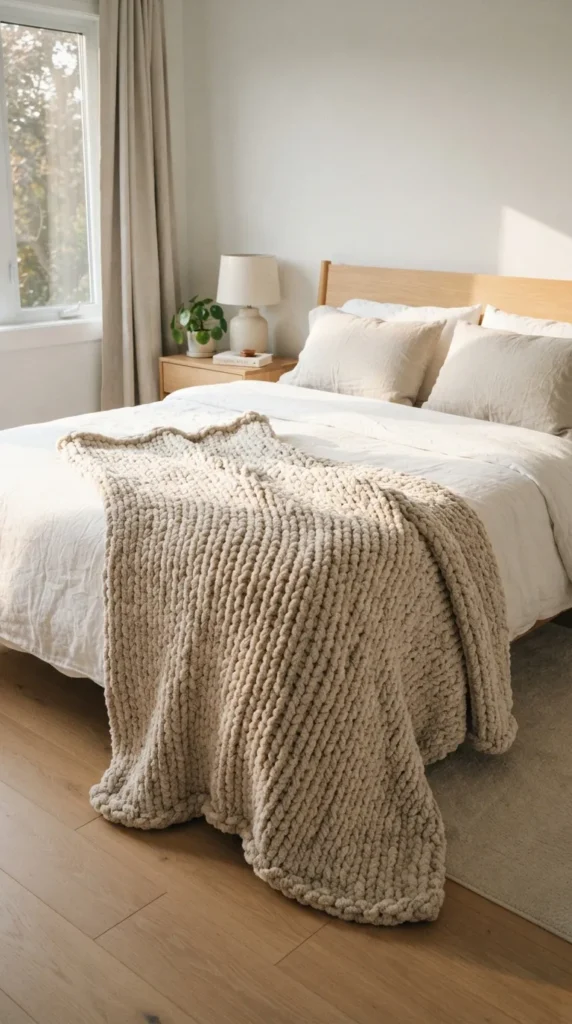
6. Chunky Hand-Knit Chenille Blankets
Crafted entirely without knitting needles, chunky hand-knit blankets use ultra-plush jumbo chenille yarn woven together with simple arm-knitting or hand-loop techniques. These cozy, oversized blankets are perennial bestsellers for bedrooms and living rooms.
- Introduction & Concept: The appeal of chunky hand knits lies in their plush, exaggerated texture and immediate cozy feel. They offer high perceived value, making them prime candidates for luxury gift collections and winter decor lines.
- Materials Needed: 6 to 8 skeins (approx. 28 yards each) of jumbo weight 7 chenille yarn, large clean working table or smooth floor space, sharp fabric scissors, and matching thread for sewing raw yarn ends.
- How to Make It:
- Create an initial slipknot leaving a short tail, then chain 25 to 30 loose loops to set your blanket width.
- Working left to right, pull a working loop through each chain loop from the bottom upward, making sure all loops are a consistent height of about 1.5 inches.
- Reverse direction and weave the working yarn through the loops from right to left, maintaining uniform loop tension without twisting.
- Continue this back-and-forth looping process across rows until your blanket reaches the desired length.
- To bind off, take the first two loops in the final row, pass the working yarn through both to merge them into one loop, and repeat across the entire edge.
- Cut the yarn tail, pull it through the final remaining loop, and tie a discreet knot.
- Tuck and sew all yarn ends seamlessly into the thick knit stitches with a needle and thread.
- Tips & Market Variations:
- Keep loop sizes consistent across every row; uneven loop sizes make blanket edges bow or flare outward.
- Variations: Offer two-tone color blocks, chunky herringbone weave variations, lap throws for reading chairs, or nursery crib accents.
7. Macramé Crystal & Botanical Wall Hangings
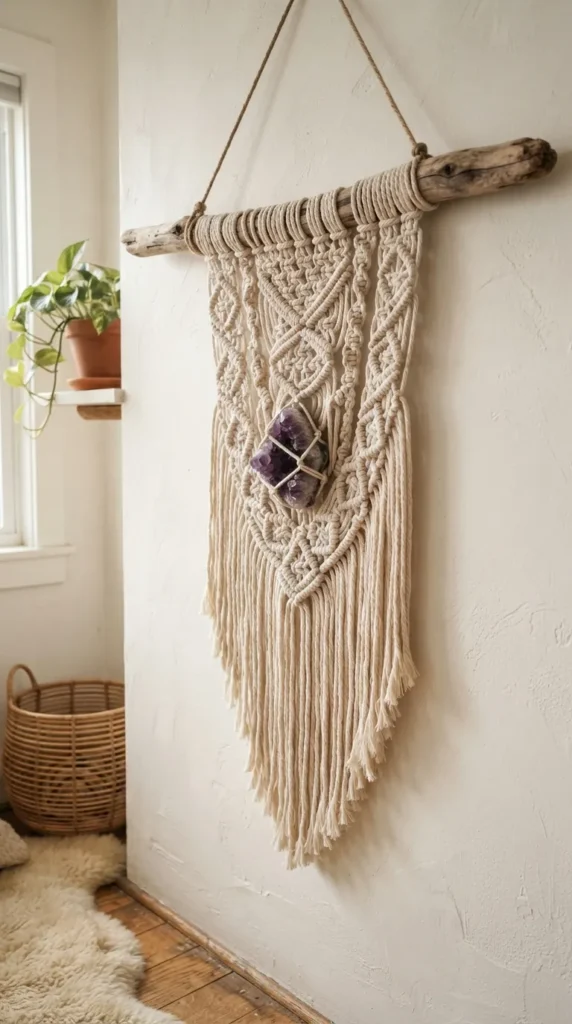
Modern macramé combines structural cotton cord knotting with raw gemstones, driftwood, and potted foliage. Moving far beyond vintage styles, today’s designs focus on clean lines, symmetrical geometric diamonds, and rich organic materials.
- Introduction & Concept: Contemporary macramé bridges fiber art and bohemian home decor. Integrating natural crystals (like raw quartz, amethyst, or selenite) elevates standard knotwork into high-vibe wall installations that sell quickly online.
- Materials Needed: 4mm or 5mm single-strand or 3-ply twisted natural cotton macramé cord, polished natural driftwood branch or copper dowel, raw gemstones with wire wrap grooves, measuring tape, sharp craft shears, and a pet slicker brush for fringe.
- How to Make It:
- Cut 16 strands of cotton cord, each measuring approximately 12 to 14 feet long.
- Mount each strand onto the driftwood using clean lark’s head knots, creating 32 working cords across the bar.
- Group cords in clusters of four and tie rows of square knots, working downward into a symmetrical inverted chevron or diamond pattern.
- Form alternating diagonal half-hitch knots to create crisp, defined outlines along the edges of the central diamond.
- Secure a raw amethyst or selenite crystal into the center cavity using delicate netting knots or discreet jewelry wire.
- Finish lower cord extensions with clean gathering wraps or flowing fringe.
- Brush out the raw ends with a fine slicker brush and trim the lower fringe into an even point or crescent shape with sharp shears.
- Tips & Market Variations:
- Lightly mist cotton fringe with a mixture of water and fabric stiffener to keep the fringe hanging flat during shipping.
- Variations: Create hanging plant holders, wall banners featuring brass metallic beads, or oversized bed headboard tapestries.
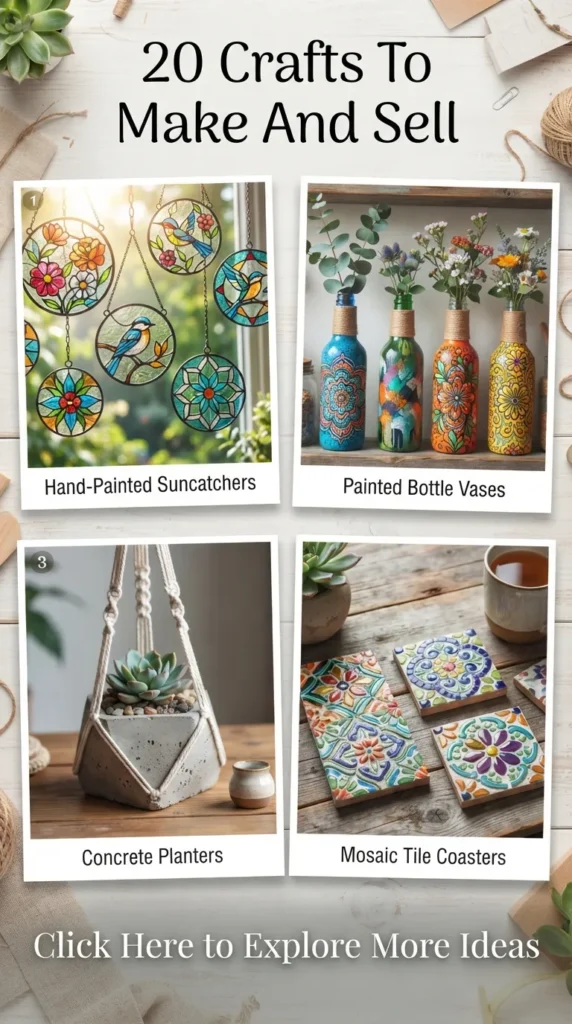
8. Stained Glass Geometric Suncatchers
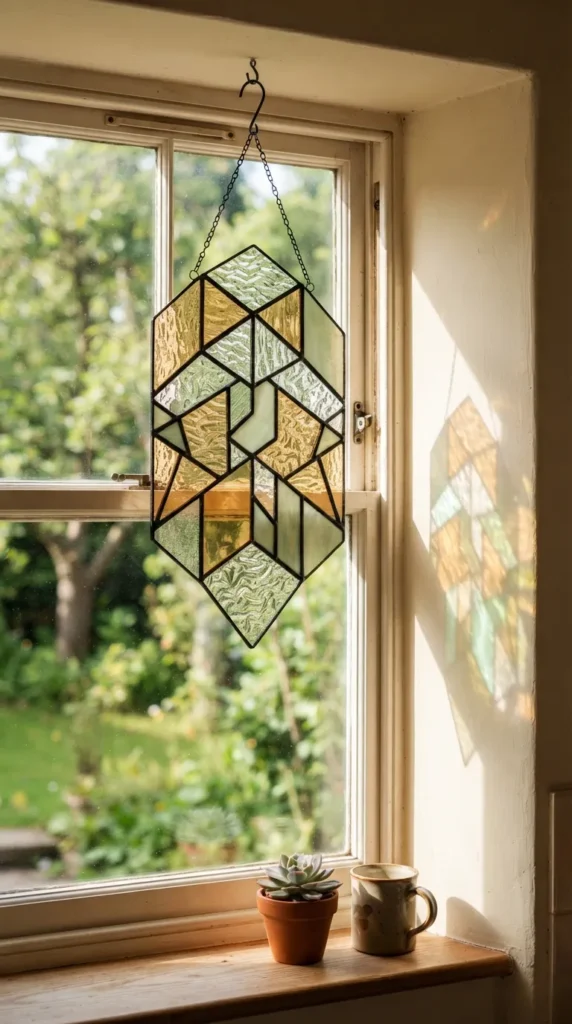
Stained glass suncatchers use traditional copper foil techniques (the Tiffany method) to transform modern geometric, floral, and celestial glass designs into luminous window art.
- Introduction & Concept: Stained glass pieces transform natural daylight into vibrant patterns of colored light. Modern buyers look for clean, minimalist designs like celestial crescents, monstera leaves, and clean geometric prisms.
- Materials Needed: Assorted colored and textured art glass sheets, pistol-grip glass cutter, cutting oil, glass running pliers and grozing pliers, glass grinder, 7/32-inch copper foil tape, 60/40 solder wire (tin/lead or lead-free), soldering iron (temperature-controlled), liquid flux with application brush, and small brass hanging rings.
- How to Make It:
- Draw a clean geometric pattern template (cartoon) on paper and cut out individual pattern pieces.
- Trace pattern shapes onto glass sheets using a fine permanent marker.
- Score along the lines with the oiled glass cutter in a smooth, continuous forward stroke with steady downward pressure.
- Snap glass cleanly using running pliers positioned parallel along the score line.
- Grind all glass edges smooth on the electric diamond grinder to remove sharp burrs and ensure tight joints.
- Wash and dry every glass piece thoroughly to remove residual glass dust.
- Apply copper foil tape evenly along the entire perimeter of each piece, burnishing it down firmly with a fid tool.
- Assemble the pieces together, apply liquid flux along the foil seams, and tack-solder the joints in place.
- Run smooth, rounded bead lines of solder across all seams, secure brass hanging rings to the top joints, clean off flux residue, and apply a black or copper patina finish.
- Tips & Market Variations:
- Use lead-free solder if marketing products designed for interactive home spaces, nurseries, or kitchen garden windows.
- Variations: Design botanical terrarium panels, arched suncatcher sets, or minimalist hanging mirror combinations.
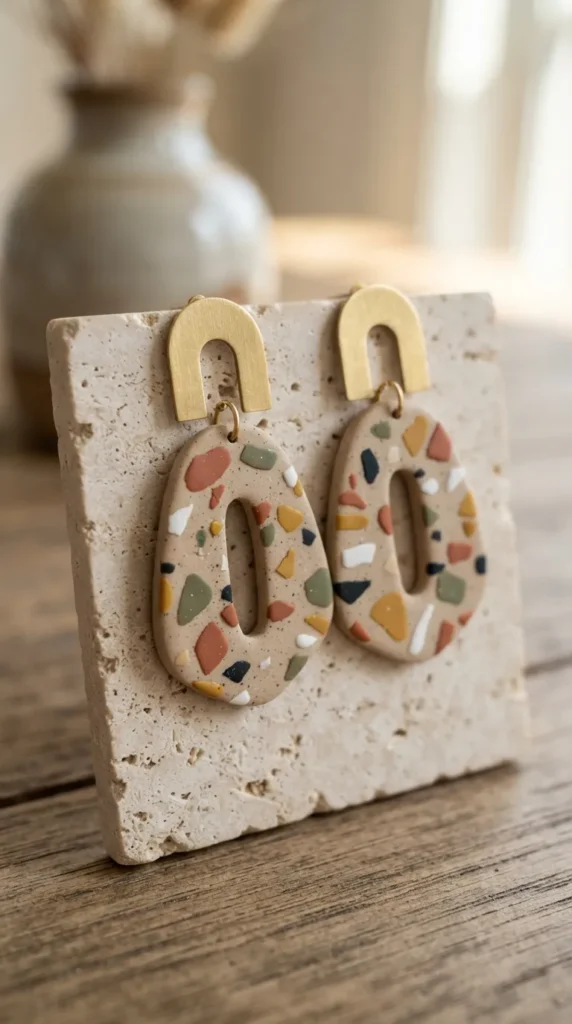
9. Polymer Clay Terrazzo Jewelry
Lightweight and versatile, polymer clay jewelry turns artisanal patterns into comfortable statement earrings, hair clips, and necklaces. The faux-terrazzo look combines small colorful clay chips into a neutral clay base, mimicking Italian mosaic stone.
- Introduction & Concept: Polymer clay accessories combine high-fashion aesthetics with featherlight all-day comfort. Their low production overhead and compact shipping size make them one of the most profitable handmade goods to sell online.
- Materials Needed: High-grade polymer clay (such as Sculpey Premo or Fimo Professional), acrylic roller or clay conditioning pasta machine, sharp shape cutters, clay tissue blade, ceramic baking tile, mini hand drill, jump rings, hypoallergenic stainless steel earring posts, jewelry pliers, and a dedicated craft oven thermometer.
- How to Make It:
- Condition the base clay (such as off-white or sand) by rolling it through a pasta machine until pliable and smooth.
- Chop assorted brightly colored cured or raw clay scraps into tiny, irregular shards with a tissue blade.
- Scatter the colored shards randomly across the conditioned base clay sheet.
- Roll gently over the sheet with an acrylic roller to press the terrazzo chips flush into the background without distorting their shapes.
- Press shape cutters (arches, organic teardrops, rings) firmly into the slab to cut out matching earring pairs.
- Lay shapes onto a smooth ceramic tile and bake at the manufacturer’s specified temperature (typically 275°F / 135°C) for 35 to 45 minutes.
- Once fully cooled, drill small connection holes using a handheld pin vise drill.
- Sand edges smooth with micro-mesh pads under warm water, clean, and connect the components using sturdy jump rings and earring posts.
- Tips & Market Variations:
- Never guess oven temperatures; always use an independent analog oven thermometer to prevent clay underbaking (brittleness) or burning.
- Variations: Create matte raw-clay textures, translucent clay bases, liquid clay marbling, or gilded brass component accents.
10. Hand-Poured Artisan Cold Process Soap Bars
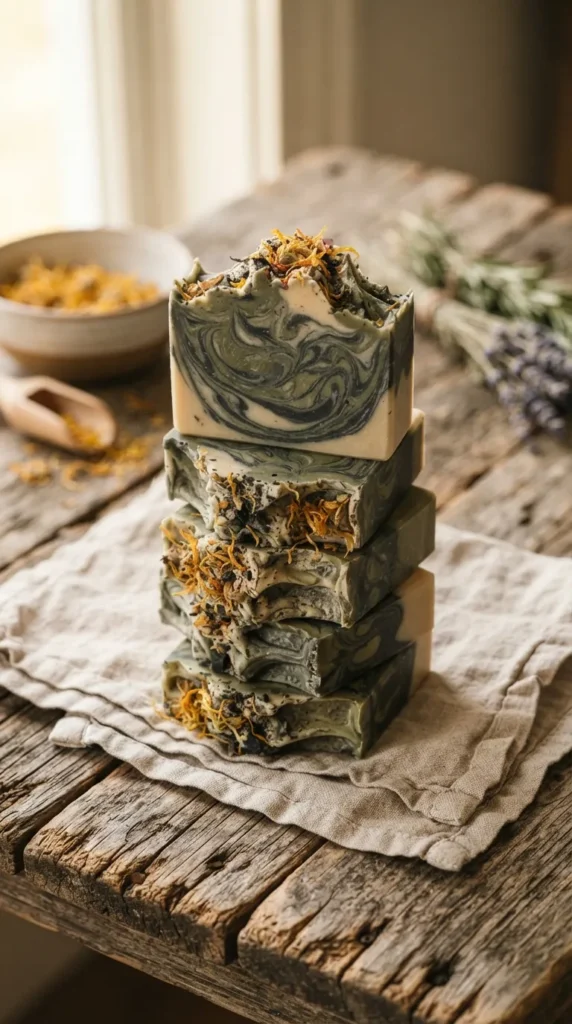
Cold process soap making merges chemistry with botanical artistry. Blending plant oils with sodium hydroxide produces long-lasting, gentle cleansing bars featuring swirl designs, layered clays, and dried botanical garnishes.
- Introduction & Concept: Clean-beauty consumers are turning away from commercial detergent bars in favor of palm-free, skin-nourishing artisan soaps. Natural mineral colorants, textured tops, and complex essential oil blends turn everyday hygiene into a spa ritual.
- Materials Needed: Olive oil, coconut oil, shea butter, castor oil, sodium hydroxide (lye), distilled water, essential oils, natural colorants (French green clay, rose kaolin, activated charcoal), stick immersion blender, digital scale, silicone loaf mold, and a soap-cutting wire tool.
- How to Make It:
- Weigh distilled water and lye crystals separately on a digital scale in a well-ventilated area, wearing safety goggles and gloves.
- Pour the lye into the water slowly (never water into lye), stir until clear, and set aside to cool to 100°F–110°F (38°C–43°C).
- Melt solid butters and combine with liquid oils in a heat-safe bowl, bringing the oil temperature to match the lye solution.
- Pour the lye water into the oils and pulse with an immersion blender until a light trace is achieved (a thin pancake batter consistency).
- Blend in pure essential oil blends and divide the batter into separate bowls to mix in natural clays and botanical colorants.
- Pour colored batters into the loaf mold using an in-the-pot or hanger swirl technique to create internal patterns.
- Texturize the top of the soap loaf with a small spoon and sprinkle with dried calendula or lavender buds.
- Insulate the mold for 24 hours, demold, slice into 1-inch bars with a wire cutter, and cure on drying racks for 4 to 6 weeks.
- Tips & Market Variations:
- Keep recipes palm-oil-free and clearly label all plant oils to appeal to environmentally conscious, label-reading customers.
- Variations: Craft exfoliating coffee grit bars, facial bars infused with activated charcoal, or goat milk moisturizing soaps.
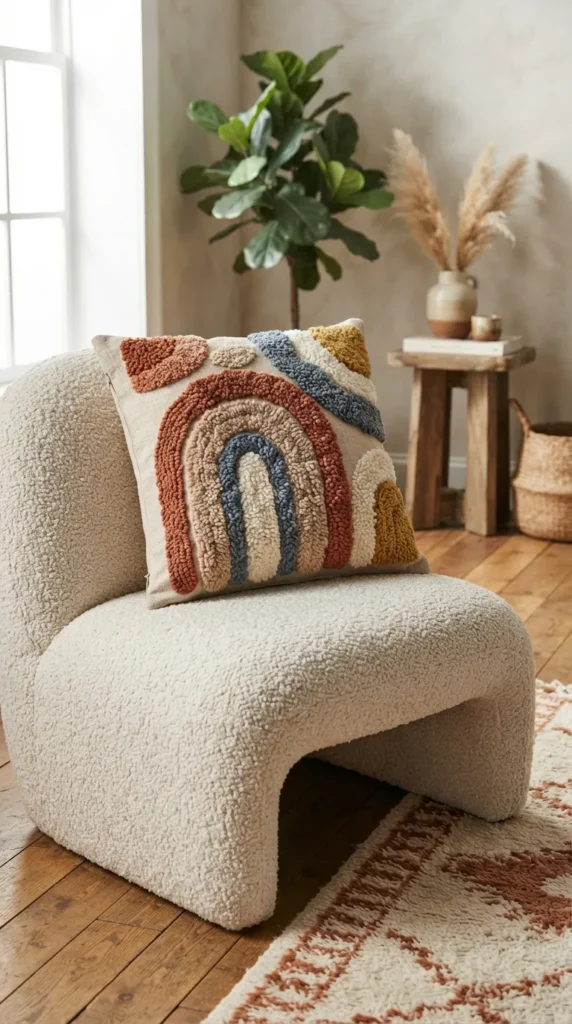
11. Punch Needle Textured Fiber Pillows
Punch needle embroidery uses hollow needles to push continuous loops of wool yarn into foundation cloth, creating plush, durable pile textures. Made into decorative accent pillows, these pieces bring tactile warmth to modern living spaces.
- Introduction & Concept: Punch needle art creates dynamic, rug-like pile surfaces that stand out in home decor. Bold abstract shapes, line-art faces, and earthy palettes make these pillows standout statement accents.
- Materials Needed: Oxford punch needle (size #10 or #14), sturdy non-slip gripper frame or stretched canvas frame, 100% cotton monk’s cloth with grid lines, bulky 100% wool rug yarn, fabric shears, sewing machine, linen pillow backing fabric, zipper or envelope closure, and heavy-duty fabric glue.
- How to Make It:
- Stretch the monk’s cloth tightly over the gripper frame until it sounds like a drum when tapped.
- Trace your mirror-image design onto the cloth using a permanent fabric marker.
- Thread your punch needle with wool yarn, keeping the yarn strand free of any tension from the skein.
- Hold the punch needle upright like a pencil and punch straight down through the fabric until the handle touches, then slide forward along the pattern line.
- Punch outlines first using shorter, consistent stitches, then fill in color blocks with dense, even rows of loops.
- Once the design is complete, paint a thin layer of latex rug adhesive over the flat back stitches to permanently secure the loops.
- Trim the finished piece from the frame with a 1-inch fabric allowance.
- Sew the front punched panel to a linen back piece with a hidden zipper closure, insert an oversized pillow insert, and fluff.
- Tips & Market Variations:
- Keep your needle point flush against the foundation cloth surface when moving between stitches to prevent loops from pulling out from the back.
- Variations: Create textured wall tapestries, desk coasters, floor poufs, or plush chair pads.
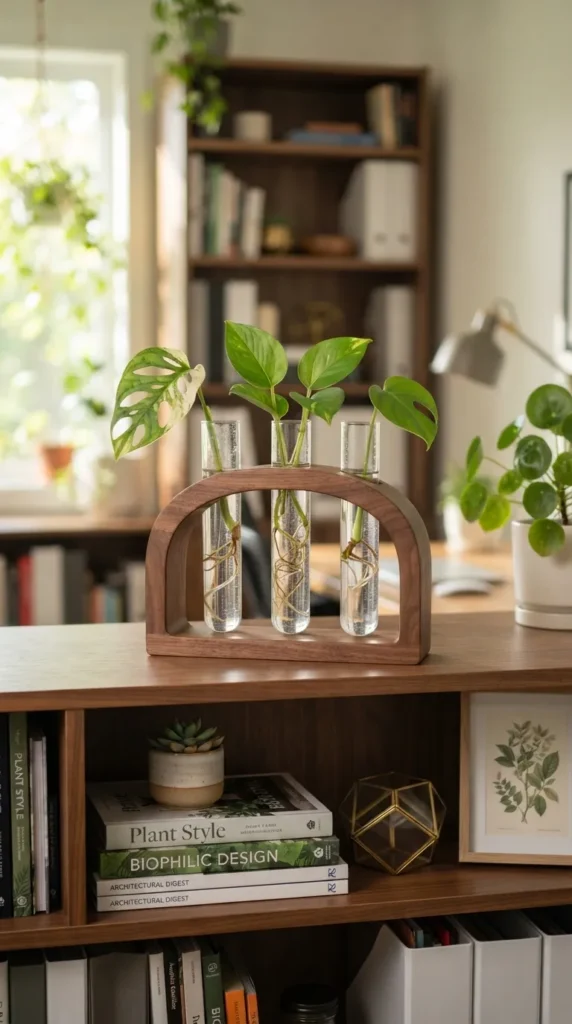
12. Wooden Arch & Half-Moon Propagation Stations
Botanical propagation stations combine finished hardwoods with clear glass chemistry test tubes to display houseplant cuttings as they grow roots in water. Their architectural styling appeals directly to plant lovers and urban gardeners.
- Introduction & Concept: Plant propagation has grown into an aesthetic hobby. Propagation stations showcase plant cuttings as living home accents, turning simple plant multiplication into an attractive interior display.
- Materials Needed: Solid hardwood lumber (walnut, white oak, maple), drill press with 1-inch Forstner bits, scroll saw or bandsaw, assorted sandpaper (80 to 320 grit), food-grade mineral oil or hardwax finish, rimmed glass laboratory test tubes (25mm x 150mm), and measuring calipers.
- How to Make It:
- Mill hardwood boards down to clean 1.5-inch square blocks or 1-inch thick arch profiles.
- Mark test tube hole locations precisely along the top centerline of the wooden block.
- Drill vertical holes using a drill press equipped with a Forstner bit, boring 4 inches deep to support test tubes securely without wobbling.
- Cut curved arch or half-moon silhouettes around the drilled core using a bandsaw or scroll saw.
- Sand all wood faces progressively through 80, 120, 220, and 320 grit until surfaces are satiny smooth.
- Soften sharp top edges with a subtle hand bevel.
- Wipe away all sawdust and apply a generous coat of natural wood oil or hardwax to bring out the wood grain.
- Allow the finish to cure for 24 hours, buff dry with a microfiber cloth, and insert clean glass test tubes.
- Tips & Market Variations:
- Ensure the Forstner bit diameter is 1–2mm wider than your glass tubes to prevent glass breakage from seasonal wood expansion.
- Variations: Build multi-tiered hanging wall units, magnetic fridge stations, or rotating desktop propagation carousels.
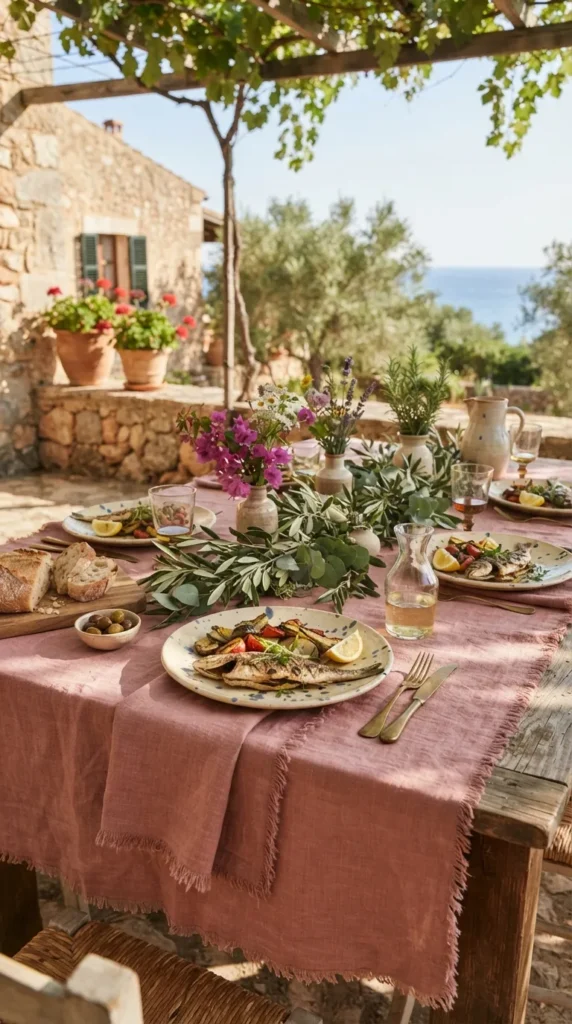
13. Minimalist Hand-Dyed Linen Table Scapes
Handmade European-style linen tablecloths, frayed-edge runners, and matching dinner napkin sets elevate everyday meals. Colored with plant dyes or soft fiber-reactive dyes, natural linen gains a soft, relaxed drape that fits modern dinner parties.
- Introduction & Concept: The modern tablescape movement favors lived-in luxury, breathable natural textures, and earthy palettes over formal, stiff dining linens. Pure flax linen develops a softer, more beautiful drape with every wash.
- Materials Needed: 100% pre-washed medium-weight flax linen fabric, non-toxic fiber-reactive dyes or botanical dye baths (avocado pits, indigo, walnut hulls), soda ash fixative, tailor’s sewing shears, matching linen sewing thread, sewing machine, and an iron.
- How to Make It:
- Wash and tumble-dry linen fabric at high temperatures to pre-shrink the fibers before measuring.
- Tear along the fabric grain rather than cutting with scissors to ensure true, straight edges on all sides.
- For raw fringed napkins, carefully pull out 4 to 6 loose threads along every edge using a pin until a 1/2-inch fringe forms.
- Run a straight stay-stitch line along the inner base of the fringe on your sewing machine to prevent unravelling during washing.
- For hemmed tablecloths, fold edges into double-fold 1/2-inch mitered corners and press flat with a steam iron before edge-stitching.
- Prepare a warm dye bath, add dissolved fiber-reactive dye and salt, and submerge the wet linen.
- Stir the fabric continuously for 30 minutes to ensure even color saturation across every fold.
- Add soda ash fixative to lock in color fastness, let sit for 45 minutes, then rinse in cold water until the water runs completely clear.
- Dry and press lightly with a steam iron, leaving the signature linen texture visible.
- Tips & Market Variations:
- Tearing along the weave guarantees that rectangular pieces hang straight without diagonal skewing after laundering.
- Variations: Create natural ombre dips, botanical eco-printed foliage napkins, or raw, unbleached rustic bread wraps.
14. Handcrafted Leather Desk Mats & Catchalls
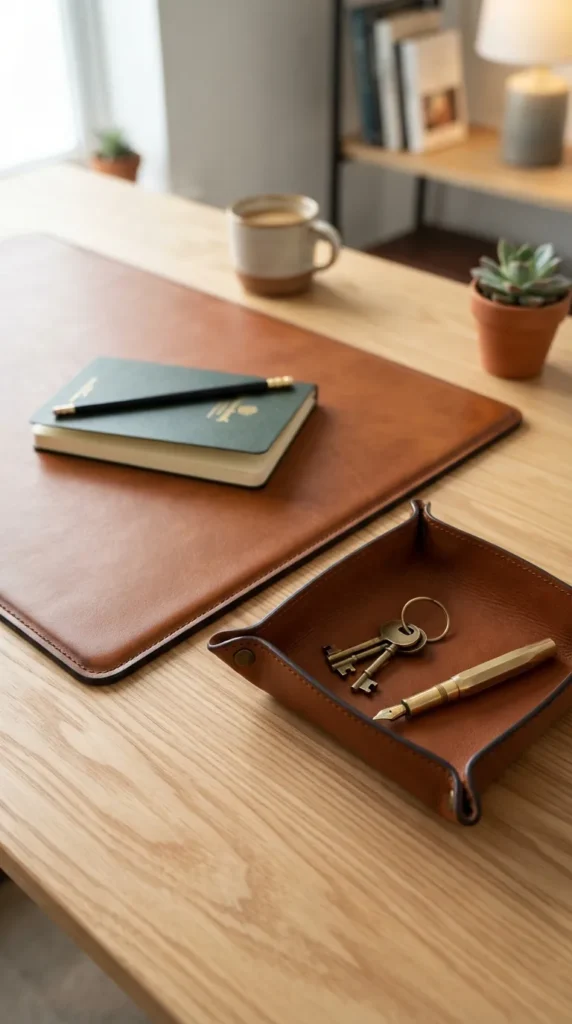
Vegetable-tanned leather desk pads and corner-riveted catchall trays bring timeless, functional organization to workspaces and entryways. Over time, natural leather develops a rich, personalized patina that increases its charm.
- Introduction & Concept: Work-from-home culture has driven strong demand for premium desk accessories. Full-grain, vegetable-tanned leather offers durability and classic design that mass-produced plastic organizers cannot match.
- Materials Needed: 5-6 oz full-grain vegetable-tanned leather hides, rotary leather cutter, self-healing cutting mat, edge beveler (size 2), tokonole burnishing gum, wooden slicker tool, solid brass Chicago screws or setter rivets, hole punch pliers, and water-resistant leather conditioner.
- How to Make It:
- Measure and cut the leather hide into clean, square rectangles using a heavy steel ruler and sharp rotary cutter.
- Round the outer corners neatly with a corner punch or coin template for smooth lines.
- Run an edge beveler along the top and bottom edge lines at a 45-degree angle to remove sharp square corners.
- Apply a thin, even coat of Tokonole burnishing gum along the raw edges.
- Rub the edge vigorously with a grooved wooden slicker until friction creates a glossy, smooth edge.
- For catchall trays, punch matching holes in each corner and secure them with solid antique brass rivets to form raised walls.
- Apply a light coat of natural beeswax or neat’s-foot oil over the surface to condition the leather fibers and highlight natural grain marks.
- Tips & Market Variations:
- Always cut full-grain leather in a single, smooth blade pass; repeated cutting strokes along the same line create jagged, stepped edges.
- Variations: Offer custom-stamped monogram initialing, integrated mouse-pad rest grooves, or contrasting wax-stitched borders.
15. Gilded Botanical Intaglio Keepsake Boxes
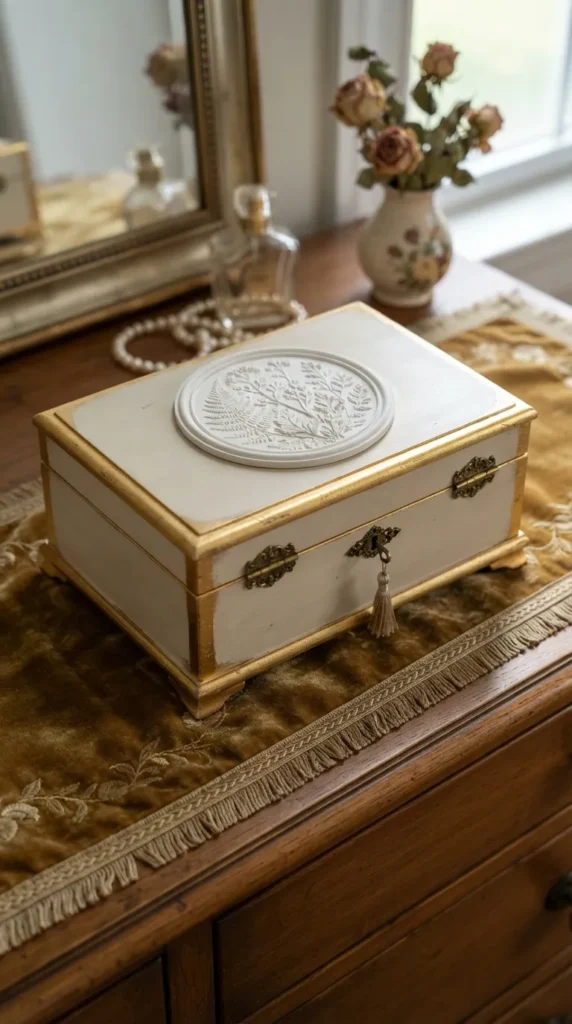
Intaglio jewelry boxes feature classic plaster intaglio relief medallions mounted onto lacquered wooden or glass-topped keepsake cases. Finished with hand-applied gold leaf borders, these pieces bring vintage, grandmillennial sophistication to dressing tables.
- Introduction & Concept: Intaglio crafts combine classical relief casting with modern home accessories. The combination of chalky matte plaster reliefs against warm metallic gold and polished wood makes these boxes popular for keepsakes and bridal gifts.
- Materials Needed: Unfinished solid birch or glass-topped wooden keepsake boxes, high-density plaster of Paris or hydrocal casting plaster, intaglio silicone relief molds (botanical wreaths, classical silhouettes), gold leaf sheets with gilding adhesive (size), fine gilding brushes, chalk-finish paint, and satin polycrylic sealer.
- How to Make It:
- Mix hydrocal plaster with water to a creamy, lump-free consistency and pour into delicate intaglio silicone molds.
- Tap molds lightly to eliminate air bubbles from fine relief lines and let cure for one hour until stone-hard.
- Demold plaster intaglios carefully and allow all internal moisture to evaporate over 24 hours.
- Paint the wooden keepsake box inside and out with two coats of soft chalk paint (warm ivory, French blue, or muted charcoal).
- Apply a thin layer of gold leaf sizing adhesive along the top lid borders and let sit until it turns clear and tacky.
- Carefully lay gold leaf sheets over the adhesive, smoothing with a soft dry mop brush, and brush away excess flakes.
- Mount the cured plaster intaglio onto the center of the box lid using strong craft epoxy or wood glue.
- Seal the completed box with a thin coat of clear spray sealer to protect the gold leaf from tarnishing.
- Tips & Market Variations:
- Ensure the plaster intaglio is thoroughly dry before adhering; trapped moisture can bubble paint or weaken the glue bond.
- Variations: Create velvet-lined interior ring compartments, personalized initial medallions, or wall-mounted intaglio framed sets.
16. Mosaic Terrazzo Candle Coasters
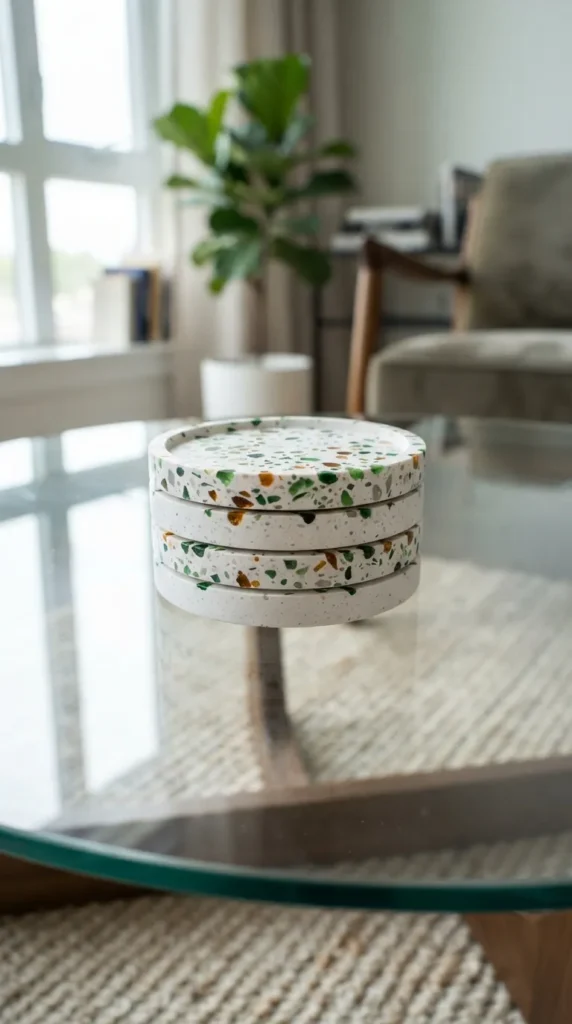
Terrazzo candle coasters use cast stone composite embedded with contrasting crushed minerals, tumbled sea glass, or reclaimed marble fragments. Once ground flat and sealed, each coaster reveals an intricate stone mosaic pattern.
- Introduction & Concept: Terrazzo homeware brings architectural interest to functional tabletop accessories. The combination of colorful mineral aggregates set into a stone base makes these coasters popular for curated coffee tables and nightstands.
- Materials Needed: Casting stone composite (acrylic resin-mineral base), crushed colored glass, quartz aggregate or colored Jesmonite chips, round coaster silicone molds, 120-to-800 grit wet/dry sandpaper sheets, high-speed rotary sander (optional), and penetrating stone sealer.
- How to Make It:
- Prepare a batch of colored casting composite chips in assorted contrasting shades, let them cure completely, and break them into small chips.
- Mix fresh neutral-colored base composite liquid and powder thoroughly to a pourable consistency.
- Fold the colored aggregate chips into the wet base mixture, ensuring chips are evenly distributed throughout the batch.
- Pour the mixture into the round silicone coaster molds, tapping the sides to level the composite.
- Allow coasters to cure for two hours until completely hard and cool to the touch.
- Demold the coasters and submerge them in a shallow tray of water.
- Sand the top surface using coarse 120-grit wet sandpaper to grind through the thin top film and expose the sharp, colorful aggregate chips below.
- Progressively sand through 240, 400, and 800 grits to create a polished stone finish.
- Dry completely and apply two coats of food-safe, stain-resistant penetrating stone sealer.
- Tips & Market Variations:
- Always sand terrazzo wet; dry sanding fills the air with fine composite dust and creates deep surface scratches.
- Variations: Hexagonal coaster sets, large charcuterie board bases with handles, or contrasting black-and-white stone patterns.
17. Hand-Dipped Beeswax Taper Candles
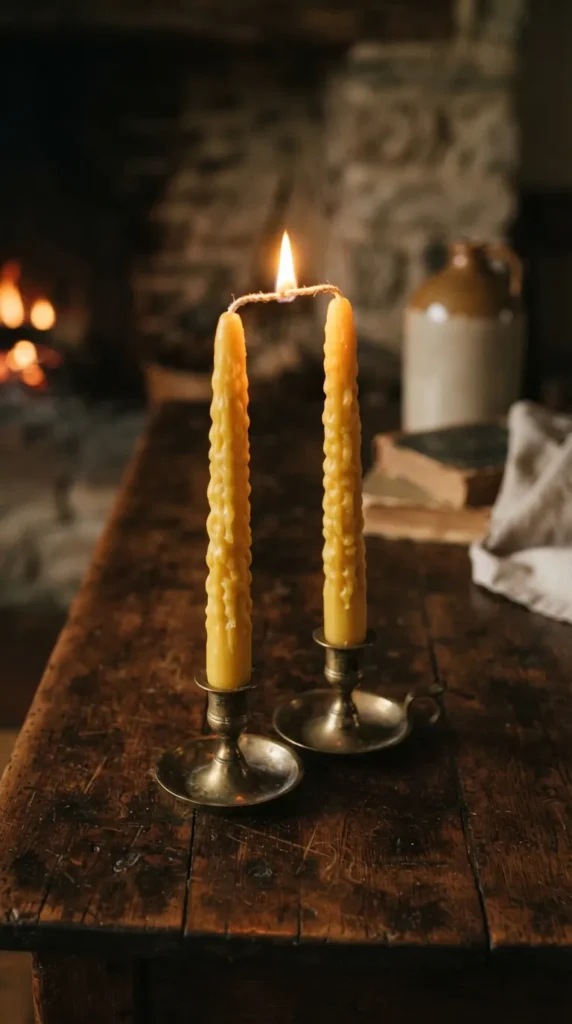
Traditional hand-dipped taper candles are crafted by repeatedly dipping cotton wicks into vats of molten, aromatic yellow beeswax. Each slow dip adds a thin layer, resulting in elegant, naturally scented candles with classic tapered silhouettes.
- Introduction & Concept: Pure beeswax taper candles burn cleaner, longer, and brighter than paraffin alternatives, emitting a subtle honey scent. Their timeless, artisanal look makes them a staple for dinner parties and holiday tables.
- Materials Needed: 100% pure filtered yellow or white cappings beeswax, tall cylindrical dipping can (wax melting pitcher), double boiler base, square-braided cotton wicking (size #1 or #2), dipping rack or dowel hanger, water cooling bath, and a sharp knife for trimming bases.
- How to Make It:
- Melt pure beeswax in a tall dipping pitcher inside a double boiler until it stabilizes at 160°F–165°F (71°C–74°C).
- Cut cotton wicks in pairs to your desired finished length, weighting the lower ends with a small metal nut so they hang straight.
- Submerge the paired wicks into the molten wax for three seconds, lift smoothly, and allow the wax to cool and stiffen in the air.
- Continue dipping the wicks steadily: dip down for two seconds, lift out smoothly, and pause for one minute between dips to let each layer solidify.
- Maintain consistent wax temperature; if the wax is too hot, it will melt off previous layers instead of building thickness.
- Repeat for 25 to 35 dips until the tapers reach a base diameter of approximately 7/8 inch (standard candlestick size).
- Cut the bottom wax buildup flush with a warm craft knife while the base is still slightly pliable.
- Hang the candles by their connected wick pairs in a cool space for 24 hours to cure before packaging.
- Tips & Market Variations:
- Dip candles briefly into a cool water bath between wax dips to speed up production when crafting large batches.
- Variations: Create natural botanical-dyed sage and terracotta tapers, spiral-twisted candle pairs, or textured honeycomb patterns.
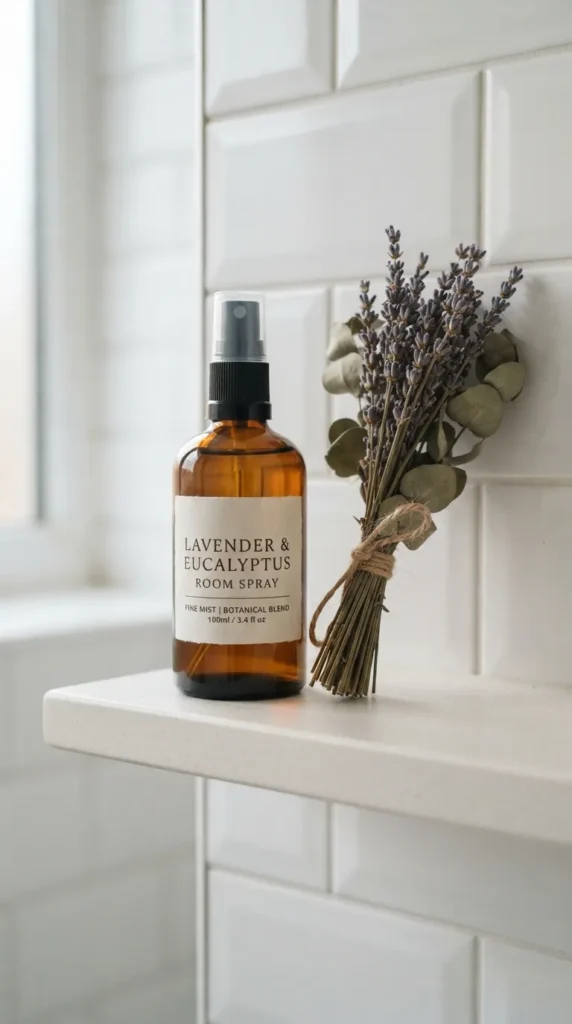
18. Artisanal Scented Room & Linen Sprays
Formulated with pure witch hazel, distilled water, and complex perfume-grade fragrance blends, artisanal room sprays offer an instant home scent refresh. Packaged in amber glass apothecary bottles with minimalist waterproof labels, they are easy to produce in volume.
- Introduction & Concept: Room and linen mists are an accessible entry point for fragrance lovers. Their quick production and consistent repeat purchases make them strong additions to any handmade bath and body brand.
- Materials Needed: 16 oz amber or frosted glass spray bottles with ultra-fine mist sprayers, organic witch hazel or high-proof perfumer’s alcohol, distilled water, phthalate-free fragrance oils and essential oils, polysorbate 20 (emulsifier), glass measuring beakers, and waterproof labels.
- How to Make It:
- Combine your fragrance oil blend and Polysorbate 20 in a glass beaker at an exact 1:1 ratio, stirring for one minute to bind the oils.
- Add the perfumer’s alcohol or witch hazel base to the fragrance mixture and stir until clear.
- Slowly pour in distilled water while stirring continuously until the solution is completely blended.
- Pour the finished room spray through a small funnel into clean glass bottles.
- Trim the internal dip tube of the fine mist trigger so it rests comfortably against the bottom curve of the bottle.
- Cap the bottles securely and wipe down the exterior glass with rubbing alcohol.
- Apply a moisture-resistant label along the front center line of the bottle.
- Tips & Market Variations:
- Always use a fragrance emulsifier like Polysorbate 20; without it, the aromatic oils will separate from the water base and float to the top.
- Variations: Create calming lavender sleep sprays, odor-eliminating citrus kitchen mists, or cedarwood-scented wardrobe sprays.
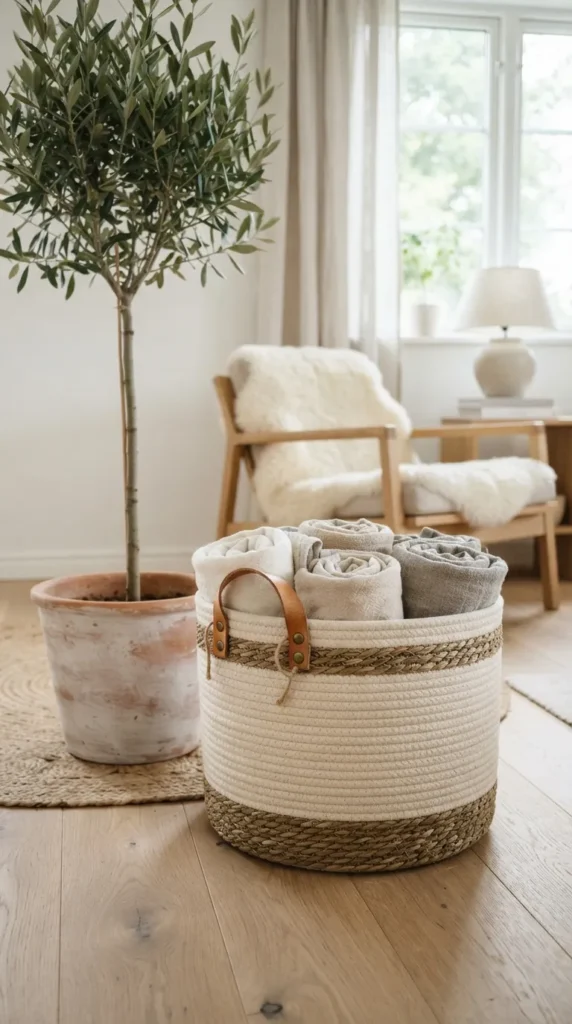
19. Woven Seagrass & Cotton Rope Baskets
Coiled rope baskets combine natural unbleached cotton sash cord with accents of raw jute, seagrass, and wrapped thread. Shaped on a standard home sewing machine with a wide zig-zag stitch, these structured baskets provide chic, practical home storage.
- Introduction & Concept: Coiled rope baskets offer practical storage with a warm, minimalist feel. Strong, flexible, and visually clean, they work well as plant pot sleeves, nursery storage, or catchalls for blankets and toys.
- Materials Needed: 100% solid braided cotton clothesline cord (7/32 or 1/4-inch diameter), raw twisted seagrass cordage, heavy-duty sewing machine with a wide zig-zag stitch, heavy-duty denim needle (size 100/16 or 110/18), high-strength polyester thread, leather scraps for handles, and brass rivets.
- How to Make It:
- Form the core of the base by coiling the end of the cotton rope into a tight, flat spiral center.
- Position the flat coil under your sewing machine presser foot and sew back and forth across the center using a wide zig-zag stitch to lock the core.
- Continue rotating the coil slowly under the needle, using a 4mm wide, 2.5mm long zig-zag stitch that catches both the inner and outer cord edges.
- Keep the coiled base completely flat on the machine bed until you reach your desired base diameter.
- Tilt the flat base upward at a 90-degree angle against the sewing machine body; this shift in angle makes the cord sew upward into vertical basket walls.
- Wrap sections of the outer cord with colored thread or sew in strips of seagrass to introduce contrasting texture bands.
- Finish the top rim by tapering the rope end under a final zig-zag pass, then rivet folded leather loop handles on opposite sides.
- Tips & Market Variations:
- Maintain steady, light guide pressure without pulling or stretching the rope as it enters the needle, which can distort the circular profile.
- Variations: Create shallow round fruit trays, tall laundry hampers with lids, or two-tone plant pot covers.
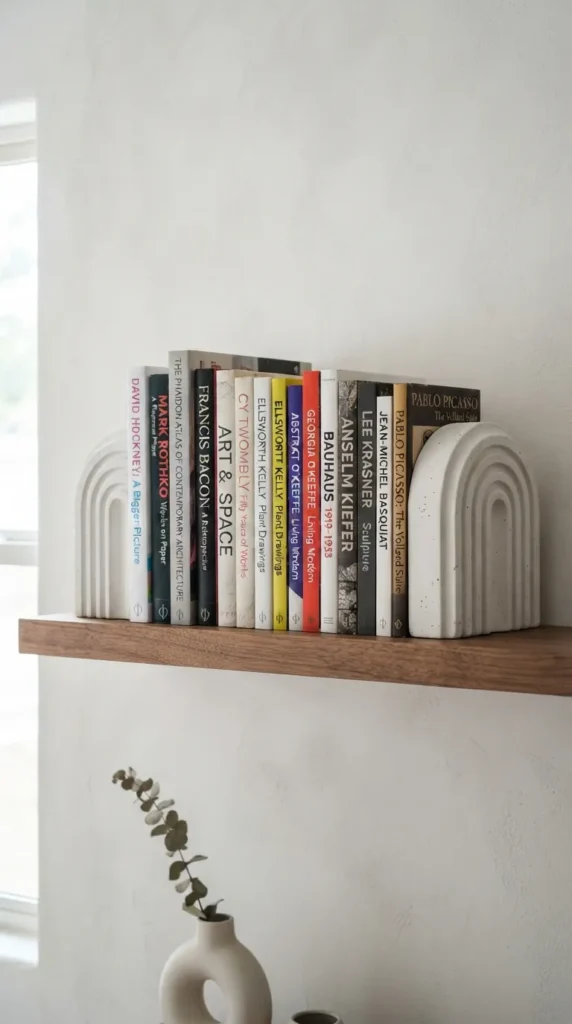
20. Textured Arch Bookends & Paperweights
Cast concrete and plaster arch bookends add clean geometric weight to modern bookshelves. Featuring fluted channels, stepped art deco curves, and smooth stone textures, these functional items bring grounded architectural style to interior styling.
- Introduction & Concept: Modern book styling favors sculptural, architectural accents over traditional metal supports. Heavy cast arch bookends serve double duty as stable functional organizers and standalone decorative art pieces.
- Materials Needed: High-strength fine white casting concrete or architectural gypsum plaster, arch-profile silicone molds with fluted or stepped detailing, water, pigment powders, mixing bucket, silicone spatula, self-adhesive velvet or cork base pads, and clear water-based concrete sealer.
- How to Make It:
- Measure out dry white concrete powder and blend in mineral pigment powder if you want a warm terracotta or slate grey color.
- Add water according to the mix specifications and stir thoroughly until you reach a pourable, peanut-butter-batter consistency.
- Pour the concrete mix slowly into the arch silicone molds, filling each cavity halfway.
- Tap and vibrate the molds firmly against the work surface to bring air bubbles to the top, then fill the molds to the rim.
- Level the top back edge flat using a straight-edge palette knife.
- Allow the concrete to cure undisturbed for a full 24 to 48 hours to reach structural strength.
- Gently peel away the silicone mold from the cured arch bookends.
- Sand the flat bottom edge smooth using 120-grit sandpaper, then wipe away all residual concrete dust.
- Apply a coat of penetrating matte concrete sealer to resist dirt, and attach soft adhesive-backed cork or velvet pads to the base to protect furniture surfaces.
- Tips & Market Variations:
- Let concrete cure inside the mold in a humid space to prevent rapid drying, which can cause micro-fractures along thin arch peaks.
- Variations: Offer stepped art-deco silhouettes, dual-color split pours, or polished raw brass inlays along the center groove.