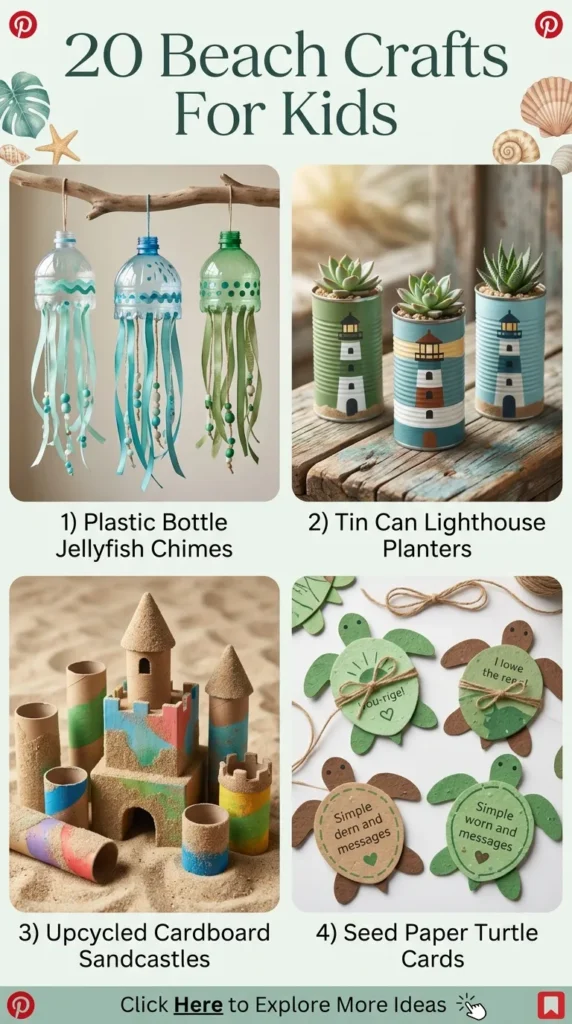
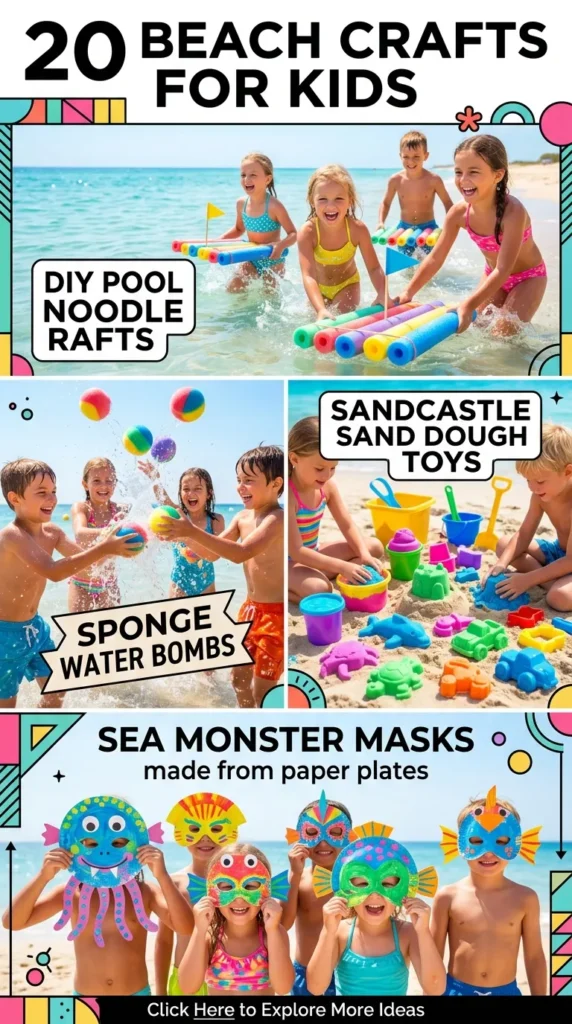
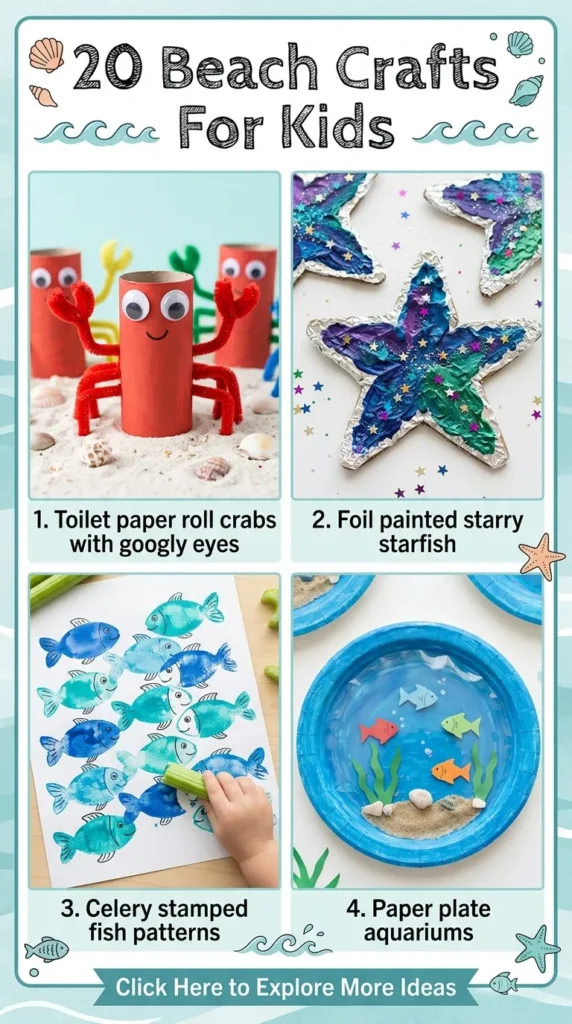
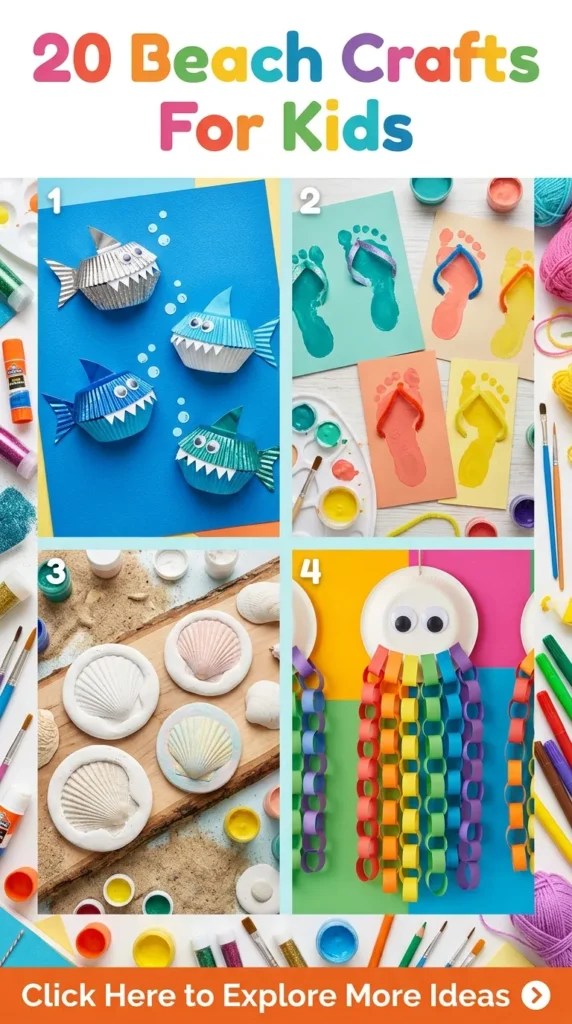
Coastal crafting combines natural textures, airy palettes, and organic materials found along the shoreline into timeless keepsakes. Modern beach crafts focus on clean aesthetics, soft earthy tones, raw driftwoods, subtle ceramics, and shimmering sea glass, moving away from plastic clutter toward elevated home decor that children can proudly display in modern living spaces.
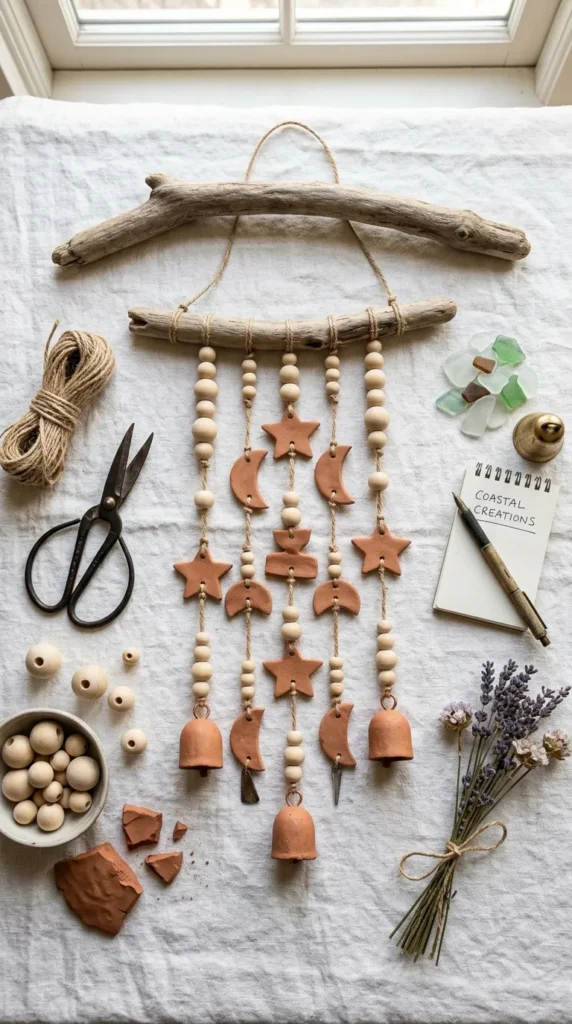
1. Minimalist Driftwood & Ceramic Wind Chime
Introduction A gentle coastal breeze brings natural movement to handcrafted outdoor pieces. This project pairs weathered shore wood with handmade air-dry clay disks, producing a soft, tranquil clinking sound and a Scandinavian-inspired silhouette for sunny balconies or bedroom windows.
What This Idea Means This craft centers on tactile balance: smooth matte clay contrasting against raw, salt-crusted driftwood. It teaches children balance, knot tying, and patience while assembling a functional piece of kinetic art.
Materials Needed
- 1 sturdy driftwood branch (10–14 inches long)
- Air-dry clay (terracotta or natural white)
- Natural jute twine or organic hemp cord
- Circle cookie cutters or small jar rims
- Wooden beads (unfinished)
- Fine-grit sandpaper
How to Make It
- Roll the air-dry clay out on a smooth, clean surface to an even 1/4-inch thickness.
- Cut out 8 to 12 clay discs using small cutters, then punch a 3mm hole near the top edge of each disc with a straw or skewer.
- Allow the clay pieces to cure completely for 24 to 48 hours, lightly sanding rough edges once dry.
- Cut 4 lengths of hemp twine (varying between 10 and 16 inches).
- Thread 2 to 3 clay discs onto each cord, securing them with double knots beneath each piece and alternating with unvarnished wooden beads.
- Tie the vertical strands evenly across the driftwood branch, ensuring the discs lightly tap against one another when swinging.
- Knot a 15-inch hanging loop securely to both ends of the main branch.
Tips & Variations
- Press tiny dried sea fennel or delicate lace into the wet clay before cutting to create organic pressed textures.
- Swap standard circular shapes for organic oval or pebble-like silhouettes.
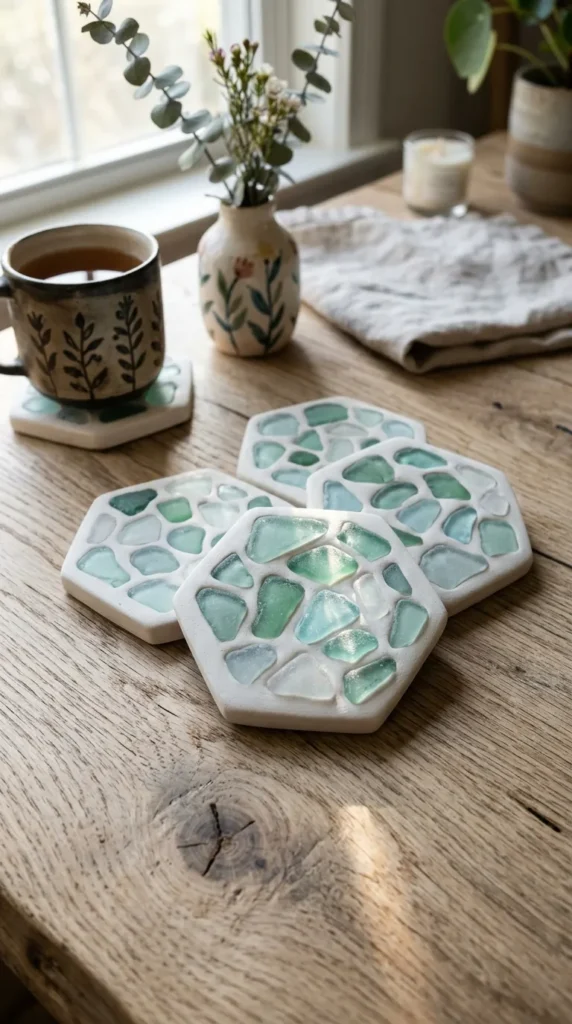
2. Frosted Sea Glass Mosaic Coasters
Introduction Tumbled ocean glass offers soft, translucent sea tones ranging from seafoam green to pale cornflower blue. Embedding these oceanic gems into self-hardening stone clay turns simple drink rests into luminous, modern art pieces.
What This Idea Means A study in geometry and color theory, this craft allows kids to practice mosaic patterning while preserving treasured beach-combing finds within durable, functional everyday decor.
Materials Needed
- Assorted authentic or tumbled sea glass (smooth edges)
- Hexagonal or round cork coaster bases (4-inch width)
- White fine-grain air-dry modeling clay or lightweight grout
- Non-toxic PVA craft glue
- Matte stone sealant
How to Make It
- Apply a thin layer of PVA glue to the top surface of the cork base.
- Press an even 1/4-inch layer of white air-dry modeling clay firmly over the cork, smoothing the outer rim with a damp fingertip.
- Arrange sea glass pieces smoothly into the wet clay surface, pressing them flat so the top surface remains even and safe for resting glasses.
- Wipe any stray clay residue from the upper glass faces with a damp cotton swab.
- Let dry undisturbed for 36 hours until the compound sets stone-hard.
- Brush a clear matte sealant across the clay spaces to protect against water rings.
Tips & Variations
- Arrange glass pieces in a monochromatic ombre pattern moving from deep olive to frosted ice-white.
- For younger children, use larger flat glass pieces to simplify handling.
3. Coastal Sunburst Raffia & Scallop Shell Mirror
Introduction Natural raffia and pale sea bivalves frame a round vanity mirror with sun-drenched texture. This piece mirrors high-end boho-luxe coastal decor while remaining accessible for little hands to assemble.
What This Idea Means It transforms flat coastal findings into a multi-layered, three-dimensional decorative sunburst, teaching children spatial symmetry and pattern repetition.
Materials Needed
- 6-inch round glass craft mirror
- 10-inch round sturdy cardboard or lightweight wood backing ring
- Natural untamed raffia bundle
- Clean, matched white scallop or cockle shells
- Quick-dry non-toxic craft adhesive
- Picture hanging bracket
How to Make It
- Fasten the mirror directly to the center of the wooden backing disc.
- Cut strands of natural raffia into 5-inch pieces.
- Fold each strand in half and loop-tie (lark’s head knot) around the outer perimeter of the wood ring, creating a full, fringed halo.
- Trim the raffia fringe evenly with craft shears into a neat circular halo.
- Glue matched white scallop shells in an overlapping sequence around the immediate inner border where the mirror meets the raffia base.
- Allow the glue to set fully for 3 to 4 hours before mounting.
Tips & Variations
- Comb out the raffia ends with a wide-tooth comb for a feathery, modern texture.
- Bleach darker shells in a mild vinegar bath beforehand to achieve uniform sandy-cream tones.

4. Sculptural Clay & Sea-Pod Botanical Vases
Introduction Small, air-dry ceramic pinch pots adorned with shoreline flora textures bring subtle ocean vibes indoors. Styled with dried beach grasses and bunny tails, these miniature vessels elevate any kid-crafted room display.
What This Idea Means Focuses on organic hand-building clay techniques and negative space, cultivating mindful hand-eye coordination without requiring a specialized ceramic kiln.
Materials Needed
- Natural stone air-dry clay (grey or off-white)
- Dried beach reeds, salt grasses, or sea urchin spines
- Small wooden modeling tools
- Clear matte interior craft varnish
How to Make It
- Roll a tennis-ball-sized portion of clay into a smooth sphere.
- Press a thumb gently into the center, pinching evenly upward around the perimeter to form a thick, organic vessel wall.
- Gently tap the base against a flat table to create a stable bottom.
- Press the stems of real sea grasses or sea-worn stones into the outer clay walls to imprint delicate fossil-like relief patterns.
- Smooth the top lip with a wet sponge, maintaining an intentionally asymmetrical, wabi-sabi rim.
- Dry thoroughly for 48 hours, then seal with a protective coat of matte varnish.
Tips & Variations
- Insert a small, narrow recycled glass bottle inside the wet clay body if you wish to hold fresh water and real flowers.
- Keep the clay completely unpainted to emphasize the natural raw pottery finish.

5. Architectural Seaside Shadow Box Keepsakes
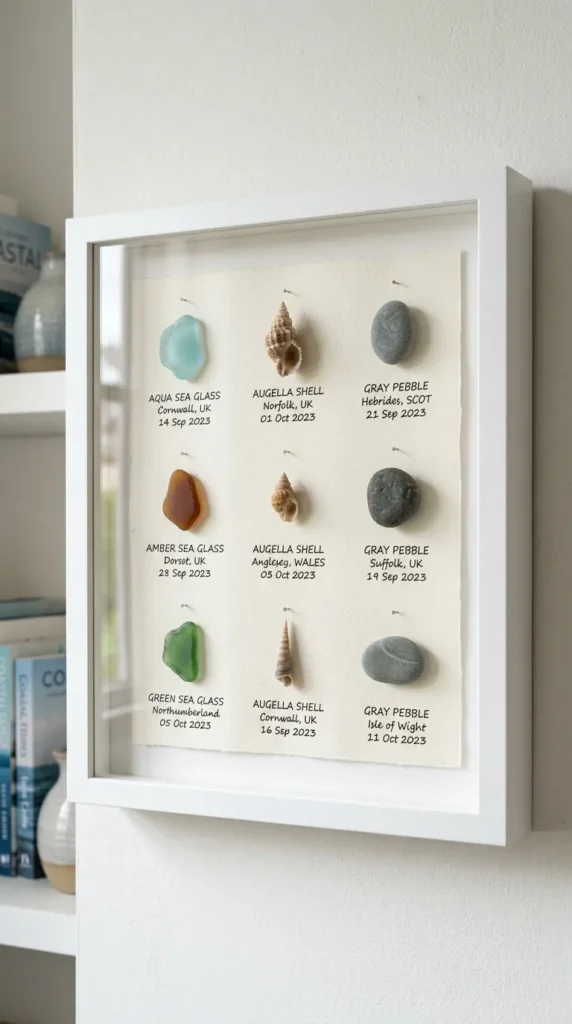
Introduction A clean museum-style shadow frame turns found pebbles, sea fans, bleached coral fragments, and spiral auger shells into high-end minimalist wall art.
What This Idea Means This project transforms basic beach collecting into conscious curatorial design, teaching children taxonomy, aesthetic composition, and visual balance.
Materials Needed
- 8×8-inch white or light-oak deep shadow box frame
- Heavyweight cold-press watercolor paper (300 gsm)
- Assorted tiny beach treasures (sea glass, whole miniature shells, sea glass tiles, smooth flat pebbles)
- Fine-tip archival ink pen
- Clear museum-grade silicone gel or craft glue
How to Make It
- Cut the watercolor paper to fit the inner dimensions of the shadow box backing.
- Using a ruler and pencil, lightly mark a balanced 3×3 or 4×4 grid of small crosshairs.
- Sort tiny coastal specimens by color, size, and category (e.g., three stones, three shells, three coral sprigs).
- Secure each treasure precisely onto its designated grid point with a small drop of clear adhesive.
- Write the beach location and collection date in neat, tiny script beneath each item using the archival pen.
- Mount the board inside the shadow box frame behind the glass.
Tips & Variations
- Arrange items in a strict color gradient from stark bone-white to deep slate-grey.
- Use a single, dramatic specimen (like a pristine sand dollar) centered on an oversized negative-space mat.
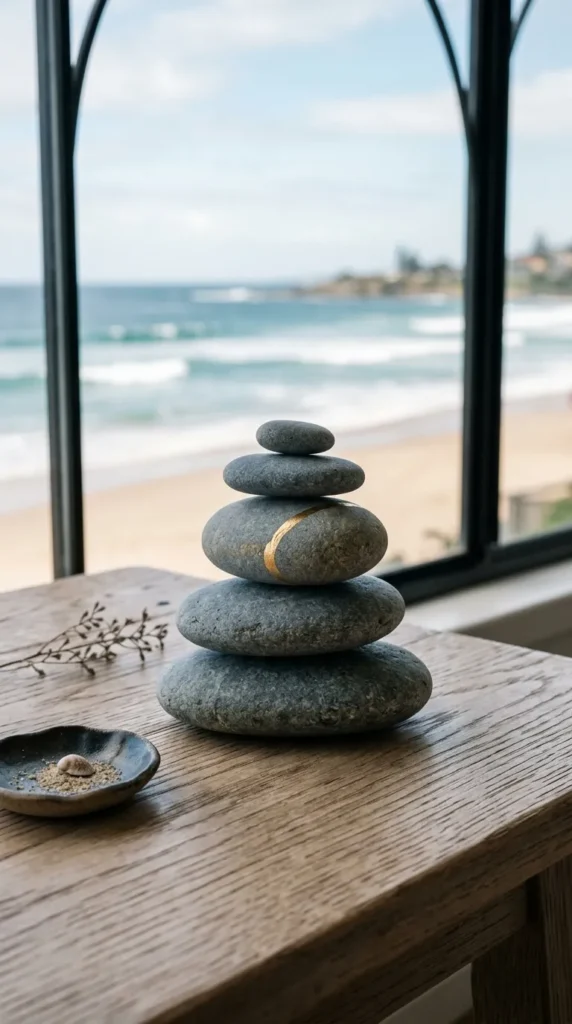
6. Neutral Textured Beach Stone Balancing Cairns
Introduction Inspired by stacked shore markers, this indoor sculpture craft secures flat, ocean-smoothed stones into striking zen towers anchored with brass-toned wire and felt detailing.
What This Idea Means Kids explore physical balance, weight distribution, and tactile geometry by matching irregular organic stone shapes into steady, artistic vertical silhouettes.
Materials Needed
- 5 to 7 flat, oval ocean pebbles of descending sizes
- Sturdy multi-surface adhesive or clear epoxy glue (child-safe or parent-assisted)
- Ultra-fine sandpaper
- Non-toxic matte stone oil or beeswax polish
How to Make It
- Wash and scrub the beach stones clean of salt and sand, then let them dry completely.
- Rub each stone lightly with a drop of beeswax polish to enhance natural mineral grain and color.
- Dry-stack the stones from largest at the base to smallest at the top, testing stability and shifting positions until a graceful vertical silhouette is achieved.
- Disassemble the stack systematically, then rebuild by applying a small dot of strong craft adhesive between each contact point.
- Hold each layer steady for 60 seconds before adding the next level.
- Allow the stone stack to cure undisturbed for 12 hours.
Tips & Variations
- Paint a delicate single stripe of muted gold leaf or warm ochre paint around the perimeter of the center stone before assembly.
- Set the bottom stone into a tiny square plaster block for an elevated gallery-pedestal appearance.




7. Framed Cyanotype Shoreline Sun Prints
Introduction Harnessing natural solar energy, sun-print paper captures deep Prussian blue silhouettes of ocean flora, feathers, and delicate shell outlines in minutes.
What This Idea Means A fusion of early photographic science and nature art, cyanotype printing teaches light-exposure fundamentals while preserving fragile sea foliage silhouettes.
Materials Needed
- Sun-print paper (cyanotype sheets)
- Fresh or dried seaweed, sea oats, seagull feathers, and skeletal coral
- Clear acrylic sheet or picture frame glass
- Shallow tray filled with cold tap water
- Natural wood picture frame
How to Make It
- In a shaded indoor area, place a sheet of sun-print paper blue-side-up on a flat board.
- Carefully arrange beach foliage and transparent items on top of the paper to form an artistic composition.
- Weigh the items down with a clear acrylic sheet to maintain sharp contact lines.
- Carry the tray into direct midday sunlight for 1 to 3 minutes until the exposed paper fades to a pale bronze-white.
- Bring the paper indoors, remove the objects, and submerge the print in cold water for 1 to 2 minutes to lock the deep ocean-blue tone.
- Lay flat on paper towels to dry, then frame in a light natural timber frame.
Tips & Variations
- Sprinkle fine beach sand across areas of the paper during exposure for a starry, textured background effect.
- Combine pressed sea lace and thin ribbons of kelp for varying opacities and tonal depth.
8. Hand-Dipped Indigo & Sand Coastal Candles
Introduction Transforming simple unscented soy pillar candles into organic home accents, this craft combines textured ocean sand bases with calming, hand-dipped ombre blue wax finishes.
What This Idea Means Kids practice dipping, texture layering, and heat-safe material crafting while transforming plain household items into modern coastal tabletop decor.
Materials Needed
- White or ivory unscented soy pillar candles
- Ultra-fine white beach sand
- Nontoxic soy wax dye chips (deep indigo)
- Heat-safe metal melting pitcher (parent-supervised water bath)
- Mod Podge or water-based craft varnish
- Small sponge brush
How to Make It
- Paint the bottom 1.5 inches of the pillar candle with a smooth layer of water-based craft varnish.
- Roll the wet candle base gently in fine beach sand until fully coated, creating a clean textured lower band. Tap off excess.
- Under parent supervision, melt a small cup of soy wax blended with deep indigo dye.
- Dip the center third of the candle briefly into the indigo wax for 2 seconds, pulling out smoothly to cool.
- Dip the lower midsection an inch deeper for a few extra seconds to create a subtle, multi-toned blue gradient right above the sand line.
- Set upright on parchment paper to cool and harden completely.
Tips & Variations
- Keep the sand completely natural or blend in a tiny pinch of mica powder for a subtle shimmer.
- Use tapered dinner candles instead of pillars for slender mantelpiece arrangements.
9. Modern Shell Ring Dishes with Gilded Rims
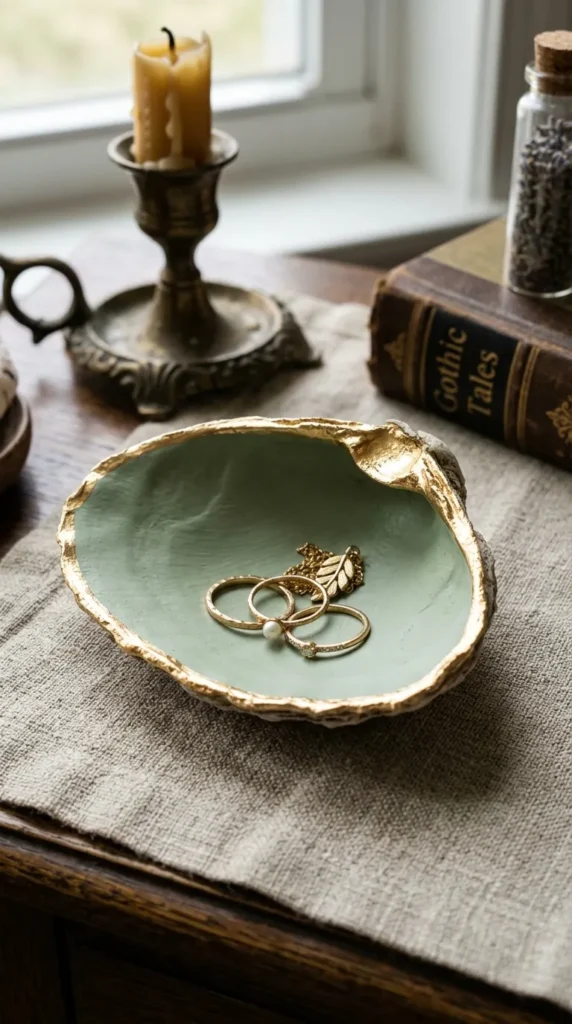
Introduction Oversized ocean shells—such as deep clam shells, oyster shells, or sea scallops—make elegant jewelry trays when finished with soft matte interior bases and delicate metallic edges.
What This Idea Means This craft turns everyday shoreline discoveries into durable trinket holders, teaching steady brushwork, gilding methods, and upcycling.
Materials Needed
- Large, deep sea shells (clams, oysters, or quahogs, 3–5 inches across)
- Non-toxic acrylic paint in soft tones (linen, dusty sage, warm terracotta)
- Metallic gold liquid leaf paint or gold acrylic
- Fine detail paintbrush
- Gloss or satin waterproof varnish
How to Make It
- Scrub shells thoroughly with warm soapy water and a stiff brush, letting them sun-dry until clean and odor-free.
- Paint the smooth inside bowl of the shell with two coats of soft linen or sage acrylic, leaving the natural outer ridge bare.
- Once the base coat is dry, use a fine detail brush to carefully outline the organic scalloped rim with metallic gold paint.
- Apply an ultra-thin clear coat of satin varnish across the painted interior to protect against scratching.
- Attach three small silicone bumper dots to the underside of the shell so it sits flat and balanced on nightstands.
Tips & Variations
- Apply a delicate floral or coastal decoupage napkin to the interior using Mod Podge instead of solid paint.
- Leave the raw mother-of-pearl interior natural, gilding only the uneven outer edges.
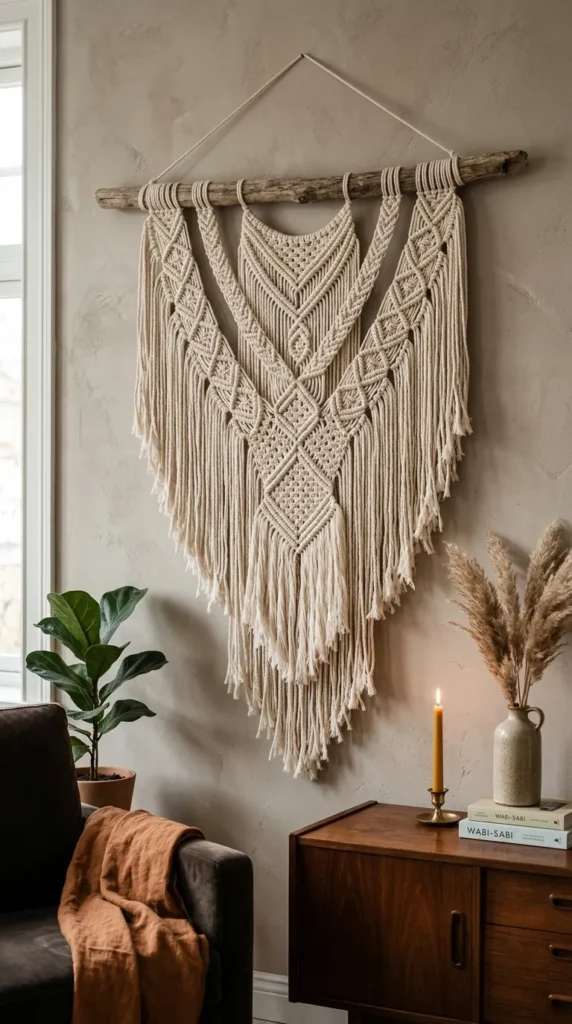
10. Driftwood & Organic Cotton Macramé Wall Banner
Introduction A clean branch smoothed by tides serves as the grounding anchor for a soft, woven cotton wall hanging styled with natural unspun fibers and simple knots.
What This Idea Means Fiber arts build fine motor strength and geometric rhythm. Kids learn foundational knot-making while creating timeless bohemian wall art.
Materials Needed
- 1 straight, ocean-tumbled driftwood stick (12–16 inches)
- 4mm single-strand unbleached cotton macramé cord
- Wooden craft beads
- Sharp fabric scissors
- Comb for fringing
How to Make It
- Cut 8 to 10 strands of cotton cord, each measuring approximately 4 to 5 feet long.
- Mount each cord onto the driftwood stick using a clean Lark’s Head Knot across the center width.
- Form a simple chevron pattern down the front using basic square knots, working from left to right.
- Thread neutral wooden beads onto select center strands, securing them with simple overhand knots.
- Trim the bottom ends diagonally with fabric shears into an elegant “V” shape.
- Unravel the bottom rope strands with a comb to create a soft, feathery fringe.
Tips & Variations
- Dip-dye the bottom two inches of the finished cotton fringe into a shallow pan of natural tea or chamomile for an organic ombre tone.
- Incorporate two or three thin strands of natural jute rope alongside the cotton cord for textural contrast.
11. Sculpted Air-Clay Sand Dollar Wall Plinths
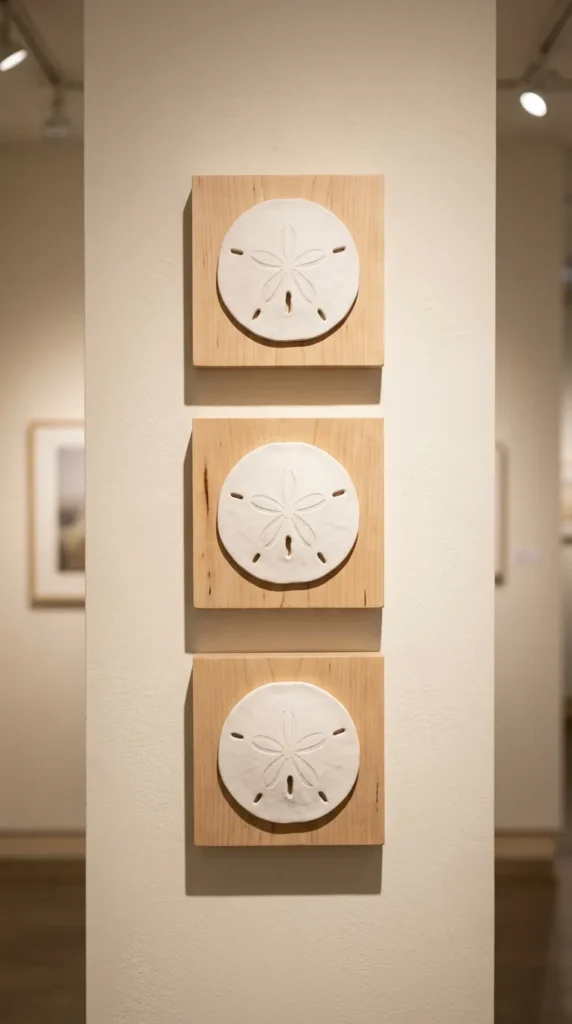
Introduction Stylized clay relief tiles inspired by sand dollar anatomy bring clean, sculptural coastal texture to interior gallery walls.
What This Idea Means Focuses on bas-relief modeling, pattern transfer, and botanical imprint techniques, teaching kids how to interpret natural patterns through minimalist clay sculpture.
Materials Needed
- Pure white air-dry clay
- 4×4-inch wooden square art blocks
- Clay sculpting stylus or toothpick
- Fine-mist spray bottle
- Neutral linen fabric scrap
- Mounting glue
How to Make It
- Roll out a 1/2-inch thick slab of white air-dry clay over a scrap of linen to impart a subtle woven fabric texture into the back.
- Cut a circular shape (approx. 3 inches wide) using a clay cutter.
- Lightly score a five-point radial star shape from the center toward the outer edges with a clay stylus.
- Pierce five small oval perforations near the points of the star to replicate natural sand dollar apertures.
- Smooth all outer edges with a damp sponge for a soft, ocean-worn look.
- Once fully dry (48 hours), adhere the ceramic piece onto the center of a natural wood block with strong mounting glue.
Tips & Variations
- Keep the clay entirely uncolored to celebrate architectural white-on-white wall styling.
- Use different-sized clay rounds to build an asymmetrical triptych for a nursery or study.
12. Ocean Wave Resin-Look Coasters with Safe PVA Enamel
Introduction Achieving the fluid look of crashing sea foam without using complex epoxies, this kid-safe pour technique uses pigmented gloss enamels layered across birch wood rounds.
What This Idea Means Explores fluid dynamics, density separation, and color blending, allowing kids to recreate the dynamic motion of ocean surf safely.
Materials Needed
- 4-inch raw birch wood coaster rounds
- Multi-surface high-gloss pouring medium or high-gloss PVA craft enamel
- Liquid craft paints (deep navy, turquoise, transparent aqua, titanium white)
- Small paper mixing cups & stir sticks
- Drinking straw
How to Make It
- Mix separate cups of pouring medium with drops of navy, aqua, and titanium white.
- Tilt the wooden coaster slightly and pour a band of deep navy across the top third, aqua across the center, and pale turquoise along the bottom.
- Drizzle a thin line of white enamel right along the borders where the colors meet.
- Gently blow air through a straw across the wet white paint line to spread and “cell” the color, mimicking the frothy lacing of ocean surf.
- Place the coasters on elevated cups in a dust-free box to dry flat for 24 to 48 hours until glossy and hard.
Tips & Variations
- Paint the dry outer rim of the birch wood in matte light gray to frame the fluid art cleanly.
- Sprinkle ultra-fine real sand onto the lowest edge while the paint is wet to mimic a sandy shoreline.
13. Minimalist Wire & Sea Pebble Botanical Sculptures
Introduction Smooth, salt-rounded beach stones serve as sculptural weighted bases for delicate, pliable wire stems shaped into minimalist monstera or kelp leaves.
What This Idea Means Combines heavy, grounded stone elements with airy wire line drawings in 3D space, introducing children to abstract wire sculpture and modern line work.
Materials Needed
- Smooth, palm-sized, flat-bottomed beach stones
- 18-gauge flexible craft wire (matte black, champagne gold, or raw copper)
- Small wire cutters and round-nose pliers
- Super-strong multi-surface craft glue
How to Make It
- Clean and dry the chosen stone base.
- Cut a 14-inch length of flexible craft wire.
- Using fingers and round-nose pliers, bend the upper half of the wire into a single continuous outline of an ocean kelp frond, palm branch, or minimalist leaf.
- Twist the lower wire ends together into a sturdy 2-inch stem.
- Wrap the bottom wire tail securely 2 to 3 times around the center girth of the beach stone, fixing the anchor point with a drop of clear adhesive beneath the rock.
- Adjust the upright wire leaf to balance gracefully.
Tips & Variations
- Paint the beach stone with matte black chalk paint for a striking contrast against gold wire.
- Make a mini-forest trio of varied wire heights to group together on an open bookshelf.
14. Modern Coastal Herbarium Pressed-Seaweed Frames
Introduction Preserving the intricate, lace-like beauty of dried coastal kelp and red sea moss between double-paned glass creates botanical specimens suited for any modern interior.
What This Idea Means Teaches traditional marine herbarium preparation and botanical preservation, sharpening patience, delicate touch, and botanical observation.
Materials Needed
- Fresh, rinsed strands of delicate seaweed or sea lace
- Heavy watercolor paper & blotting parchment
- Thick books or a botanical plant press
- Floating double-glass brass or wood picture frame
- Fine craft tweezers
How to Make It
- Float fresh seaweed in a shallow pan of clean tap water to naturally fan out its delicate tendrils.
- Slide a sheet of watercolor paper underneath the floating seaweed, gently lifting it out of the water so the specimen rests spread out on the paper.
- Layer dry parchment paper over the wet specimen, sandwich it between absorbent blotters, and place inside a heavy book for 5 to 7 days.
- Once completely dry and paper-thin, carefully peel away the parchment.
- Use tweezers to transfer the pressed marine specimen into the center of a double-glass floating frame.
- Close and latch the frame, securing the natural specimen in suspension.
Tips & Variations
- Combine two contrasting species (such as dark kelp and crimson sea-lace) within a single oversized frame.
- Label the lower corner of the glass with the scientific Latin genus using a fine gold paint marker.



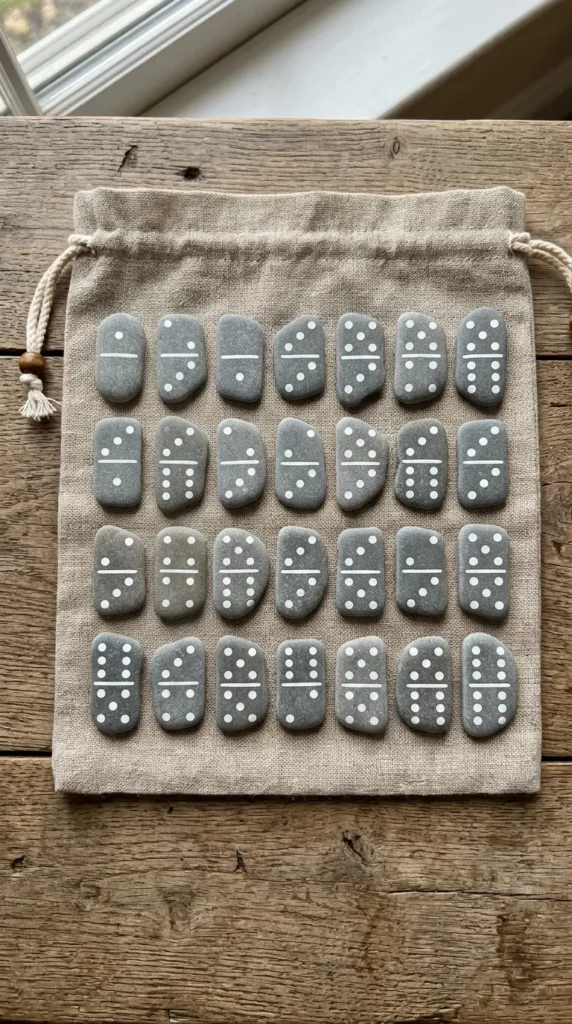

15. Geometric Painted Beach Pebble Domino Set
Introduction A complete, playful game set crafted from uniformly sized, flat gray beach stones decorated with crisp geometric patterns and number dots.
What This Idea Means A fusion of game design, precision painting, and natural toy making that encourages spatial reasoning and provides hours of tactile play.
Materials Needed
- 28 flat, similarly sized ocean-tumbled pebbles (approx. 2 inches long)
- Acrylic paint pens (crisp white, terracotta, or sage green)
- Ruler and pencil
- Drawstring linen storage bag
- Clear matte sealer spray
How to Make It
- Sort and wash 28 matching, smooth beach stones, laying them flat.
- Draw a neat dividing line across the center width of each stone using a ruler and paint pen.
- Paint standard domino dots (ranging from double-blank to double-six) onto the corresponding sides using a steady, round paint pen tip.
- Allow the paint to dry for 1 hour.
- Spray both sides with two coats of clear matte sealant to ensure the paint will not chip during gaming.
- Store the set in a small linen bag hand-stamped with a simple anchor or shell icon.
Tips & Variations
- Replace classic round dots with minimalist modern geometric shapes (such as triangles, dashes, or crosses) for custom matching games for younger toddlers.
- Use contrasting white stones painted with black ink for a reverse-monochrome look.
16. Sculptural Woven Seagrass & Shell Trinket Baskets
Introduction Coiling natural coastal rope and seagrass into compact, textural nesting bowls creates practical storage for nightstands, entryway keys, or jewelry.
What This Idea Means Introduces the ancient heritage craft of coil basketry in a simplified, child-friendly format using thick cords and basic binding techniques.
Materials Needed
- Natural 6mm braided cotton sash cord or thick coiled seagrass rope
- Waxed linen thread or thick embroidery floss (cream, sand, or warm ochre)
- Large blunt tapestry needle
- Tiny whole pre-drilled cowrie or spiral shells
How to Make It
- Coil the starting tip of the cotton rope tightly into a small flat spiral disk to form the bottom base of the bowl.
- Thread the blunt tapestry needle with waxed linen cord, using simple overcasting stitches around the coils to lock each concentric circle firmly to its neighbor.
- Once the base reaches 4 inches across, begin stacking each new rope coil slightly on top of the last to build vertical, curved side walls.
- Thread a tiny cowrie shell onto the needle stitch every third loop along the final top rim for an organic coastal border.
- Tuck the final end of the rope neatly down into the inner wall, knotting off the thread securely.
Tips & Variations
- Alternate thread colors as you wrap to create subtle geometric tribal stripes along the outer bowl walls.
- Leave the basket shallow to create a textural catchall tray rather than a deep bowl.
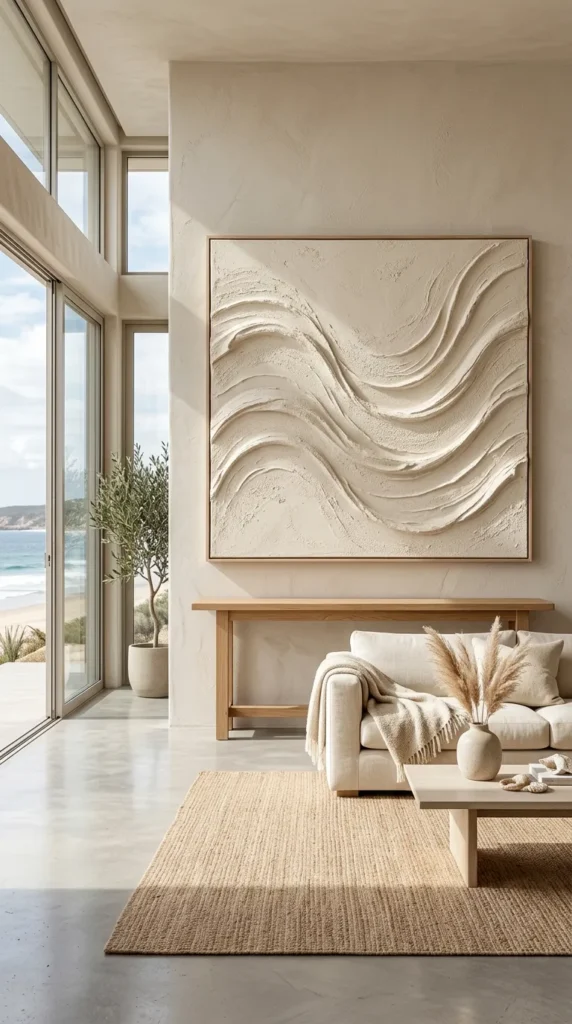
17. Neutral Textured Sand & Plaster Sculpted Canvas
Introduction High-texture tactile wall art made by blending real beach sand with artist modeling paste or plaster, sculpted into calm, flowing ocean waves.
What This Idea Means Allows kids to experiment with abstract 3D textures, tactile impasto art, and sculptural painting tools while using genuine beach sand as a thickening medium.
Materials Needed
- 8×10-inch or 12×12-inch stretched canvas board
- Artist modeling paste or smooth patching plaster
- Real beach sand (coarse or fine)
- Plastic notched adhesive spreaders or cake scrapers
- Matte neutral interior paint (warm ivory, linen, or soft sand)
How to Make It
- Mix 2 cups of modeling paste with 1 cup of clean beach sand in a wide container until it reaches a thick frosting consistency.
- Scoop the textured mixture generously across the canvas surface using a flat spatula to an even 1/4-inch depth.
- Draw the notched plastic scraper across the wet plaster in broad, sweeping wave arcs to form deep textural ridges and valleys.
- Let the textured canvas cure flat and undisturbed for 24 hours until fully hard and durable.
- Brush a single, even coat of warm linen matte paint over the entire piece to create a monochromatic art gallery finish.
Tips & Variations
- Blend different sand grits (coarse crushed shell sand vs. fine silica) across opposite sides of the canvas for organic surface variations.
- Keep the natural plaster completely unpainted if the blended sand already offers a pleasant neutral earthy hue.
18. Minimalist Driftwood & Jute Plant Hangers
Introduction A simple, functional coastal craft that turns a sturdy branch of ocean driftwood and natural jute cords into a suspended cradle for potted succulents or trailing ivy.
What This Idea Means Combines practical life-skills (knot security, weight testing) with minimalist coastal woodworking and sustainable room styling.
Materials Needed
- 1 thick, strong driftwood branch (approx. 10 inches long, minimum 1-inch diameter)
- 3-ply natural jute twine
- 1 small ceramic or terracotta plant pot with drainage tray (3–4 inches wide)
- 2 metal eyelet screws
- Measuring tape
How to Make It
- Inspect the driftwood for structural strength, brushing off loose grit or salt crystals.
- Twist two metal eyelet screws into the top of the driftwood, spaced 6 inches apart, and knot an 18-inch jute hanging strap between them.
- Cut 4 long strands of jute cord (approx. 4 feet each).
- Fold the strands in half, knot them securely around the driftwood, and let the 8 tails hang down.
- Tie adjacent strands together in pairs using simple overhand knots at 2-inch intervals, forming an open netting basket beneath the wood.
- Gather all 8 strands at the bottom and tie them into one solid, tight master knot.
- Nest the ceramic plant pot securely into the open netting cradle.
Tips & Variations
- Paint a subtle pastel dip on the lower tips of the driftwood branch using chalk paint.
- Use unbleached ivory cotton rope instead of jute for a softer, Scandinavian look.
19. Bleached Shell & Terracotta Wind Catcher
Introduction Strung along vertical twine, naturally worn shells with natural water-worn holes (hag shells) tap softly against terracotta chimes, catching the sea breeze.
What This Idea Means Focuses on finding naturally perforated beach items (“hag stones” and water-drilled bivalves), encouraging mindful beachcombing without power drills.
Materials Needed
- 15 to 20 naturally perforated beach shells (or smooth beach stones with holes)
- Small miniature terracotta craft pots (2-inch width)
- Natural waxed hemp twine
- Flat wooden hanging bar or driftwood base
- Wooden craft beads
How to Make It
- Sort your collected shells, choosing pieces that already feature natural surf-eroded holes near their hinges.
- Cut 3 strands of waxed hemp twine (each 20 inches long).
- Thread the first strand up through the drainage hole of a miniature inverted terracotta pot, securing it with an interior wooden bead and knot so the pot hangs upside down as a bell.
- Tie shells along the length of the string at 2-inch intervals, placing double knots beneath each shell to hold it in place.
- Repeat for all 3 vertical strands.
- Tie the 3 strands securely to your driftwood bar, spaced close enough so the shells gently chime together in a light breeze.
Tips & Variations
- Rub a drop of coconut oil across the shells to bring out their rich natural luster and darker patterns.
- Incorporate pieces of smoothed driftwood sticks between the shells for varied sound tones.
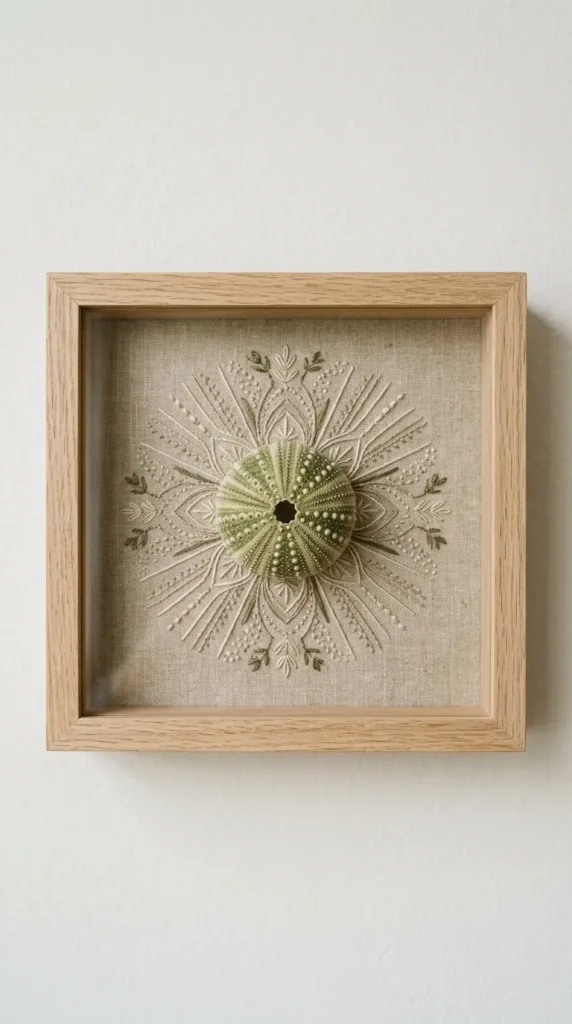
20. Framed Minimalist Sea Urchin & Fiber Art
Introduction Symmetrical, delicate green or purple sea urchin tests (skeletons) paired with minimalist stitched linen threads inside a neutral wood frame create refined wall art.
What This Idea Means Teaches symmetry, fragile object handling, and mixed-media framing, honoring delicate ocean geometry with modern textile accents.
Materials Needed
- 1 to 3 clean, intact dried sea urchin tests
- Natural oatmeal linen fabric scrap
- 6×6-inch wooden box frame
- Pale cream embroidery floss and hand sewing needle
- Thick backing matboard & craft adhesive
How to Make It
- Stretch and glue the natural oatmeal linen smoothly over the firm backing matboard.
- Using embroidery floss and a hand needle, stitch simple radial sunburst lines or minimalist crosshairs directly into the center of the linen.
- Apply a small ring of clear, strong craft adhesive around the wide bottom rim of the sea urchin test.
- Center the urchin test directly over the stitched starburst, pressing gently for 30 seconds until the adhesive catches.
- Allow the piece to set flat for 2 hours.
- Fit the textured linen board into the deep frame, keeping the protective front glass clean and spaced away from the delicate shell.
Tips & Variations
- Group three smaller urchin tests in a vertical column for tall, narrow wall spaces.
- Stitch a geometric circle pattern using muted terracotta or indigo embroidery thread to complement the linen ground.