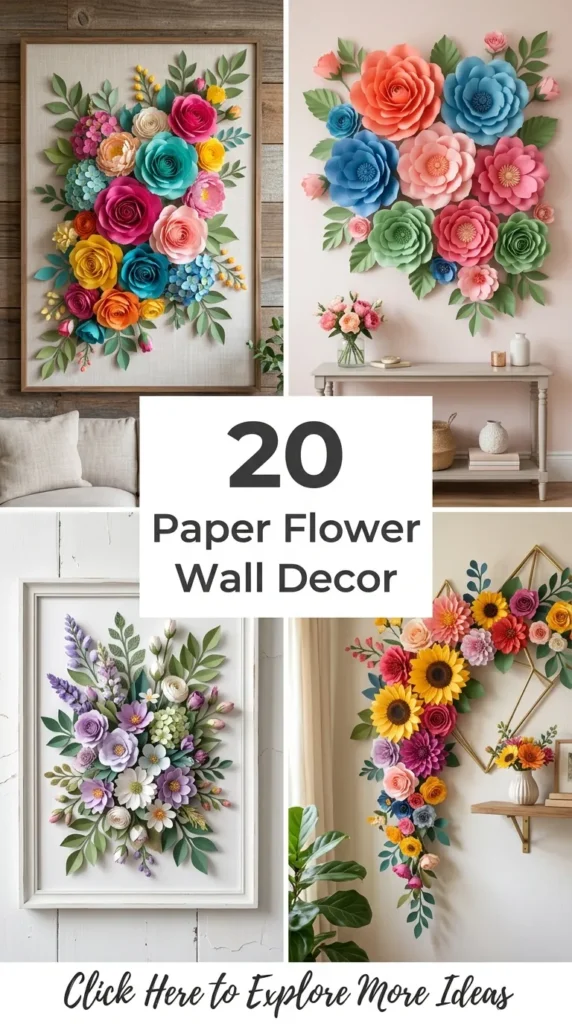
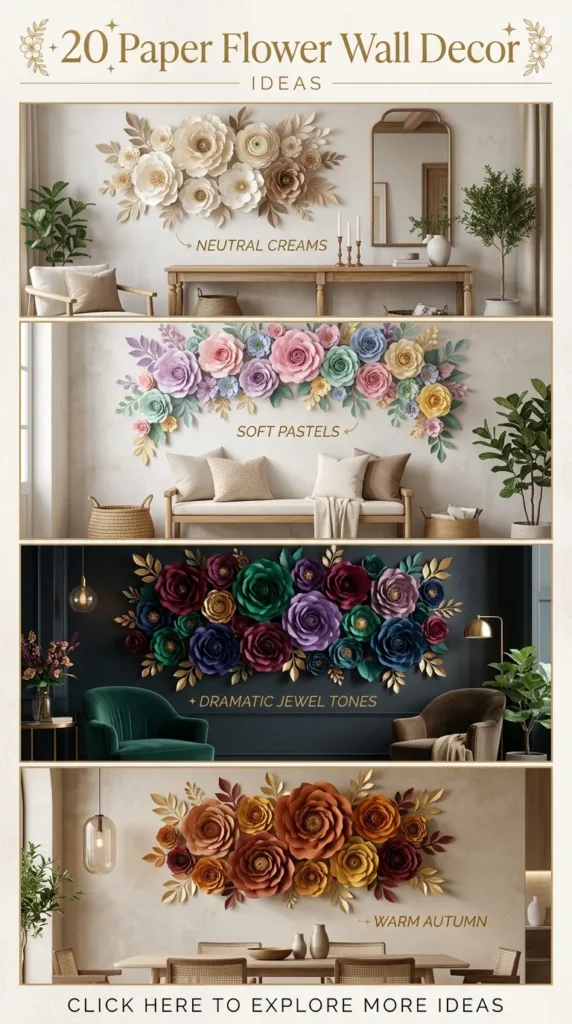
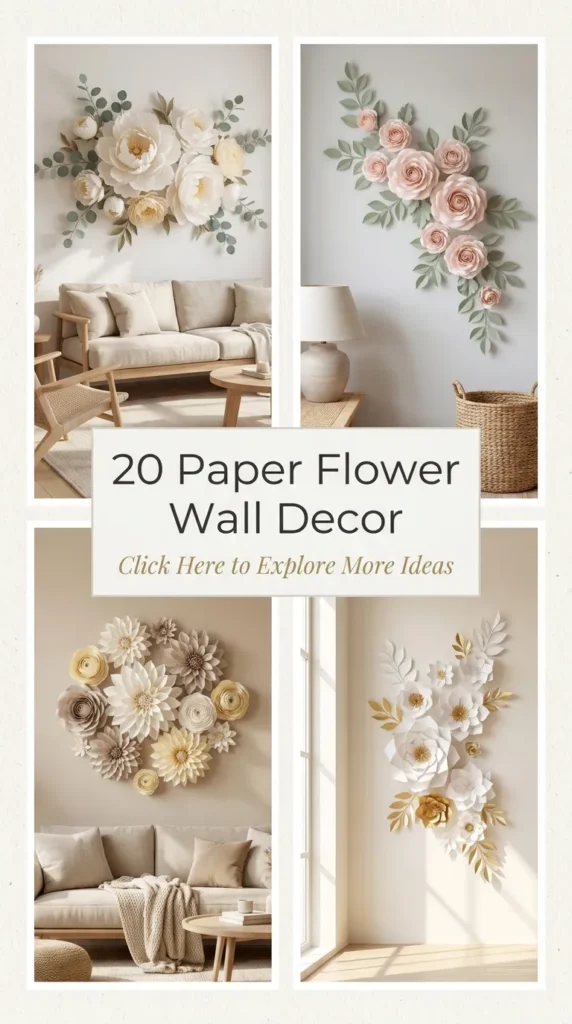
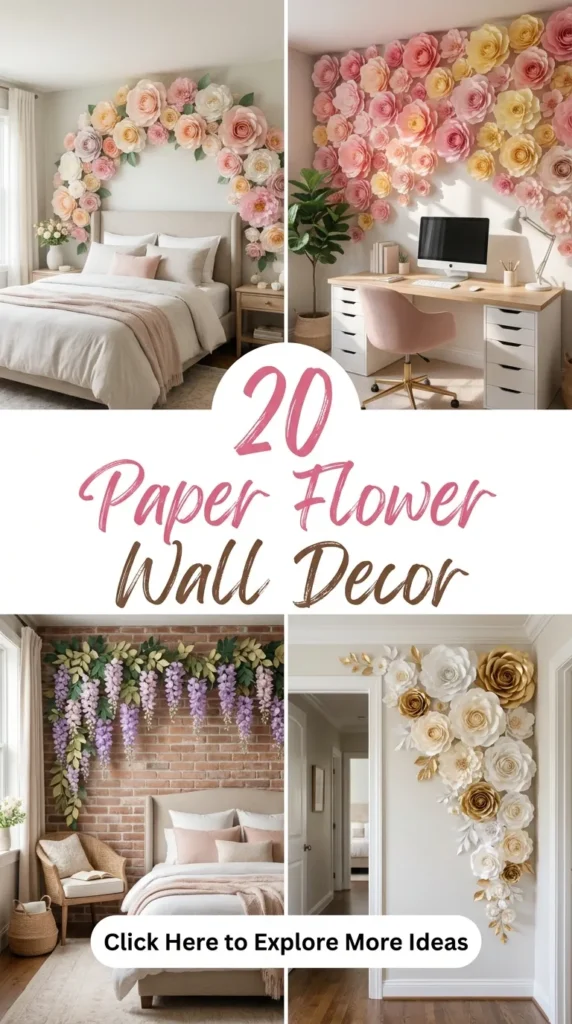
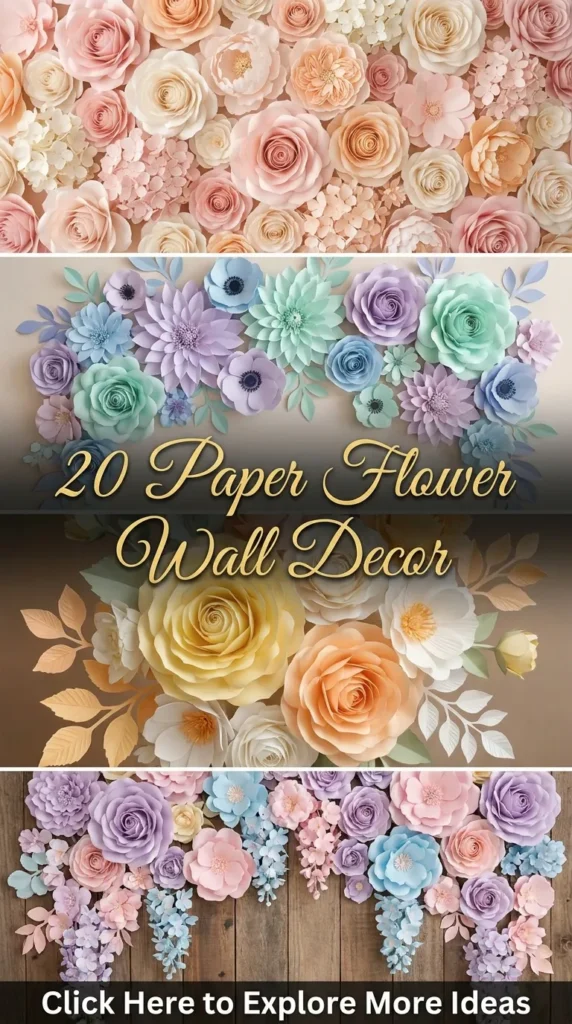
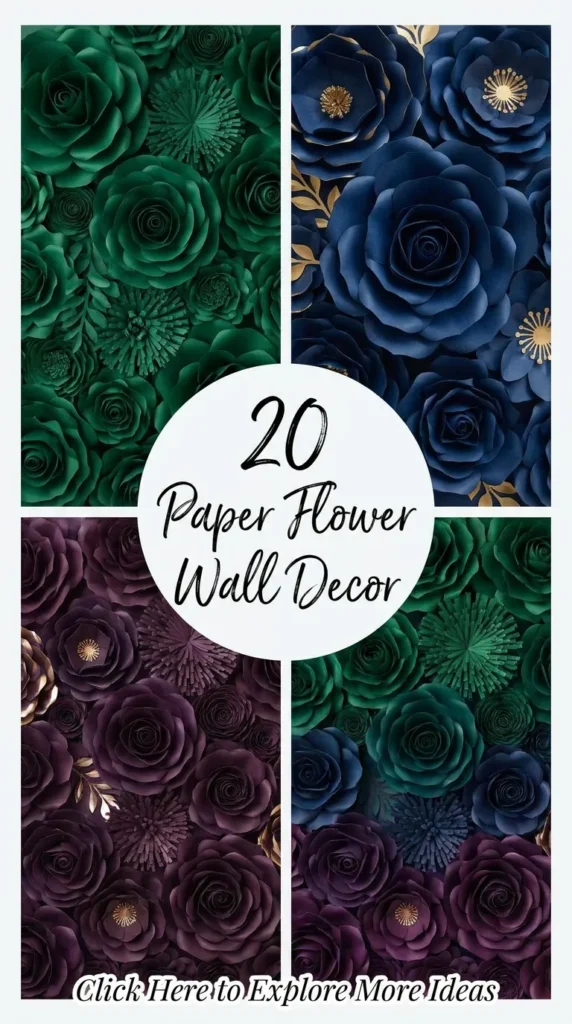
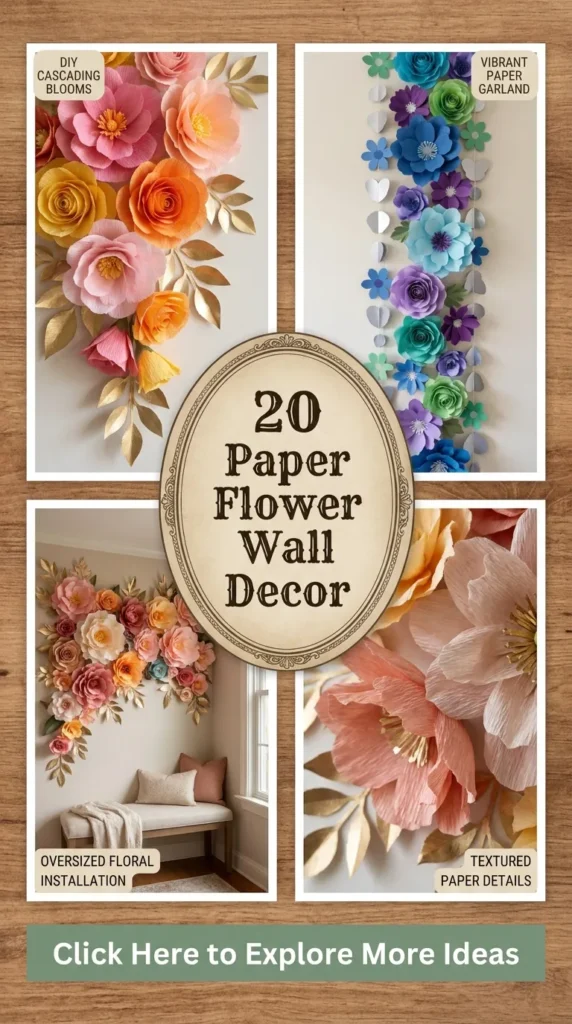
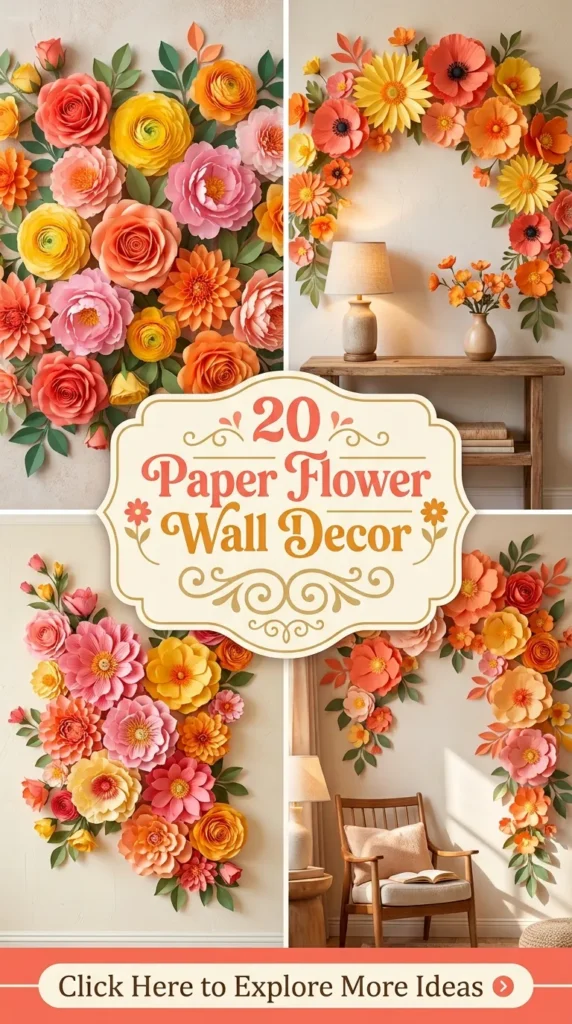
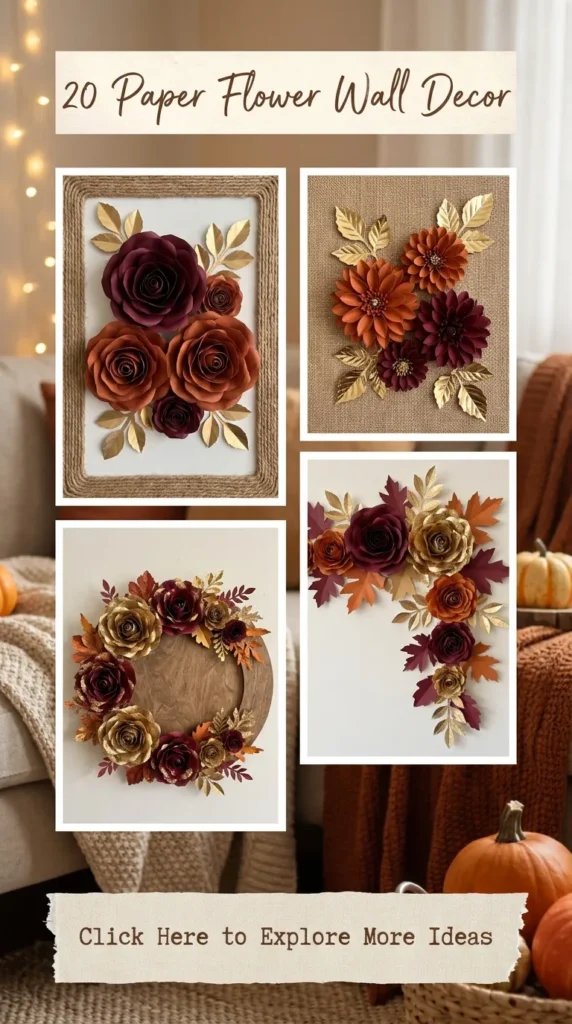
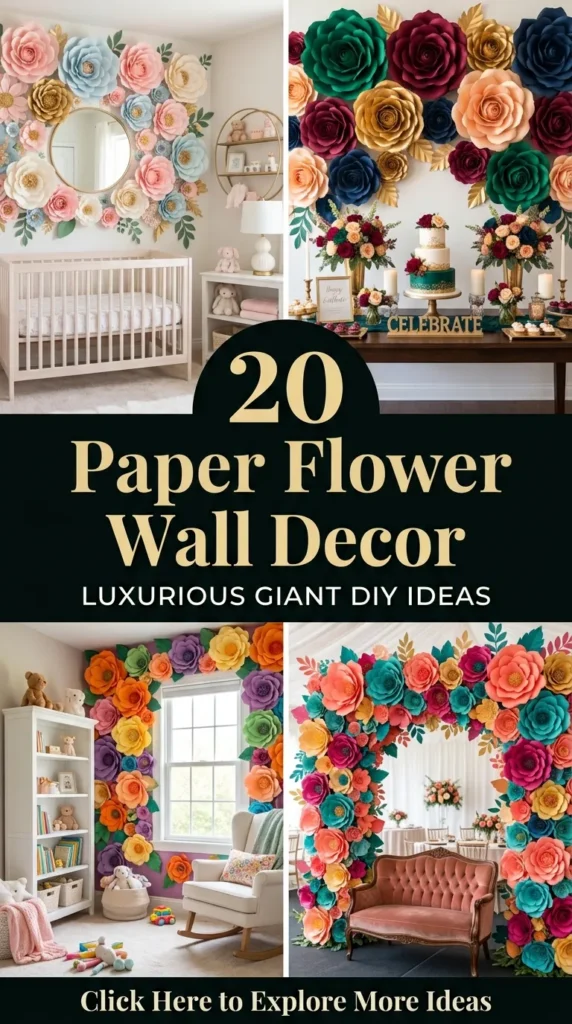
Paper flower wall decor has evolved from simple party craft decorations into sophisticated, high-end interior art installations. Combining sculptural dimensional forms, soft color palettes, delicate paper textures, and artistic layouts, handcrafted paper blooms bring permanent floral elegance into living rooms, master bedrooms, nurseries, and event backdrops.
Unlike real fresh flowers that wither within days, museum-quality crepe paper, metallic cardstock, and fine Japanese tissue blooms retain their vibrant forms for years. This comprehensive guide explores 20 unique, realistic, and Pinterest-worthy paper flower wall decor ideas. Each concept breaks down its design aesthetic, step-by-step assembly instructions, practical styling tips and variations, and a complete checklist of required materials.
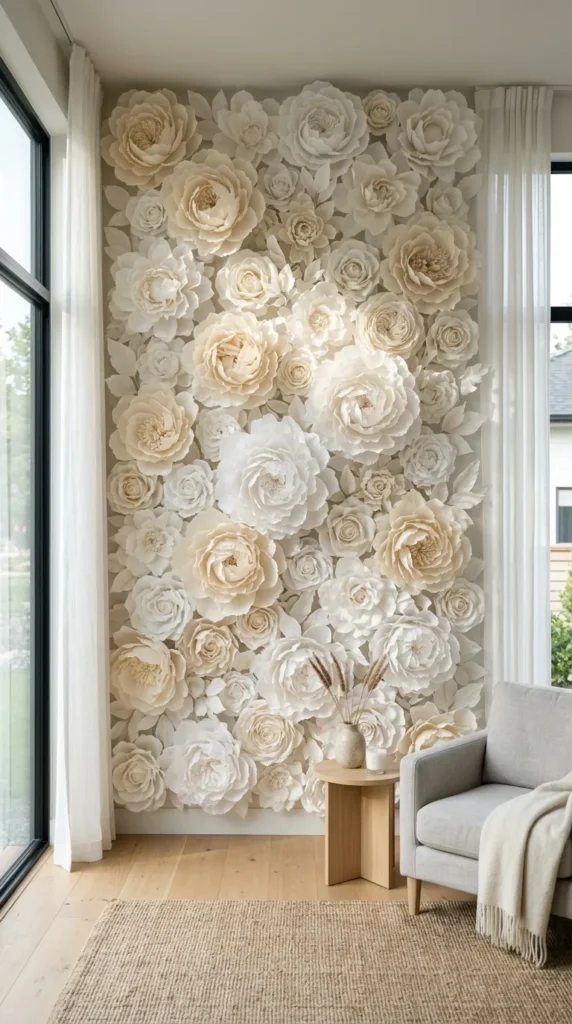
1. Minimalist Monochromatic White Peony Installation
Introduction
A pure, architectural feature, this installation uses varied shades of crisp white, ivory, and cream paper to create a textured, sculptural flower wall that adds depth without overwhelming neutral interiors.
What This Idea Means
Monochromatic design relies on shadow and texture rather than color contrast. By crafting oversized peonies using cardstock and fine crepe paper in soft white tones, this installation functions like a dynamic 3D plaster relief art installation. It fits seamlessly into modern, minimalist, Scandinavian, or organic contemporary homes.
How to Make It
- Petal Preparation: Cut 30 to 40 individual heart-shaped petals in 5 varying sizes (ranging from 2 inches up to 8 inches) out of heavy 180g German crepe paper in bright white and off-white.
- Petal Cup Shaping: Gently stretch the center of each crepe paper petal using your thumbs to create a deep, natural cupped form. Curl the top edges outward around a wooden dowel.
- Core Assembly: Form a tight central ball using aluminum foil wrapped around a floral wire stem, gluing tiny fringed paper center stamens around the foil core.
- Layering Petals: Using hot glue, attach the smallest cupped petals around the center core in overlapping layers. Gradually attach larger petals outwards, building a full, lush 14-inch peony bloom.
- Wall Mounting: Glue a flat circular heavy cardstock base onto the rear of each finished peony bloom, then attach heavy-duty removable Velcro mounting strips to install directly onto painted drywall.
Tips and Variations
- Tip: Mix matte cardstock with slightly translucent Italian crepe paper within the same bloom to create natural light diffusion across inner petals.
- Variation: Add subtle metallic gold or silver gilding wax along the outermost petal edges for subtle evening shimmer.
What You Need to Make It
- 180g Extra-Fine Italian/German Crepe Paper (White, Ivory, Cream)
- Heavyweight White Cardstock (for backing bases)
- High-Temp Hot Glue Gun & Glue Sticks
- Aluminum Foil & Floral Stem Wire
- Command Heavy-Duty Picture Hanging Velcro Strips
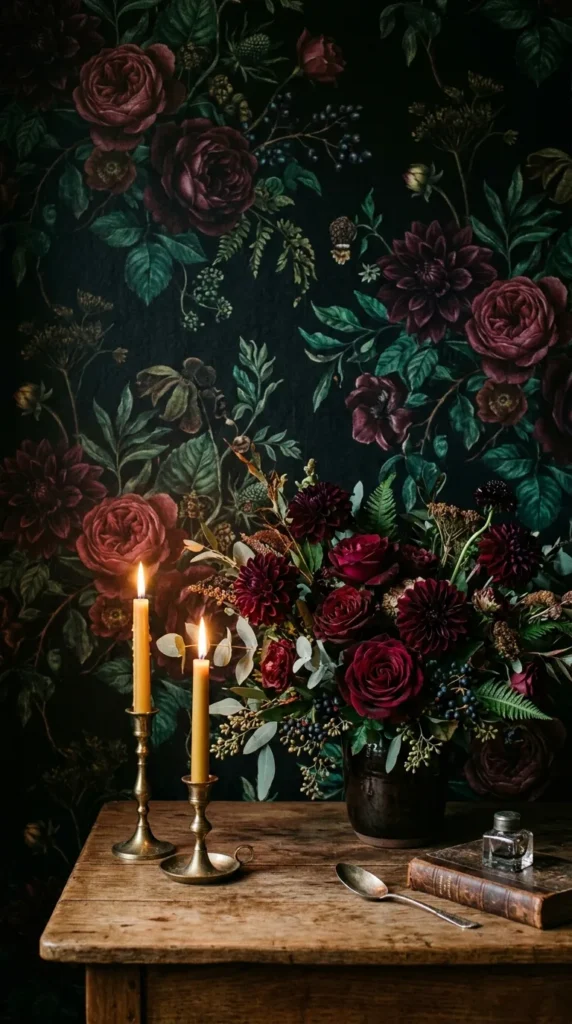
2. Moody Dark Florals & Midnight Botanical Wall
Introduction
Inspired by Dutch Master still-life oil paintings, this dramatic backdrop mixes deep burgundy, plum, navy, and emerald paper blooms against a dark painted wall feature.
What This Idea Means
This idea embraces rich dark academia and modern Gothic aesthetics. By combining large velvet-textured dark paper roses, deep crimson dahlias, and cascading eucalyptus foliage, this installation turns plain dark accent walls into romantic, moody art installations.
How to Make It
- Palette Selection: Gather double-sided 90lb cardstock and heavy crepe paper in deep burgundy, dark plum, midnight navy, and forest green.
- Dahlia Construction: Cut hundreds of small pointed cone petals. Glue them in tight concentric rings onto a 12-inch circular cardboard base, working from the outer rim inward to build a dense, spiky dahlia.
- Garden Rose Assembly: Roll long strips of scalloped crepe paper into tight spiraled rose centers, flaring outer cupped petals outwards for 12-to-16-inch bloom diameter.
- Foliage Framing: Cut long cascading vines, monstera leaves, and fern fronds out of deep emerald green cardstock, veining the leaves by scoring them with a bone folder.
- Layout Assembly: Mount the foliage onto the wall first using painter’s tape and wall tacks to establish an organic arch outline, then mount the dark floral blooms over the leaf stems.
Tips and Variations
- Tip: Spray finished paper petals with a light coat of matte clear acrylic sealer to prevent dark color pigments from fading over time.
- Variation: Intertwine warm LED micro-fairy lights between the dark paper blooms to create romantic evening glow and shadow effects.
What You Need to Make It
- 90lb Heavyweight Cardstock (Burgundy, Navy, Dark Plum, Emerald)
- Heavy Italian Crepe Paper (Deep Red, Forest Green)
- Bone Folder Tool (for leaf scoring)
- Hot Glue Gun & Dual-Temperature Sticks
- Matte Acrylic Spray Sealer
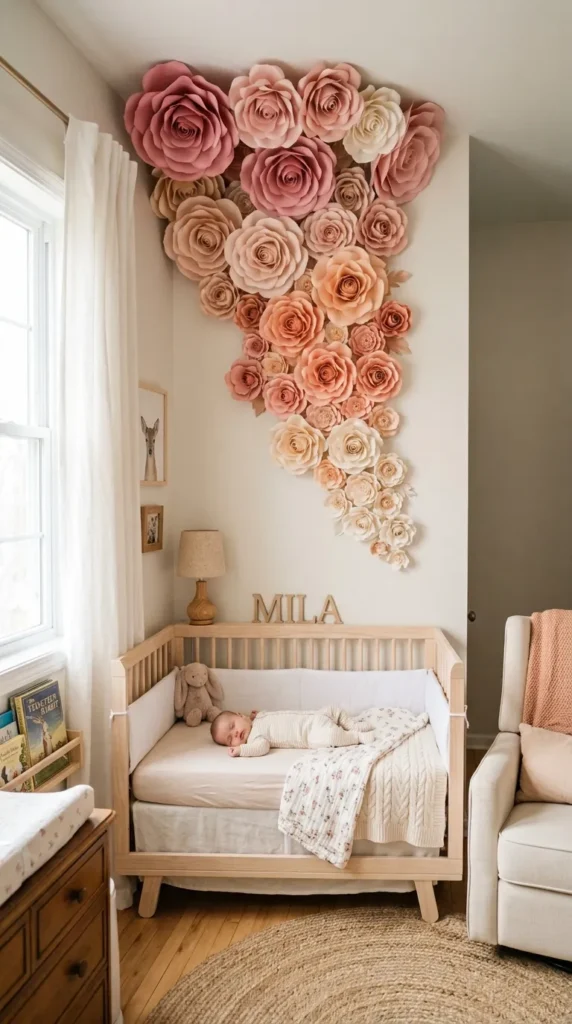
3. Delicate Pastel Ombré Nursery Flower Cascade
Introduction
A soft, dreamy installation designed for nursery rooms or romantic bedrooms, featuring paper flowers transitioning smoothly from deep blush pink at the top down to soft peach and cream at the bottom.
What This Idea Means
Ombré color blending creates gentle visual movement and relaxing atmosphere. Arranging lightweight paper blossoms in a cascading diagonal drift down a nursery accent wall creates a soft, whimsical focal point above cribs or daybeds.
How to Make It
- Color Categorization: Sort 160g crepe paper into four gradient shades: Deep Rose, Soft Blush, Warm Peach, and Vanilla Cream.
- Bloom Creation: Craft a mix of medium-sized (6 to 10 inch) ranunculus and cherry blossoms. For ranunculus, layer dozens of small overlapping rounded petals tight to form a dense inner cup.
- Branch Framework: Cut natural-looking trailing branch silhouettes out of light tan cardstock.
- Gradient Installation: Mark a sweeping S-curve on the wall using painter’s tape. Mount deep rose flowers at the top peak, gradually transitioning through blush pink and warm peach, ending with vanilla cream blooms near the bottom.
- Petal Drift: Scatter tiny individual individual loose petals along the outer edges of the installation to create the effect of flowers drifting in a gentle breeze.
Tips and Variations
- Tip: Use a light touch of pink soft pastel chalk brushed onto the centers of cream petals to create realistic color gradients.
- Variation: Replace the branch backing with a natural wooden branch mounted on the wall, suspending the flowers from fine monofilament thread.
What You Need to Make It
- 160g Italian Crepe Paper (Rose, Blush, Peach, Vanilla)
- Soft Pastel Chalks & Makeup Sponge Brushes
- Light Tan Cardstock (for trailing branches)
- Hot Glue Gun & Removable Wall Mounting Tacks
- Fine Monofilament Thread (optional)
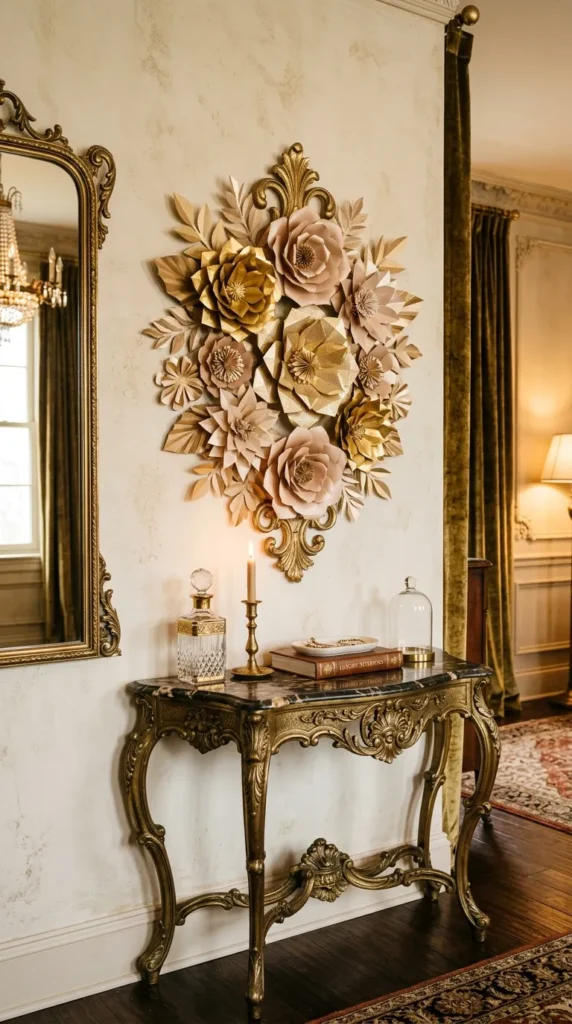
4. Metallic Gold & Champagne Luxe Floral Crest
Introduction
A glamorous wall crest featuring paper blooms crafted from metallic gold, shimmer champagne, and bronze cardstock, making a statement above entryway consoles or dining room buffets.
What This Idea Means
This concept brings metallic shimmer and architectural luxury to paper craft. Reflected light catches the metallic cardstock folds, producing dynamic highlights and rich metallic tones that complement gold mirrors, crystal chandeliers, and brass fixtures.
How to Make It
- Material Prep: Cut petal templates out of 105lb metallic shimmer cardstock in Antique Gold, Champagne Silk, and Metallic Bronze.
- Petal Creasing: Use a bone folder or dull butter knife to score vertical structural crease lines down the center of each metallic petal, giving them crisp geometric facets.
- Sculpting Blooms: Glue 5 outer creased petals onto a pentagon cardstock base. Layer 4 smaller inner petal tiers offset from each other, ending with a rolled metallic spiral stamen core.
- Crest Backplate: Cut a large oval or crest-shaped backplate out of thick foam board, painting it in matching champagne gold acrylic paint.
- Assembly: Arrange 5 to 7 large metallic blooms densely in the center of the foam board backplate, framing them with laser-cut metallic tropical palm fronds. Mount the entire crest panel as a single unit using wall hanging brackets.
Tips and Variations
- Tip: Use high-heat hot glue when working with metallic coated papers; low-temp glue may peel off slick metallic finishes over time.
- Variation: Incorporate acrylic crystal bead strands cascading down from the bottom of the metallic floral crest.
What You Need to Make It
- 105lb Metallic Shimmer Cardstock (Gold, Champagne, Bronze)
- 1/2-inch Heavy-Duty Foam Core Board
- Champagne Gold Acrylic Paint & Paint Brush
- Bone Folder Tool
- High-Temp Hot Glue Gun & Wall Hanging Hardware
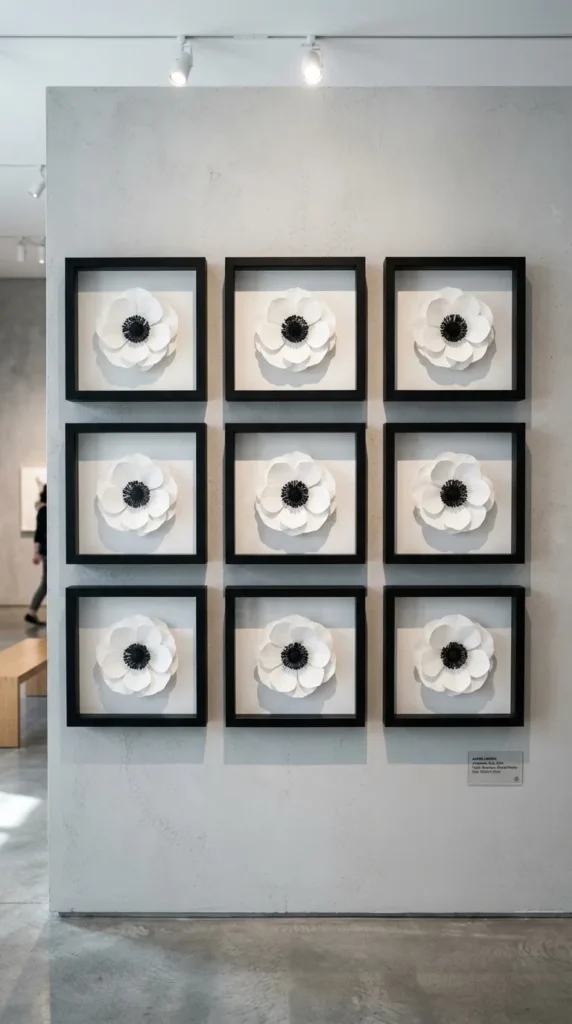
5. Modern Abstract Paper Anemone Grid Wall
Introduction
A contemporary gallery-style installation featuring high-contrast black-and-white paper anemones arranged in a clean, symmetrical grid pattern inside dark box frames.
What This Idea Means
This idea merges nature motifs with modern geometric minimalism. Striking white paper anemones featuring dark navy/black stamen centers are mounted inside uniform shadowbox frames, transforming organic blooms into clean architectural wall art.
How to Make It
- Anemone Petals: Cut 6 large rounded petals per flower out of smooth 80lb matte white cover-weight paper.
- Distinctive Center: Cut strips of black crepe paper, fringing them finely with herb scissors to make dense stamens. Roll the fringe around a black paper-covered button core to create the anemone’s black center.
- Flower Assembly: Glue the 6 white petals in a loose, flat ring around the black stamen center, cupping the petal tips slightly upward.
- Shadowbox Prep: Remove the glass from 9 uniform (10×10 inch) square black shadowbox frames, lining the inner backboard with textured gray linen fabric.
- Grid Mounting: Glue one pristine white anemone bloom into the exact center of each framed shadowbox board. Mount the 9 frames on your wall in a balanced 3×3 square grid layout.
Tips and Variations
- Tip: Ensure the depth of your shadowbox frames (at least 2 inches) accommodates the dimensional height of the paper anemones without crushing petal tips.
- Variation: Use vibrant royal blue or canary yellow for the anemone petals while keeping the black centers and grid layout consistent.
What You Need to Make It
- 80lb Matte White Cover Cardstock
- Fine Black Crepe Paper & Herb Fringing Scissors
- 9 Square Black Shadowbox Frames (10×10 inches)
- Textured Slate Gray Linen Fabric (for frame backings)
- Hot Glue Gun & Frame Level Tool
6. Botanical Eucalyptus & Wildflower Archway
Introduction
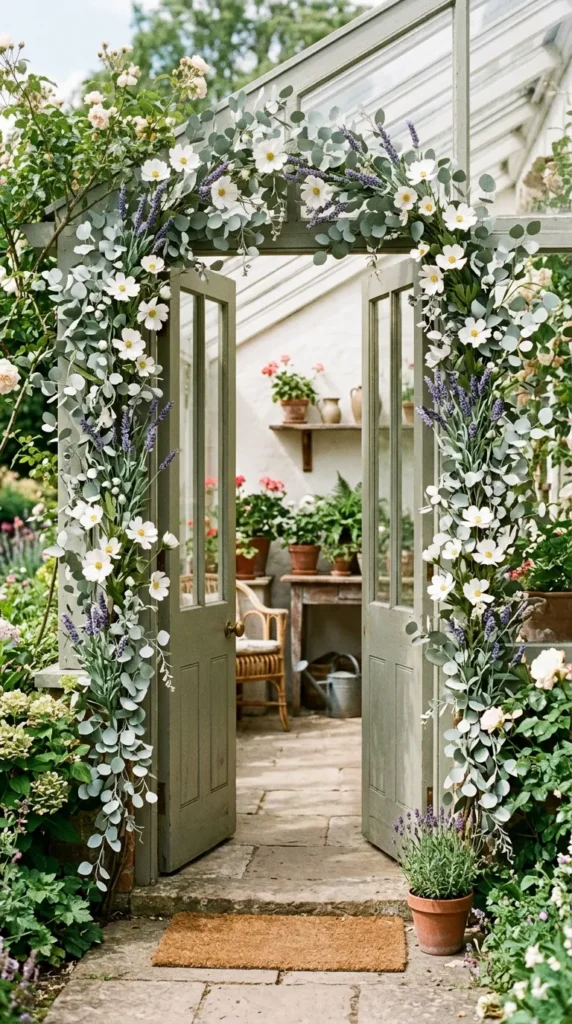
A lush, garden-inspired installation that frames doorways, mirrors, or headboards with realistic paper eucalyptus strands, sprigs of lavender, and delicate white wild cosmos blossoms.
What This Idea Means
Bringing the outdoors inside, this installation emphasizes organic botanical greenery interspersed with meadow wildflowers. It softening sharp architectural doorways and brings fresh English-garden atmosphere into living spaces.
How to Make It
- Eucalyptus Leaves: Die-cut or hand-cut hundreds of disc-shaped eucalyptus leaves out of sage green, dusty olive, and silver-dollar green cardstock.
- Stem Assembly: Glue leaf pairs along lengths of 20-gauge floral wire wrapped in green floral tape to construct flexible, trailing eucalyptus vines.
- Wildflower Crafting: Make delicate white cosmos blooms with thin yellow thread stamens and purple crepe paper lavender spikes.
- Arch Support: Bend a flexible 6-foot length of heavy aluminum armature wire into a soft arch curve tailored to your doorway or mirror frame.
- Building the Vine: Wrap and secure the eucalyptus strands and wildflower stems along the armature wire support using green floral tape. Mount the finished arch onto wall hooks above your frame.
Tips and Variations
- Tip: Dust the paper eucalyptus leaves with a touch of cornstarch or white pastel dust to replicate the natural powdery blue-green bloom found on real eucalyptus.
- Variation: Integrate dried natural pampas grass plumes along the upper arch curve for bohemian visual texture.
What You Need to Make It
- Cardstock in Sage Green, Olive, White, and Lavender
- 20-Gauge & 16-Gauge Floral Wire
- Green Floral Tape & Wire Cutters
- Yellow Embroidery Thread (for stamens)
- Removable Wall Hooks / Command Wire Hooks
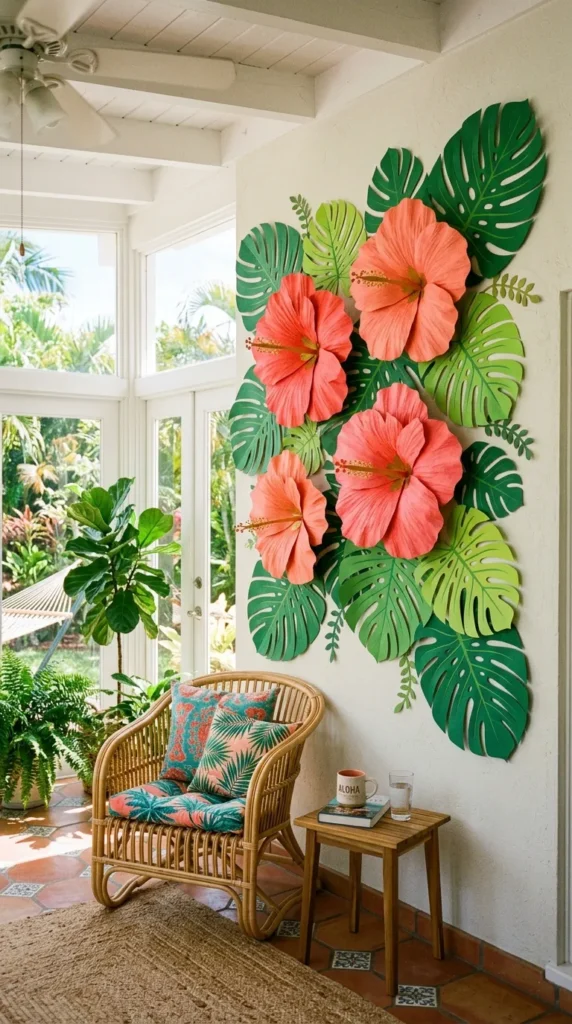
7. Tropical Paradise Hibiscus & Monster Display
Introduction
A bold, vibrant wall display featuring oversized paper hibiscus, exotic bird-of-paradise blooms, and dark green monstera palm leaves, bringing tropical energy to pool houses or sunrooms.
What This Idea Means
This concept celebrates bright colors, bold geometric leaf shapes, and vacation aesthetics. Oversized paper tropical blooms create an energetic visual statement that invigorates large plain walls.
How to Make It
- Tropical Foliage: Cut large 18-inch monstera leaves and fan palm fronds out of deep emerald green cardstock. Score deep vein lines along every leaf lobe.
- Hibiscus Petals: Cut 5 large flared petals per flower out of coral pink, bright yellow, or magenta 180g crepe paper.
- Pistil Crafting: Wrap a long piece of floral wire in yellow crepe paper, gluing tiny yellow paper balls along the top tip to form the distinct long hibiscus pistil.
- Flower Assembly: Stretch and ruffle the outer edges of the 5 coral petals, gluing them tightly around the base of the long pistil so they flare outward dramatically (14-to-18-inch bloom width).
- Installation: Layer the giant monstera leaves flat against the wall in a fan arrangement, mounting the bright hibiscus flowers centrally on top of the green foliage background.
Tips and Variations
- Tip: Use a ruffling technique on crepe paper petal edges by pulling outward with thumb and forefinger to create realistic ruffled tropical bloom edges.
- Variation: Keep all foliage black and craft the hibiscus blooms in bright neon colors for a modern tropical aesthetic.
What You Need to Make It
- 180g Heavy Crepe Paper (Coral, Yellow, Magenta)
- Heavy Emerald Green Cardstock (for giant monstera leaves)
- Long Floral Wire & Yellow Paper Beads
- Bone Folder & Scissors
- Heavy-Duty Wall Mounting Adhesive
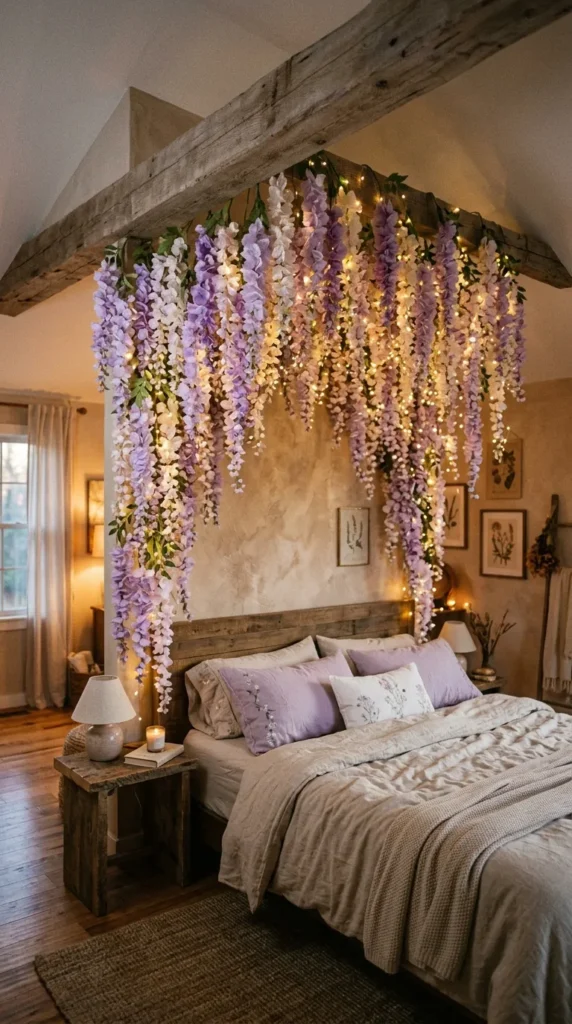
8. Romantic Hanging Paper Wisteria Ceiling-to-Wall Canopy
Introduction
An immersive, three-dimensional installation where hundreds of delicate paper wisteria blossoms cascade down from a ceiling beam onto a bedroom or reading nook wall.
What This Idea Means
This idea turns flat wall decor into an immersive ceiling-to-wall installation. Hanging trails of paper wisteria petals mimic falling floral rain, creating a fairytale-like canopy over seating areas or bed headboards.
How to Make It
- Wisteria Petal Cutouts: Die-cut thousands of tiny tear-drop petals out of lightweight tissue paper or 60g crepe paper in lilac, lavender, violet, and white.
- Strand Threading: Using a sewing needle and clear monofilament fishing line, thread petals in vertical strings (ranging from 2 feet to 5 feet in length), placing tiny clear glass beads between petals as spacers.
- Gradient Assembly: Arrange the petals along each strand so the darkest violet tones sit at the top, fading down to pure white tips at the bottom end.
- Ceiling/Wall Mount: Attach a wooden lattice strip along the junction where your ceiling meets the main wall.
- Hanging: Tie 30 to 50 individual wisteria strands along the wooden lattice strip, spacing them 2 inches apart to form a dense cascading floral waterfall curtain.
Tips and Variations
- Tip: Use lightweight tissue paper rather than heavy cardstock so the wisteria strands sway gently with natural room air currents.
- Variation: Place soft warm LED uplighting along the floor baseboard pointing upward into the hanging wisteria canopy.
What You Need to Make It
- Fine Crepe / Tissue Paper (Lilac, Lavender, Violet, White)
- Clear Monofilament Fishing Line & Sewing Needle
- Tiny Clear Glass Spacer Beads
- Wooden Mounting Lattice Strip & Screws
- Scissors & Measuring Tape
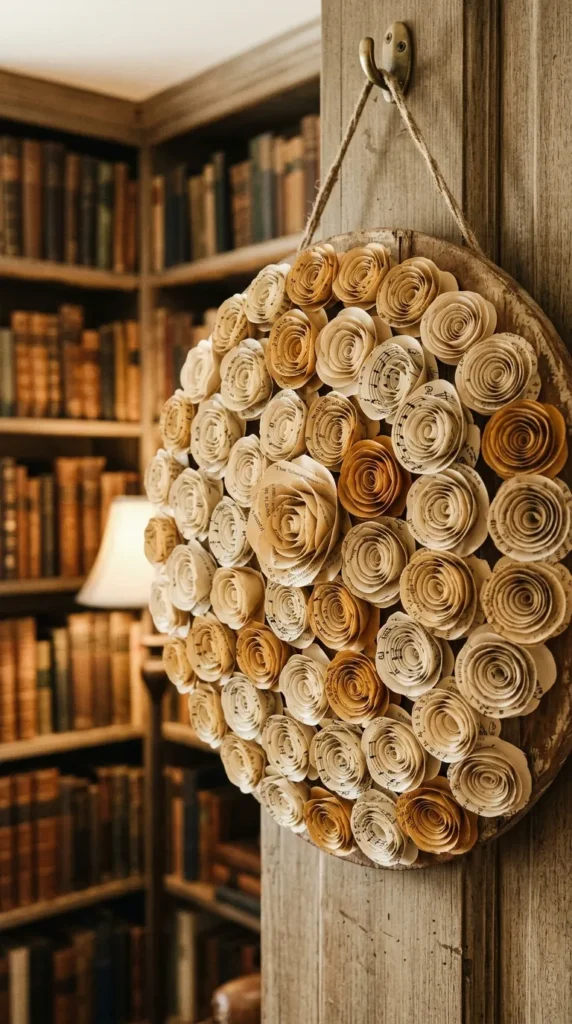
9. Vintage Book Page & Parchment Rose Medallion
Introduction
A nostalgic, literary installation featuring paper roses folded and sculpted from yellowed vintage book pages, antique sheet music, and tea-dyed parchment paper.
What This Idea Means
Perfect for home libraries, cozy study corners, or Victorian interiors, this concept blends literary history with paper craft. Reclaiming vintage paper materials creates a warm, sepia-toned wall centerpiece filled with story and character.
How to Make It
- Paper Prep: Collect damaged vintage book pages, old sheet music, and parchment paper. Tea-dye some pages in warm black tea to vary sepia tone depth.
- Rose Petal Cutting: Cut spiraled circle templates out of the vintage pages, scalloping the outer edges with pinking shears.
- Rolling Petals: Roll the spiraled paper strip tightly from the outside inward using a quilling tool, releasing the coil slightly to form a relaxed, open rose bloom (4 to 8 inches wide).
- Circular Medallion Base: Cut a 24-inch circular wooden or heavy cardboard base plate.
- Pattern Placement: Glue the parchment roses onto the circular baseboard in a spiral arrangement, mixing sheet music text with book print pages. Add tiny dried baby’s breath sprigs between rose gaps.
Tips and Variations
- Tip: Lightly ink the raw cut edges of the book page petals with brown distress ink using a foam dauber to exaggerate vintage antique edges.
- Variation: Shape the vintage book page roses into a large wall-mounted heart shape instead of a circular medallion.
What You Need to Make It
- Damaged Vintage Books, Sheet Music & Parchment Paper
- Black Tea & Spray Bottle (for aging paper)
- Quilling Tool or Fine Needle-Nose Pliers
- Vintage Brown Distress Ink Pad & Foam Dauber
- 24-inch Circular Cardboard/Wood Baseplate & Hot Glue
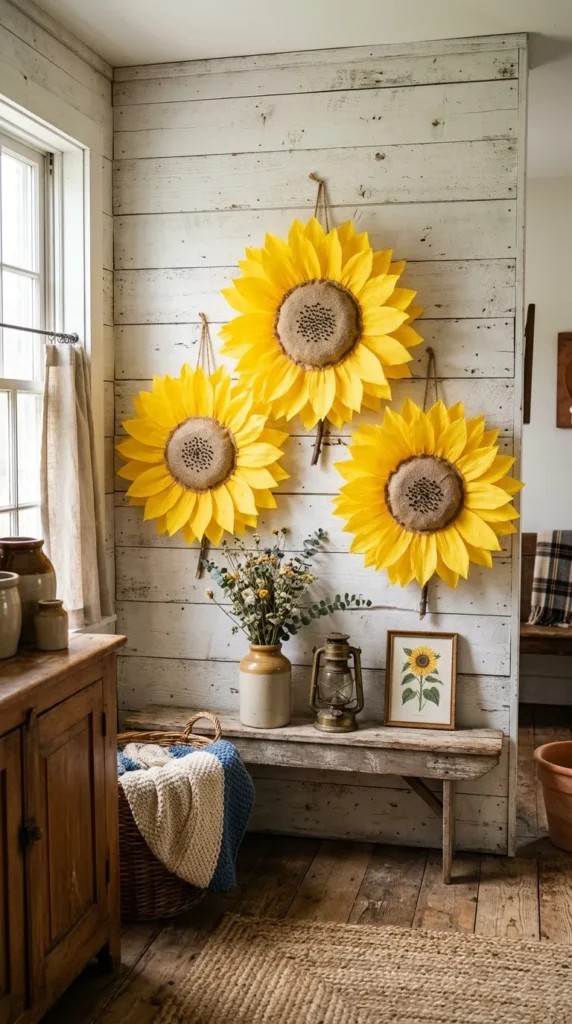
10. Rustic Burlap & Crepe Sunflower Farmhouse Trio
Introduction
A trio of large, cheery paper sunflowers combining textured brown burlap center disks with bright yellow crepe paper petals, adding sunny farmhouse warmth to dining room walls.
What This Idea Means
This idea embraces country charm and tactile material contrast. Combining rough woven natural burlap cores with vibrant yellow crepe paper petals creates a cozy, rustic accent for traditional or modern farmhouse homes.
How to Make It
- Burlap Center Core: Cut a 6-inch foam ball in half. Wrap natural brown open-weave burlap tightly over the rounded dome, gluing it securely underneath to form a textured sunflower seed center.
- Inner Stamen Ring: Cut a long strip of dark brown crepe paper, fringe the edges finely, and glue it around the perimeter base of the burlap dome.
- Sunflower Petals: Cut 40 pointed lance-shaped petals per flower out of mustard yellow and canary yellow 180g Italian crepe paper.
- Layering Petals: Glue a first tier of 20 yellow petals underneath the rim of the burlap center disk. Glue a second offset tier of shorter yellow petals directly behind the first layer to create depth.
- Backing & Hanging: Attach a sturdy wooden disc with a picture hanging wire to the back of the foam center, then mount a set of three varied-size sunflowers (12″, 16″, 20″) in a diagonal cluster.
Tips and Variations
- Tip: Paint tiny black and dark brown specks onto the burlap disk center using acrylic paint to mimic sunflower seeds.
- Variation: Substitute bright yellow with muted burnt orange and rust crepe paper for an autumn harvest look.
What You Need to Make It
- 180g Crepe Paper (Mustard Yellow, Canary Yellow, Dark Brown)
- Natural Open-Weave Brown Burlap Fabric
- 6-inch & 8-inch Styrofoam Half-Balls
- Dark Brown Acrylic Paint & Fine Detail Brush
- Wooden Backing Disks & Picture Hanging Hardware
11. Minimalist Origami Cherry Blossom Geometrics
Introduction
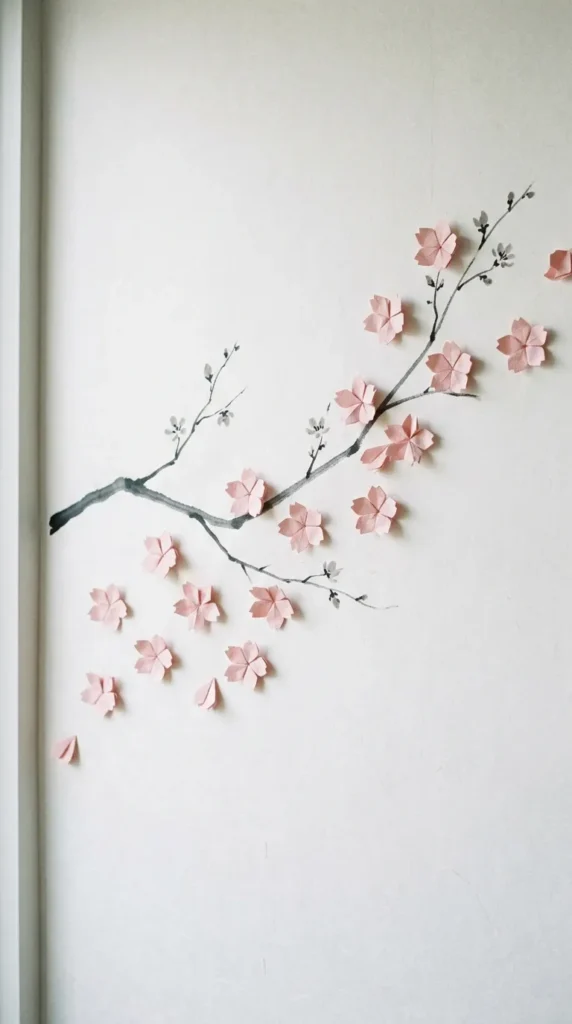
A clean, Japanese-inspired wall arrangement featuring hundreds of sharp, geometrically folded origami cherry blossoms mounted in an artistic floating cloud layout.
What This Idea Means
Merging traditional Japanese origami folding techniques with modern geometric wall art, this design emphasizes precision, clean fold lines, and airy minimalism. Delicate pink folded blossoms float across plain walls like windblown sakura petals.
How to Make It
- Square Paper Prep: Cut small 3×3 inch and 4×4 inch squares out of smooth, light-pink double-sided origami paper.
- Origami Folding: Fold each paper square using the traditional 5-petal origami cherry blossom model, creasing every fold sharply with a bone folder.
- Individuating Petals: Pinch the petal bases inward to give each 3D folded blossom a raised, cup-like geometric shape.
- Branch Silhouette: Paint a subtle, sweeping dark charcoal branch outline directly onto your wall using matte interior acrylic paint (or use removable vinyl branch decals).
- Installation: Mount the folded paper blossoms along the painted branch lines using tiny dots of removable museum wax or foam mounting squares, allowing blossoms to break away and “drift” off the branch across the wall space.
Tips and Variations
- Tip: Use bone folders for every fold; crisp crease lines are essential for geometric origami shadow lines to catch light properly.
- Variation: Fold blossoms using white and silver metallic origami paper mounted against a deep navy blue background wall.
What You Need to Make It
- Double-Sided Light Pink Origami Paper
- Bone Folder Tool
- Matte Charcoal Acrylic Wall Paint & Fine Artist Brushes
- Removable Museum Mounting Wax or Foam Squares
- Ruler & Precision Scissors
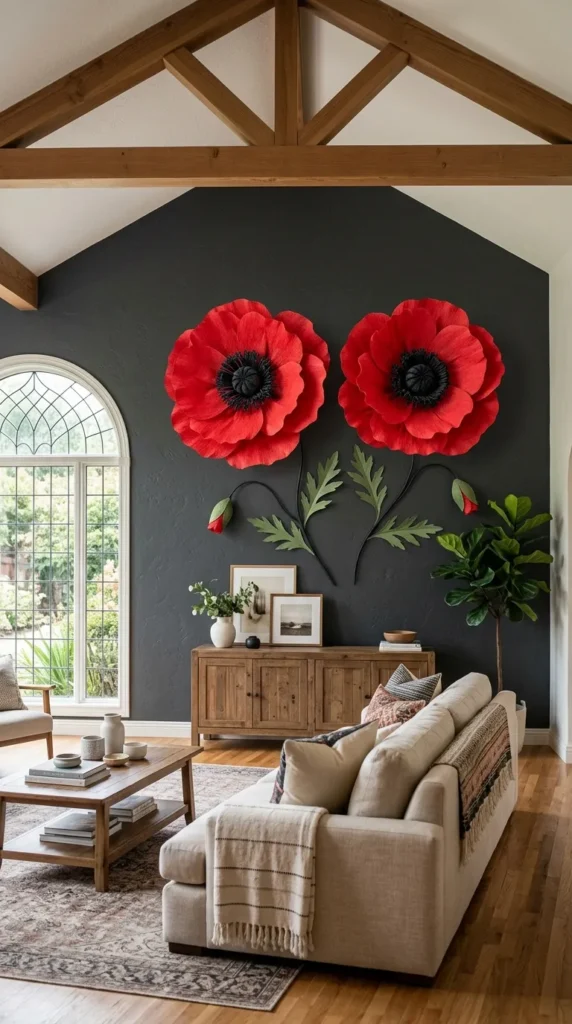
12. Whimsical Fairytale Giant Poppy Statement Piece
Introduction
An oversized statement installation featuring two or three massive (24-to-30-inch diameter) bright scarlet red paper poppies with textured black centers, dominating a feature wall like living art.
What This Idea Means
This concept celebrates dramatic proportions and storybook whimsy. Scaling flowers up to giant dimensions creates an art gallery centerpiece that draws immediate visual attention in high-ceiling rooms or photo backdrops.
How to Make It
- Giant Petal Patterns: Cut 12 massive wavy petals (14 inches long each) out of heavyweight bright scarlet red 180g crepe paper.
- Petal Sculpting: Stretch the crepe paper horizontally across the center of each petal to create deep cupping. Use a heat tool or curling rod to ruffle the outer petal edges dramatically.
- Poppy Center: Create a large 6-inch textured black center by wrapping a green crepe paper ball with a black paper grid harness, surrounded by a thick, bushy fringe ring of black paper stamens.
- Base Assembly: Glue the giant red petals in two overlapping tiers onto an 8-inch heavy corrugated cardboard base disk around the black center core.
- Wall Mount: Glue a heavy-duty metal wall hanger onto the cardboard base to mount the oversized poppy securely on wall anchors.
Tips and Variations
- Tip: Insert thin 22-gauge floral wire along the center seam of each giant petal before cupping so you can shape and pose the giant petals after mounting.
- Variation: Craft the giant poppies in soft coral, pastel peach, or white for a gentler, airy aesthetic.
What You Need to Make It
- 180g Heavy Crepe Paper (Scarlet Red, Black, Olive Green)
- 22-Gauge Floral Wire & Wire Cutters
- 8-inch Heavy Corrugated Cardboard Disks
- Hot Glue Gun & Heavy-Duty Glue Sticks
- Heavy Metal Wall Hanger Brackets
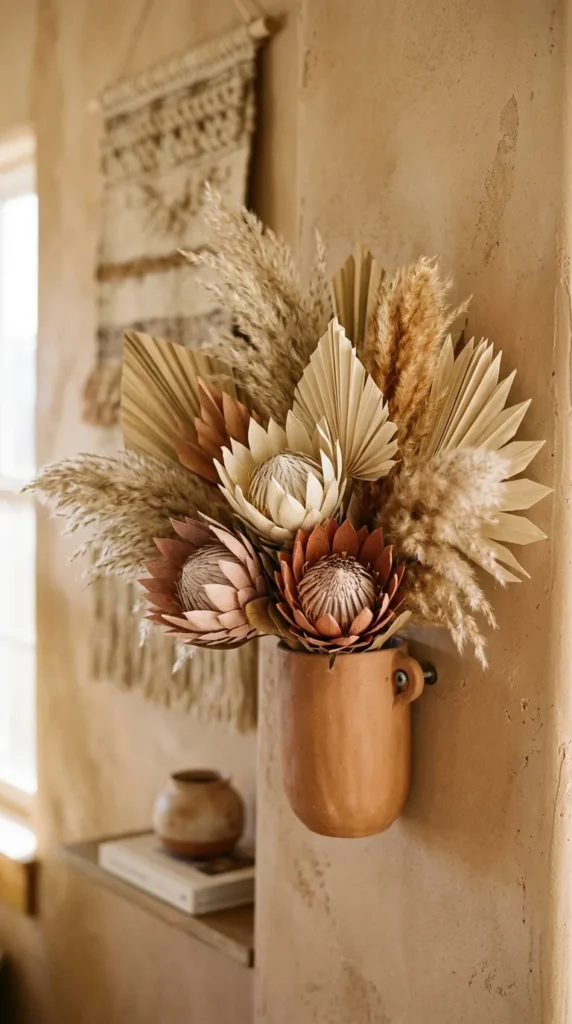
13. Bohemian Dried Look Paper Protea & Pampas Wall Display
Introduction
A modern bohemian wall installation mimicking expensive dried botanical arrangements, featuring handcrafted paper king proteas, dried palm spears, and paper pampas grass.
What This Idea Means
This idea captures trendy dry-flower aesthetics using durable paper techniques. Handcrafting dried proteas, faded eucalyptus, and sun-bleached palm spears out of muted taupe, terracotta, and ecru paper yields long-lasting boho wall art that never sheds or gathers dust.
How to Make It
- Paper Protea Center: Create a tall cone core out of pink/terracotta crepe paper. Glue dozens of tiny pointed fuzzy paper bracts in tight overlapping rows upward around the cone.
- Protea Outer Leaves: Cut stiff outer protea petals out of muted terracotta cardstock, ink-blending the tips with dark brown pastel chalk. Glue them around the protea center, flaring tips outward.
- Paper Palm Spears: Fold cream-colored cardstock into accordion pleats, trim the top into a pointed arch, and secure the base to form ribbed paper sun palm spears.
- Paper Pampas: Fringe long strips of fine kraft paper, curling the fringed edges with a wire brush to simulate fluffy pampas grass plumes.
- Arrangement: Bundle the paper proteas, paper palms, and paper pampas into a fan shape, securing the bundle with jute twine and mounting it inside a wall-mounted wooden shadow vessel.
Tips and Variations
- Tip: Use light tan distress ink brushed over paper edges to create an authentic sun-baked, dried botanical patina.
- Variation: Add real dried lagurus (bunny tails) or preserved eucalyptus alongside your paper creations for mixed-media texture.
What You Need to Make It
- Cardstock & Crepe Paper (Terracotta, Ecru, Taupe, Muted Pink)
- Brown & Tan Distress Ink Pads with Sponge Applicators
- Jute Twine & Wire Brush
- Wall-Mounted Wooden Shadow Vessel or Sconce Bracket
- Scissors & Hot Glue Gun
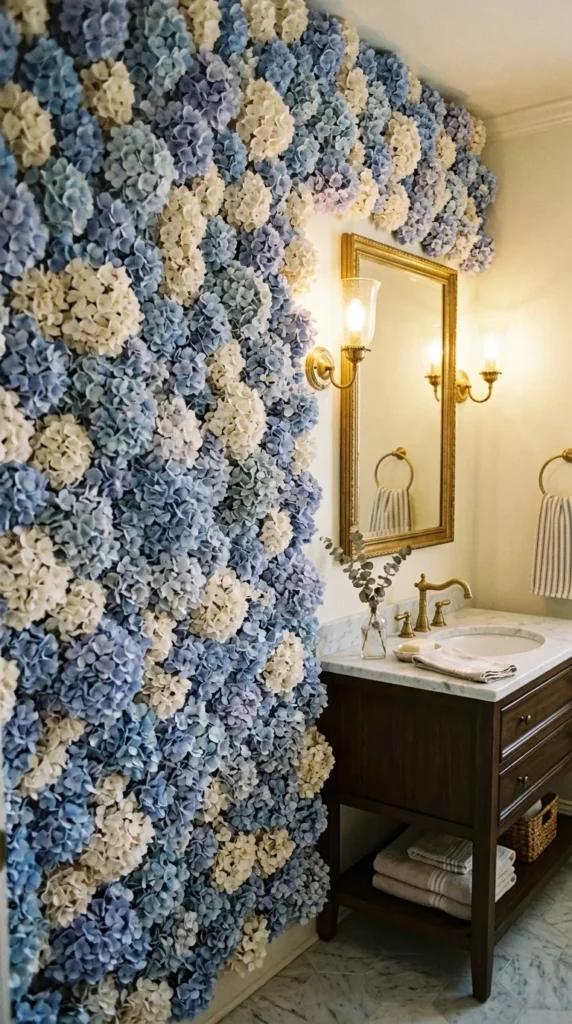
14. Ethereal Tissue Paper Hydrangea Cloud Panels
Introduction
A soft, cloud-like wall panel covered densely in thousands of tiny pastel hydrangea florets, creating a luxurious, pillow-like floral wall feature for vanity areas or powder rooms.
What This Idea Means
Hydrangeas are defined by their dense clusters of small, delicate petals. Covering flat wall panels with thousands of multi-toned paper hydrangea florets creates a soft, tactile, high-density floral wall that absorbs sound and adds romance to small spaces.
How to Make It
- Florets Die-Cutting: Use a 4-petal flower punch to punch thousands of small 1.5-inch flower shapes out of tissue paper or lightweight cardstock in shades of sky blue, periwinkle, lavender, and soft cream.
- 3D Shaping: Press the center of each tiny 4-petal cutout into a soft foam pad using a round ball-embossing tool to pop the petals upward into 3D cupped florets.
- Panel Base: Take a 2×3 foot lightweight pink insulation foam board panel and paint it pale blue.
- Dense Gluing: Using tiny dabs of low-temp hot glue or craft glue, stick the 3D florets densely onto the foam panel, blending blue, lavender, and cream tones seamlessly together.
- Seamless Installation: Mount multiple filled panels side-by-side on your wall using picture-hanging strips to create a seamless, wall-to-wall hydrangea cloud feature.
Tips and Variations
- Tip: Use a ball-embossing tool on a soft mousepad or foam block to shape 3D paper florets quickly in large batches.
- Variation: Create a romantic ombre transition across the panels, moving from deep violet at the bottom up to soft ice blue at the top.
What You Need to Make It
- Lightweight Cardstock / Tissue Paper (Sky Blue, Periwinkle, Lavender, Cream)
- 4-Petal Floral Craft Punch (1.5 inch)
- Ball-Embossing Sculpting Tool & Soft Foam Mat
- 2×3 Foot Rigid Foam Insulation Panels
- Low-Temp Glue Gun or Tacky Craft Glue
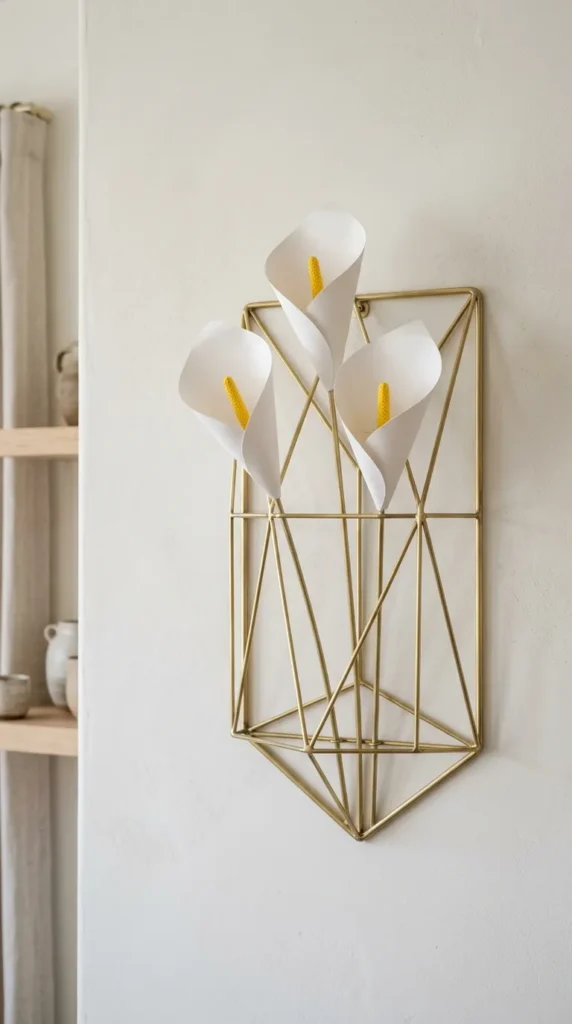
15. Minimalist Paper Calla Lily Wall Sconce Accent
Introduction
An elegant, sculptural arrangement featuring sleek white paper calla lilies with bright yellow spadix centers, mounted vertically inside modern brass wire wall sconce frames.
What This Idea Means
Modern minimalism values sleek lines and understated elegance. The calla lily’s trumpet shape offers an architectural silhouette that pairs beautifully with minimalist metal wire sconces and contemporary lighting.
How to Make It
- Spadix Core: Wrap a 12-inch piece of thick floral stem wire in textured bright yellow crepe paper or dip it in yellow floral flocking powder to form the central calla lily spadix.
- Spathe Petal: Cut a smooth, graceful trumpet shape out of heavy 100lb smooth matte white cover cardstock.
- Forming the Lily: Wrap the white spathe petal smoothly around the base of the yellow spadix core, overlapping the lower edges and gluing securely to form a seamless open trumpet stem.
- Curling Tips: Gently curl the pointed top tip of the white spathe outward around a pencil.
- Sconce Mount: Arrange 3 tall white calla lilies alongside sleek green paper calla leaves inside a wall-mounted geometric brass wire sconce frame.
Tips and Variations
- Tip: Score a subtle curving line down the center of the white spathe cardstock to help it wrap smoothly into a trumpet without creasing awkwardly.
- Variation: Craft spathe petals out of deep eggplant purple or black cardstock for a dramatic modern statement.
What You Need to Make It
- 100lb Smooth Matte White Cover Cardstock
- Bright Yellow Crepe Paper or Floral Flocking Powder
- Thick Green Floral Stem Wire & Tape
- Geometric Brass Wire Wall Sconces
- Hot Glue Gun & Pencil (for curling tips)
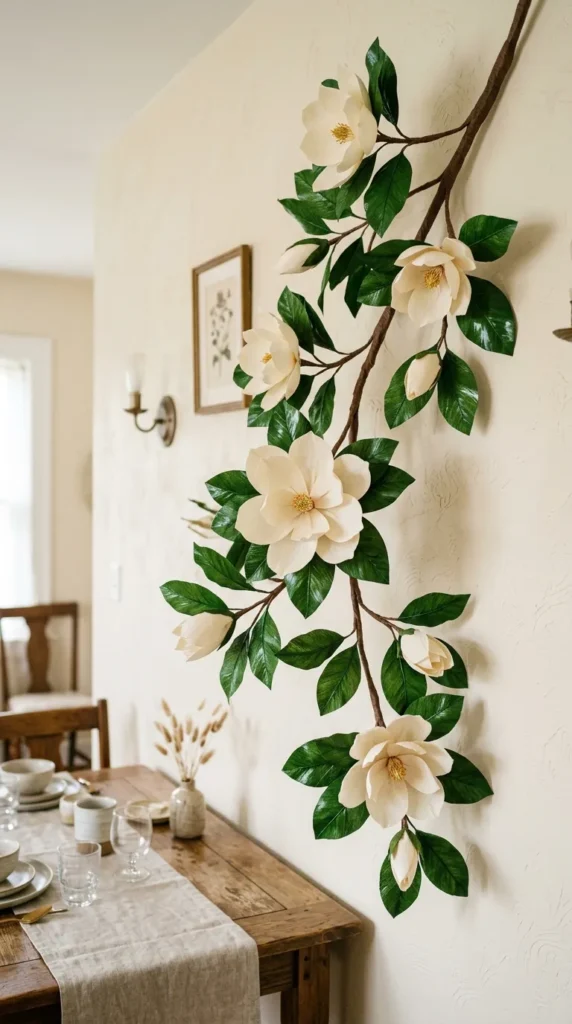
16. Whimsical Paper Magnolia Branch Wall Feature
Introduction
A realistic life-sized paper magnolia branch installation, featuring thick textured brown paper branches adorned with large creamy-white magnolia blooms and glossy green leaves stretching across a dining room wall.
What This Idea Means
This concept replicates the architectural grace of a blooming spring magnolia tree indoors. Sculfted paper branches flow organically across the wall surface, bearing large, cup-shaped white magnolia blooms that feel fresh year-round.
How to Make It
- Branch Sculpting: Twist lengths of thick aluminum armature wire together to form a main branch with smaller offshoots. Wrap the wire tightly in brown floral tape, then layer brown crepe paper and tissue over top, painting with brown and gray acrylics to mimic real tree bark.
- Magnolia Petals: Cut 9 thick oval petals per bloom out of heavy cream-colored 180g crepe paper. Paint soft dusty pink shading at the base of each petal.
- Center Cone: Build a green-and-pink textured seed cone core out of clay or wrapped paper, gluing small yellow stamens around its base.
- Flower Assembly: Layer the 9 cream petals around the seed cone core in three offset tiers of 3 petals each, forming a cup-shaped magnolia bloom (8 to 10 inches wide).
- Wall Installation: Mount the sculpted branch onto wall studs using clear cable clips, then attach glossy green cardstock magnolia leaves and white blooms along the branch nodes.
Tips and Variations
- Tip: Coat the green cardstock leaves with clear glossy spray varnish to replicate the natural shiny surface of magnolia foliage.
- Variation: Include unopened furry paper magnolia buds wrapped in light tan tissue along the smaller twig tips for realistic spring details.
What You Need to Make It
- 180g Heavy Crepe Paper (Cream, Dusty Pink, Tan)
- Thick Aluminum Armature Wire & Floral Tape
- Heavy Green Cardstock & Glossy Spray Varnish
- Brown & Gray Acrylic Paints with Brushes
- Clear Cable Clips & Wall Screws
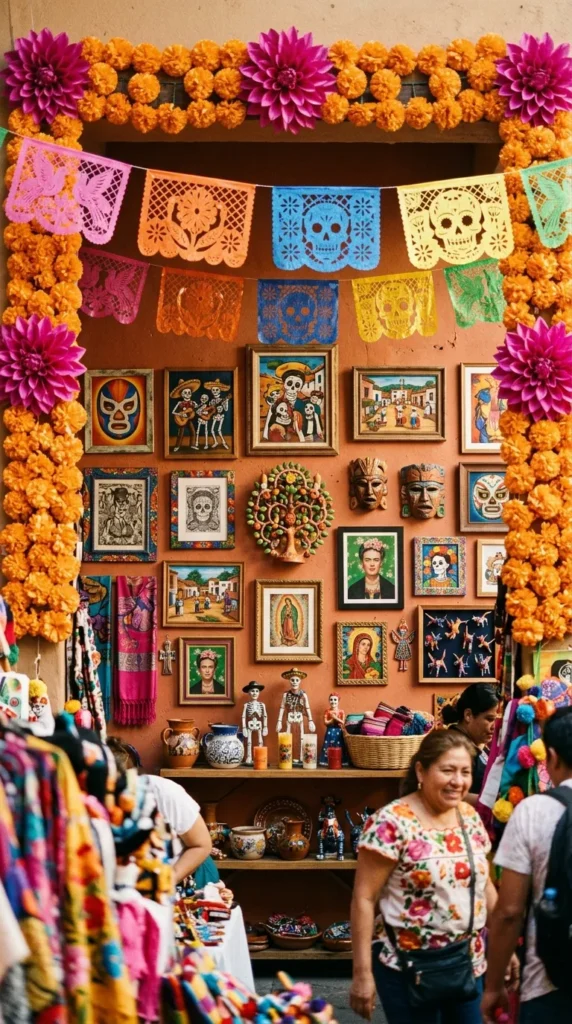
17. Vibrant Folk Art Mexican Dahlia & Marigold Wall
Introduction
A festive, high-energy installation inspired by traditional Mexican folk art, featuring bright marigolds, vibrant dahlias, and intricate paper papel picado banners framing a gallery wall.
What This Idea Means
Celebrating rich cultural heritage, vibrant color palettes, and playful geometric symmetry, this idea fills living spaces with joyful energy using saturated magenta, orange, turquoise, and sunny yellow paper blooms.
How to Make It
- Marigold Balls: Fringe long 4-inch wide strips of bright orange crepe paper along both edges. Roll the fringed strips tightly, fluffing the edges out into dense, spherical marigold pom-poms.
- Layered Folk Dahlias: Cut concentric starburst petal rings out of magenta, turquoise, and yellow cardstock. Layer the rings using foam spacer dots between layers to build raised 3D geometric dahlias.
- Papel Picado Framing: Cut intricate geometric lace patterns into rectangular tissue paper sheets to create traditional Mexican papel picado banners.
- Layout Grid: String the papel picado banners across the top wall border on bright yarn.
- Mounting: Cluster the bold marigold pom-poms and layered dahlias densely around photo frames or mirror borders using damage-free mounting strips.
Tips and Variations
- Tip: Use 3D double-sided foam adhesive dots between petal layers to instantly add shadow depth to flat cardstock cutouts.
- Variation: Stick to a strict duo-tone palette (such as orange and magenta only) for a refined contemporary twist on folk art.
What You Need to Make It
- Saturated Color Cardstock & Crepe Paper (Orange, Magenta, Turquoise, Yellow)
- 3D Double-Sided Foam Adhesive Dots
- Colored Tissue Paper (for papel picado banners)
- Herb Fringing Scissors & Craft Knife
- Removable Mounting Strips & Yarn
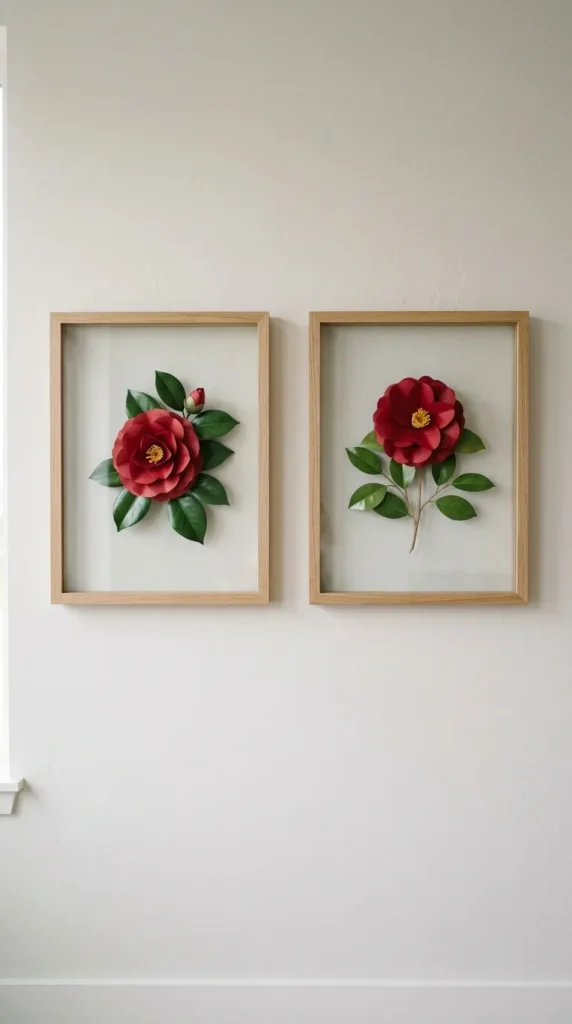
18. Modern Geometric Framed Paper Camellia Display
Introduction
A pair of clean, minimalist wall displays featuring deep-red paper camellias with glossy green leaves mounted neatly inside floating double-glass oak frames.
What This Idea Means
Floating glass frames create a modern illusion where handcrafted paper blooms appear to hover weightlessly against your painted wall surface, combining traditional botanical art with clean modern framing.
How to Make It
- Camellia Petals: Cut 20 rounded heart-shaped petals out of rich crimson or deep red 140g crepe paper.
- Forming Bloom: Cupping petals slightly, glue them in tight overlapping spiral layers around a small bright yellow stamen core to create a flat-backed, double-flowered camellia bloom (5 to 7 inches wide).
- Glossy Foliage: Cut deep green cardstock camellia leaves, scoring realistic center vein lines.
- Glass Frame Mounting: Open a double-glass floating oak picture frame. Position the paper camellia bloom and leaves on the inner glass pane.
- Securing: Apply a tiny, invisible dot of clear UV silicone adhesive on the back base of the flower to anchor it to the glass pane before closing the outer frame.
Tips and Variations
- Tip: Keep the depth profile of the paper camellia relatively flat (under 1.5 inches) so the double glass panes close smoothly without compressing petals.
- Variation: Mount soft pink camellias against dark-tinted or frosted floating glass panes.
What You Need to Make It
- 140g Crepe Paper (Deep Red, Bright Yellow)
- Heavy Dark Green Cardstock (for leaves)
- Double-Glass Floating Oak Frames
- Clear UV Silicone Adhesive
- Bone Folder & Precision Scissors
19. Enchanted Paper Water Lily & Dragonfly Murals
Introduction
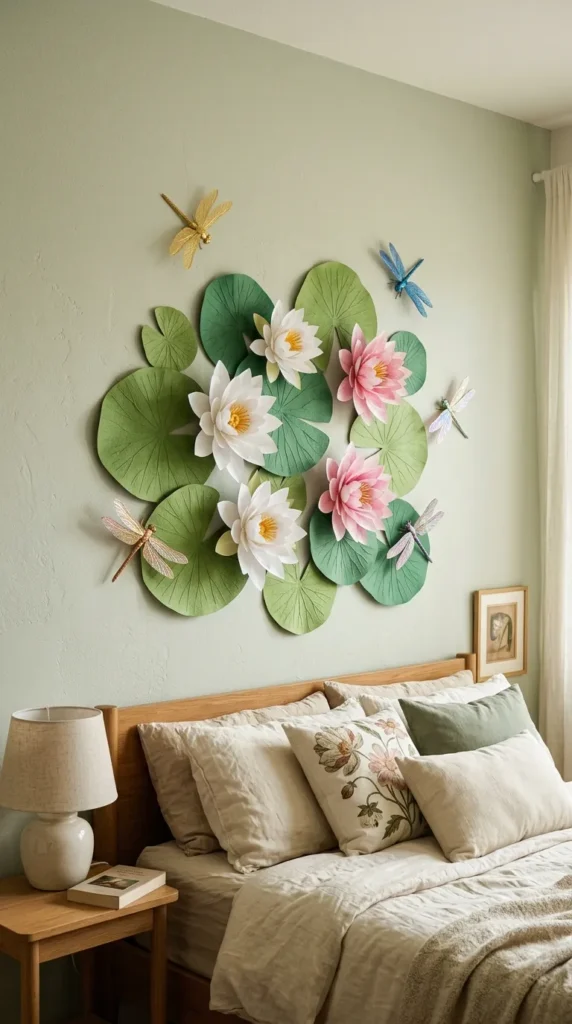
A whimsical wall mural installation featuring serene white and blush paper water lilies resting on giant dark green paper lotus pads, accompanied by shimmering metallic paper dragonflies.
What This Idea Means
This idea brings the tranquil atmosphere of a Japanese koi pond into peaceful interior spaces. Dimensional paper lilies and oversized lily pads turn plain bedroom or bathroom walls into a relaxing water-garden scene.
How to Make It
- Lotus Pads: Cut large 16-to-22-inch circular lily pads out of forest green cardstock, cutting a single triangular notch out of each circle rim. Score radial vein lines extending from the center.
- Water Lily Petals: Cut 25 long, slender pointed petals per flower out of crisp white and blush pink crepe paper.
- Yellow Center: Cut a wide strip of yellow cardstock, fringe the top edge finely, and roll it tightly to form a dense yellow center sunburst core.
- Assembly: Glue the white pointed petals in multiple starburst tiers around the yellow center core, flaring outer petals outward. Mount each finished lily directly on top of a green lotus pad.
- Dragonflies: Cut delicate dragonfly silhouettes out of iridescent metallic cardstock, bending their wings upward to create a 3D flying effect when mounted nearby on the wall.
Tips and Variations
- Tip: Fold dragonfly wings upward at a 45-degree angle along the body line before mounting to cast realistic flying shadows on the wall.
- Variation: Paint soft watercolor blue swirls directly onto the wall background behind the lily pads to simulate water movement.
What You Need to Make It
- Crepe Paper & Cardstock (White, Blush, Forest Green, Yellow)
- Iridescent Metallic Cardstock (for dragonflies)
- Bone Folder Tool (for leaf vein scoring)
- Hot Glue Gun & Removable Mounting Squares
- Watercolor Paint & Brushes (optional, for wall background)
20. Luxury Paper Orchid Branch Sconce Installation
Introduction
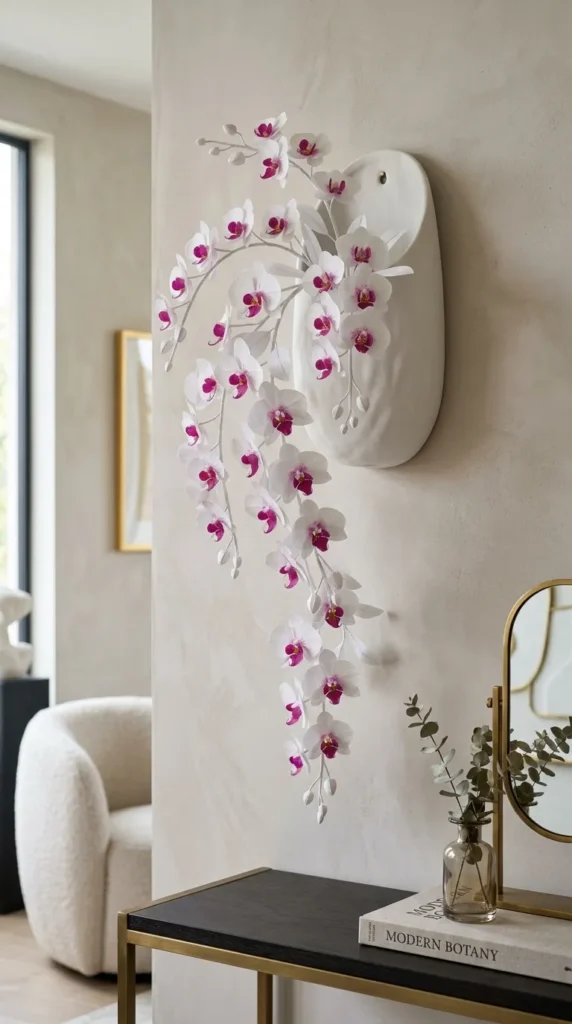
An opulent, high-end installation featuring delicate white and magenta Phalaenopsis paper orchid stems cascading elegantly out of wall-mounted ceramic vessel sconces.
What This Idea Means
Orchids represent luxury, refined beauty, and architectural grace. Handcrafting paper orchids allows you to maintain permanently pristine, perfectly blooming orchid displays in low-light interior spaces where real orchids struggle to survive.
How to Make It
- Orchid Petals: Cut 3 rounded outer sepals, 2 wide lateral petals, and 1 intricate 3-lobed center lip petal out of smooth 90lb white and magenta cardstock.
- Lip Detail: Use fine alcohol markers to hand-draw realistic yellow and magenta freckle speckles onto the inner lip petal cutout.
- Flower Assembly: Shape petals gently with a ball tool. Glue the lateral petals and sepals around a small central column bead, attaching the speckled lip petal in the bottom center.
- Stem Construction: Attach 5 to 7 finished orchid blooms at alternating nodes along a thick, gently curving brown aluminum floral stem wire. Add green paper buds at the stem tip.
- Vessel Mounting: Insert the long paper orchid stems into wall-mounted matte white ceramic wall pocket sconces, securing stems inside with floral foam blocks.
Tips and Variations
- Tip: Use fine-tip alcohol markers (like Copic markers) to shade orchid center lip details smoothly without warping smooth paper.
- Variation: Craft all orchid blooms in pure crisp white with soft yellow centers for a clean, spa-like aesthetic.
What You Need to Make It
- 90lb Smooth Cover Cardstock (White, Magenta, Green)
- Fine-Tip Alcohol Markers (Magenta, Yellow)
- Thick Brown Aluminum Stem Wire & Floral Foam Blocks
- Wall-Mounted Matte White Ceramic Pocket Sconces
- Ball-Embossing Tool & Hot Glue Gun