Transforming your bedroom into a cosmic sanctuary is one of the most mesmerizing ways to blend interior design with personal wonder. The galaxy aesthetic brings the infinite beauty of the cosmos—deep cosmic purples, glowing nebulae, constellation lines, glowing moon phases, and shimmering starlight—directly onto your bedroom walls. It creates a serene, dreamlike ambiance that promotes relaxation, night-time mindfulness, and creative inspiration.
Designing a galaxy-themed bedroom wall doesn’t mean you have to settle for childish glow-in-the-dark stars pasted on the ceiling. Modern cosmic decor utilizes sophisticated painting techniques, ambient LED fiber optics, ethereal tapestries, geometric metallic wall art, and celestial light projectors. Whether you are aiming for a moody moody-dark cosmic bedroom, a soft pastel dreamscape, or an elegant minimalist constellation wall, here are 20 amazing, realistic, and Pinterest-friendly galaxy wall decor ideas to help you create your ultimate celestial retreat.


1. Hand-Painted Watercolor Nebula Wall Mural
What This Idea Means
A hand-painted watercolor nebula mural transforms an entire focal wall into a soft, dreamlike cosmic cloud formation. Using layered sponge painting techniques with blended hues of indigo, magenta, teal, and deep violet, this feature wall creates a soft, ethereal backdrop for your bed.
How to Make It
- Prepare the Wall: Paint the entire focal wall with a dark navy blue or rich black matte interior wall paint to serve as deep space.
- Layer the Nebula Base: Mix acrylic or interior paint with a glazing medium. Dip a large sea sponge into magenta and soft violet paint, light-dabbing in soft, sweeping diagonal cloud formations.
- Add Vibrant Highlights: Blend vibrant teal and bright cyan paint into the center of the cloud formations to build cosmic depth.
- Splatter Starlight: Dip a stiff paintbrush into thinned white paint. Flick the bristles with your thumb over the wall to scatter thousands of tiny, realistic star flecks.
Tips and Variations
- Tips: Work while the glaze is slightly damp so colors blend seamlessly together without harsh edges.
- Variations: Paint the nebula in soft pastel tones (blush pink, sky blue, cream) for a lighter, romantic aesthetic.
Needs to Make That Thing
- Matte black or navy wall paint
- Interior wall paints (magenta, violet, teal, white)
- Acrylic glazing medium
- Natural sea sponges
- Stiff bristle brush for splattering
2. Fiber Optic Starry Night Constellation Ceiling & Wall
What This Idea Means
Fiber optic wall lighting embeds tiny light-emitting cables directly into your wall or ceiling panel. When illuminated, hundreds of pin-prick lights glow like real distant stars, creating a truly authentic, twinkling night sky effect without glaring ambient light.
How to Make It
- Prepare Panel Frame: Mount lightweight drywall or fabric-wrapped acoustic panels designed for the wall space behind your headboard.
- Drill Cable Holes: Trace real celestial constellation maps onto the back of the panel and drill tiny micro-holes through the constellation points.
- Thread Fiber Optics: Thread individual fiber optic light cables through the drilled holes from behind, securing each tip with clear adhesive.
- Connect Light Engine: Gather all fiber optic cable ends into an LED light engine hidden behind the panel, and mount the panel flush to the wall.
Tips and Variations
- Tips: Choose a fiber optic engine with a “twinkle wheel” function to mimic the natural flickering of distant stars.
- Variations: Outline specific zodiac constellations using thicker fiber cables to emphasize your birth star patterns.
Needs to Make That Thing
- Fiber optic ceiling/wall kit with LED light engine
- Lightweight drywall or acoustic fabric panel
- Micro drill bits and hand drill
- Clear epoxy or hot glue
- Constellation map template
3. Illuminated Glowing Moon Phase Wall Art
What This Idea Means
A moon phase wall installation features a horizontal or vertical sequence of moon sculptures showing the progression from waxing crescent to full moon. Backlit with soft warm LED halo lighting, it brings romantic celestial illumination to your bedroom.
How to Make It
- Prepare Moon Discs: Cut 5 to 7 circular wooden or lightweight foam-board discs of equal diameter.
- Texture the Moons: Apply pre-mixed plaster or joint compound over the disc surfaces using a sea sponge to mimic lunar craters and seas. Paint in realistic greys, whites, and charcoal.
- Add Backlighting: Stick warm-white LED light strip rings onto the back side of each disc.
- Mount on Wall: Mount the moon discs in sequential order (crescent, half, gibbous, full) across the wall using standoff wall spacers so light glows softly behind them.
Tips and Variations
- Tips: Connect the LED strips to a smart dimmer switch to control night-time brightness directly from your bed.
- Variations: Paint the moon surfaces with metallic gold or copper leaf for a luxurious, warm metallic shine.
Needs to Make That Thing
- Round wooden or foam-board discs
- Joint compound or plaster
- Acrylic paints (grey, white, black)
- Warm-white LED light strips
- Standoff wall mounts
4. Oversized Celestial Galaxy Tapestry with Fairy Lights
What This Idea Means
Hanging an oversized fabric galaxy tapestry illuminated by warm fairy light strings behind it is a cozy, low-cost way to completely transform a plain wall into a glowing cosmic haven without painting.
How to Make It
- Hang LED String Lights: String vertical rows of warm-white LED curtain lights evenly across your designated bedroom wall space.
- Mount Tapestry Hooks: Install clear adhesive wall hooks along the top ceiling seam directly above the light curtain.
- Hang Tapestry: Hang a high-resolution printed fabric galaxy tapestry over the lights so the LED points shine through the woven fabric, illuminating nebula clouds.
- Secure Edges: Clip the bottom corners flat against the wall using clear thumb tacks or magnetic wall strips.
Tips and Variations
- Tips: Choose a soft polyester tapestry with dark background tones so the LED light points contrast sharply through the fabric.
- Variations: Frame the outer border of the tapestry with wooden hanging dowels to give it a structured tapestry scroll appearance.
Needs to Make That Thing
- High-resolution fabric galaxy tapestry
- LED curtain string lights
- Clear adhesive wall hooks
- Wall tacks or clips
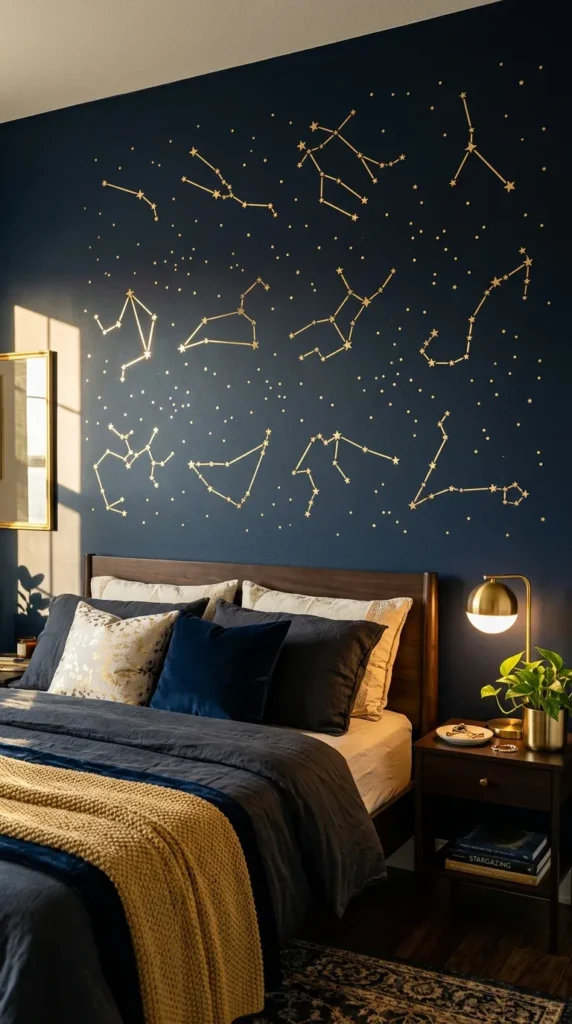
5. Geometric Metallic Constellation Line Art
What This Idea Means
Geometric metallic constellation art uses thin metallic brass or copper tape directly on a dark painted wall to construct modern, minimalist star patterns. It blends Scandinavian minimalism with cosmic decor.
How to Make It
- Paint Base Wall: Paint your focal accent wall in a deep matte charcoal or dark midnight blue.
- Plot Star Points: Use a pencil and constellation star chart to mark star locations on the wall.
- Apply Metallic Tape: Stretch self-adhesive 1/4-inch metallic gold or brass tape straight between star points to form geometric constellation lines.
- Attach Star Studs: Press metallic gold thumbtacks or small mirror glass tiles onto the line intersections to represent bright major stars.
Tips and Variations
- Tips: Use a laser level to keep long geometric constellation lines crisp, straight, and visually balanced.
- Variations: Replace tape with metallic gold wall paint applied with a fine liner brush for permanent, hand-crafted lines.
Needs to Make That Thing
- Matte dark wall paint
- 1/4-inch self-adhesive metallic gold/brass tape
- Gold metallic thumbtacks or mini mirror tiles
- Laser level and pencil
- Constellation star map
6. Galaxy Projection Galaxy Ceiling & Wall Sanctuary
What This Idea Means
Using a high-definition smart galaxy light projector creates an instant, moving cosmic wall experience. Projecting rotating nebula clouds and laser star fields across your walls turns your room into a dynamic planetarium at night.
How to Make It
- Prepare Wall Space: Keep a primary wall or ceiling surface clean and free of heavy busy art prints to act as a smooth projection screen.
- Position Projector: Set a smart galaxy light projector onto a bedside nightstand or mount it discreetly onto a wall shelf opposite your bed.
- Adjust Lenses: Calibrate the projection angle, light rotation speed, and color balance (blue, green, red, white) using a smartphone app or remote.
- Set Automation: Program custom timers to automatically turn off the projection 30 minutes after you fall asleep.
Tips and Variations
- Tips: Project onto a light grey or off-white wall for the sharpest, most vibrant light color saturation.
- Variations: Pair the projection with built-in Bluetooth ocean-wave soundscapes for an immersive sensory relaxation space.
Needs to Make That Thing
- HD Smart Galaxy / Star Light Projector
- Nightstand or shelf mount
- Smooth wall or ceiling surface




7. Mirrored Hexagon Cosmic Wall Tiles
What This Idea Means
Arranging hexagon-shaped acrylic mirror tiles on a dark cosmic-painted wall creates a honeycomb matrix that reflects ambient room lights and nebula colors, adding geometric depth and modern sophistication.
How to Make It
- Prep Wall: Paint the wall in a rich dark space hue (such as deep indigo or black).
- Plan Matrix: Layout acrylic hexagon mirror tiles on your bed or floor to test honeycomb grouping shapes.
- Attach Mirror Tiles: Apply double-sided foam mounting tape to the back of each hexagon tile and stick them firmly to the wall in a cluster pattern.
- Reflect Ambient Light: Position your galaxy projector or LED lights directly facing the mirror cluster to scatter reflected cosmic light around the room.
Tips and Variations
- Tips: Leave slight 1/4-inch gaps between mirror tiles so the dark wall color frames each geometric hexagon shape.
- Variations: Tint some of the mirror tiles with purple or blue transparent film to create colorful reflective facets.
Needs to Make That Thing
- Self-adhesive acrylic hexagon mirror tiles
- Dark interior wall paint
- Double-sided foam mounting tape
- Laser level
8. DIY Resin & Wood Galaxy Wall Clock
What This Idea Means
A handmade resin and wood galaxy wall clock serves as a functional art centerpiece. Swirling liquid epoxy resin tinted with mica powders and glitter over natural dark wood creates a glowing mini-galaxy on your wall.
How to Make It
- Prep Wood Disc: Sand a 16-inch round wooden clock blank smooth, coating the edges with masking tape.
- Mix & Tint Resin: Mix 2-part clear epoxy resin. Divide into small cups and tint with metallic mica powders (deep blue, magenta, turquoise, white).
- Pour Galaxy: Pour the tinted resin streams across the wooden disc, swirling colors together with a hair dryer or skewer to create nebula clouds.
- Add Star Glitter: Sprinkle fine silver micro-glitter over the wet resin and pop air bubbles with a heat gun. Let cure for 24 hours.
- Install Clock Mechanism: Drill a center hole, attach a silent quartz clock movement mechanism, and mount on your wall.
Tips and Variations
- Tips: Use a silent, non-ticking clock movement so your bedroom sanctuary stays completely quiet for sleeping.
- Variations: Omit numbers entirely and use gold star studs to mark the 12, 3, 6, and 9 o’clock hours.
Needs to Make That Thing
- Round wooden clock blank
- 2-part clear epoxy resin kit
- Metallic mica powder pigments and glitter
- Silent quartz clock movement and hands
- Heat gun
9. Glowing UV-Reactive Celestial Wall Tapestry
What This Idea Means
A blacklight UV-reactive wall tapestry features special fluorescent inks that glow brightly under ultraviolet light. Paired with a hidden blacklight bar, your bedroom wall transforms into an active glowing cosmos at night.
How to Make It
- Mount Tapestry: Secure a UV-reactive celestial tapestry (featuring glowing suns, moons, and nebulae) flat against your bedroom wall.
- Install UV Bar: Mount a sleek LED blacklight light bar along the ceiling seam or under a shelf directly facing the tapestry.
- Hide Wiring: Run power cords cleanly down wall corners using adhesive cable raceways.
- Switch Lights: Turn off main room lighting and switch on the blacklight to reveal glowing neon star systems.
Tips and Variations
- Tips: Choose a dual-mode LED bar so you can switch between normal warm room lighting and UV blacklight mode easily.
- Variations: Paint your own fluorescent details onto a standard tapestry using invisible UV textile paints.
Needs to Make That Thing
- Blacklight UV-reactive wall tapestry
- LED UV blacklight bar
- Wall mounting hardware
- Cable concealment raceways
10. Floating Dark Wood Wall Shelves with Glass Galaxy Vials
What This Idea Means
Displaying floating dark walnut wall shelves filled with miniature glass bottles of sparkling cosmic glitter, iridescent crystals, and glowing star jars creates a cozy, alchemist-style celestial display shelf.
How to Make It
- Mount Shelves: Mount two or three dark stained wooden floating shelves vertically spaced on your focal wall.
- Create Galaxy Vials: Fill small clear glass corked vials with water, glycerin, colored alcohol inks, and fine metallic star glitters.
- Add Crystals: Place raw amethyst clusters, clear quartz points, and blue lapis lazuli stones along the shelves.
- Illuminate Shelves: Install warm micro LED puck lights under each shelf to illuminate the liquid galaxy jars from above.
Tips and Variations
- Tips: Add a drop of clear liquid soap into the water-glycerin vials so glitter suspends longer when shaken.
- Variations: Store small glow-in-the-dark stars inside clear apothecary jars for a soft overnight nightlight effect.
Needs to Make That Thing
- Dark wooden floating wall shelves
- Small glass cork-stopper vials
- Water, glycerin, and fine star glitter
- Raw crystals (amethyst, quartz, lapis lazuli)
- Micro LED puck lights
11. 3D Glowing Lunar Eclipse Wall Discs
What This Idea Means
A 3D lunar eclipse installation features a large dark matte central disc surrounded by a glowing halo ring of indirect light, mimicking the breathtaking visual moment of a total solar or lunar eclipse.
How to Make It
- Prepare Wall Base: Paint a circular section of your wall matte black, or cut a large 30-inch wooden circle.
- Attach LED Ring: Fasten a continuous, dense strip of warm-white or amber LED lights around the back edge of the disc.
- Mount Off Wall: Mount the disc onto your wall using 2-inch standoff spacers so the wood floats forward.
- Illuminate Halo: Switch on the lights; the solid black front disc blocks direct light while casting a dramatic, glowing ring of light around its border.
Tips and Variations
- Tips: Use COB (Chip on Board) LED light strips for a seamless, continuous ring of light without visible bulb dots.
- Variations: Add smart RGB light strips to change your eclipse halo color from warm amber (blood moon) to cool cyan (solar corona).
Needs to Make That Thing
- 30-inch round wood or lightweight foam panel
- Matte black paint
- Dense COB LED light strip kit
- 2-inch standoff wall mounting brackets
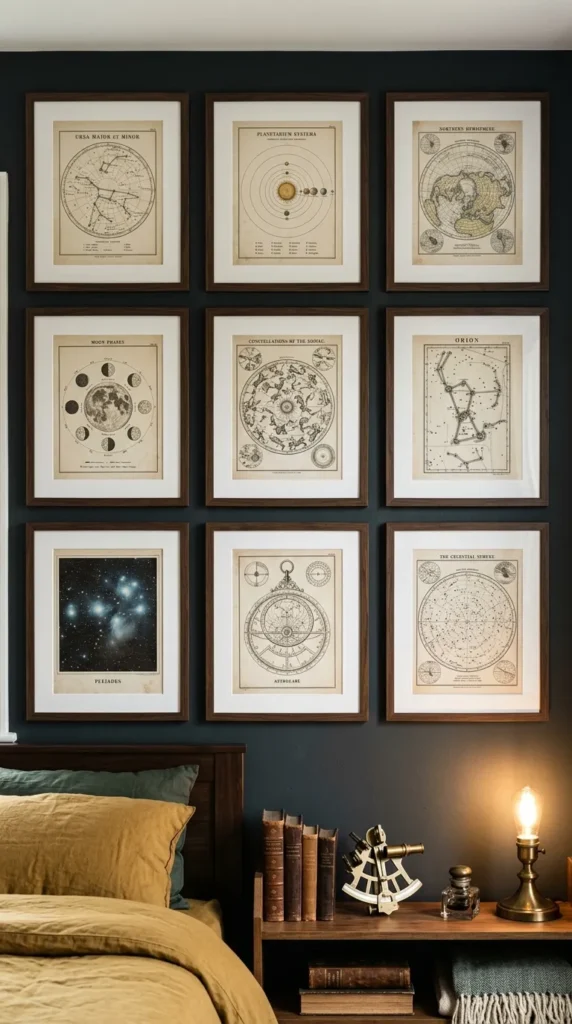
12. Framed Vintage Astronomy Print Gallery Wall
What This Idea Means
A gallery wall of framed vintage astronomical star charts, antique celestial maps, and historical moon drawings brings a sophisticated, academic aesthetic to your cosmic bedroom decor.
How to Make It
- Collect Prints: Source 6 to 9 high-resolution vintage astronomy charts, celestial hemisphere maps, and lunar sketches.
- Select Frames: Choose matching dark wood, antique gold, or sleek black picture frames with white matting.
- Arrange Grid Layout: Lay framed prints on the floor to arrange a balanced grid (such as a 3×3 layout).
- Hang Art: Mount frames onto the wall using picture hanging strips, keeping 2 inches of space between frame edges.
Tips and Variations
- Tips: Use non-reflective glass in your frames to reduce glare from bedroom lamps and light projectors.
- Variations: Mix in small brass constellation medallions or sunburst mirrors inside the gallery layout.
Needs to Make That Thing
- Set of 6 to 9 vintage astronomy art prints
- Picture frames with white matting
- Picture hanging strips or nails
- Tape measure and level
13. Soft Ombre Cosmic Horizon Wall
What This Idea Means
An ombre cosmic wall features a seamless color gradient fading from deep midnight black at the ceiling down through rich purple and navy into a soft blush pink or cream at the floor, mimicking a twilight sky horizon.
How to Make It
- Mark Color Zones: Divide your accent wall horizontally into three blending color zones using a pencil guide.
- Apply Base Paint: Paint the top section dark midnight navy, the middle section cosmic violet, and the bottom section soft blush pink.
- Blend Colors: While the paint is wet, use a clean, dry blending brush to feather the boundaries between colors in soft horizontal strokes.
- Stipple Stars: Lightly dab tiny white paint flecks onto the dark top section only, fading out as you reach the warm bottom horizon.
Tips and Variations
- Tips: Work quickly with a partner so both adjacent paint bands stay wet while blending the color seam.
- Variations: Add a metallic gold mountain silhouette along the bottom seam where the pink horizon meets the baseboard.
Needs to Make That Thing
- Wall paints (Midnight navy, cosmic violet, blush pink, white)
- Paint rollers and trays
- Large synthetic blending brushes
- Painter’s tape



14. Dreamy Macramé Moon & Star Dreamcatcher Wall
What This Idea Means
Hanging large woven macramé dreamcatchers shaped like crescent moons and stars creates a soft, bohemian aesthetic. They add cozy texture and delicate movement while honoring celestial shapes.
How to Make It
- Shape Frame: Bend thick wire or wooden hoops into large crescent moon and 5-point star outlines.
- Weave Interior: Weave intricate web patterns inside the metal frames using natural cream cotton cord.
- Attach Fringe: Tie long, flowing macramé cords, wooden beads, and soft white feathers along the bottom frame edges.
- Hang Grouping: Hang a cluster of three moon and star dreamcatchers of varying sizes above your bed headboard.
Tips and Variations
- Tips: Wrap fairy lights around the outer metal frame structure to illuminate the woven cotton webs at night.
- Variations: Dip-dye the lower cotton fringe ends in pastel pink or purple fabric dye for an ombre look.
Needs to Make That Thing
- Metal crescent moon and star frame hoops
- Natural cotton macramé cord
- Wooden beads and feathers
- Clear wall hooks
15. Metallic Foil Zodiac Constellation Decals
What This Idea Means
Applying metallic gold or silver vinyl constellation decals onto a dark accent wall provides a clean, budget-friendly design. It highlights your personal zodiac sign with shiny metallic detail.
How to Make It
- Prep Wall Surface: Clean a dark-painted wall with a damp cloth and let dry completely.
- Plan Layout: Arrange self-adhesive metallic gold vinyl constellation stickers on the wall surface.
- Apply Decals: Peel the backing paper, press the vinyl decal firmly onto the wall using a scraper tool, and carefully peel away the clear transfer tape.
- Add Accent Stars: Scatter individual mini gold star dots around the main zodiac constellations to fill open space naturally.
Tips and Variations
- Tips: Use removable interior-safe vinyl so you can peel off decals without damaging wall paint when changing decor.
- Variations: Pair major zodiac constellations with small handwritten gold lettering of your favorite inspirational quotes.
Needs to Make That Thing
- Removable metallic gold/silver vinyl constellation decals
- Squeegee or scraper tool
- Dark interior wall background
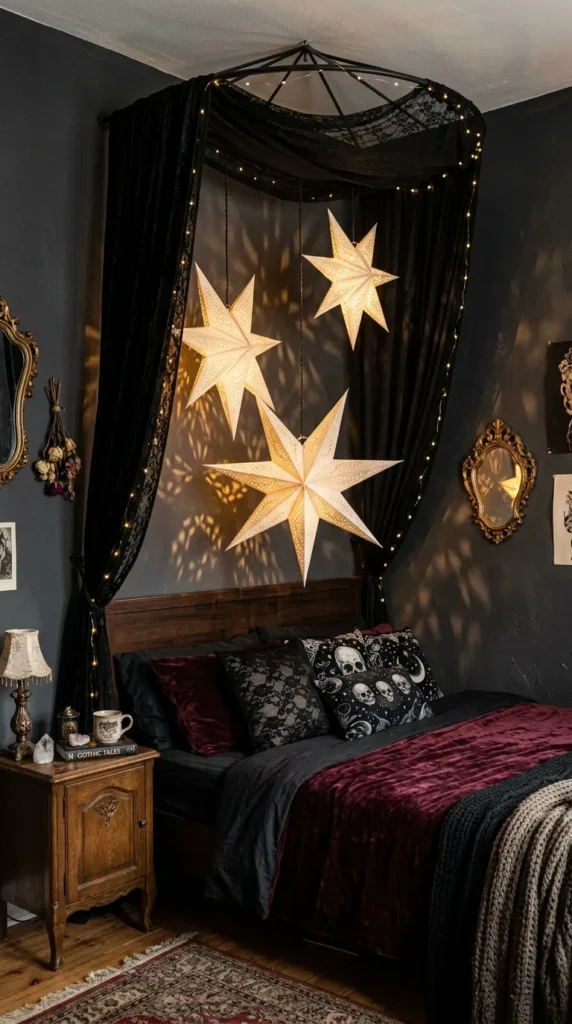
16. DIY Hanging Glowing Star Lantern Canopy
What This Idea Means
Suspending paper star lanterns featuring intricate laser-cut star patterns from the ceiling creates a 3D canopy above your bed. Lit from within by LED bulbs, they cast mesmerizing starry patterns across walls.
How to Make It
- Assemble Stars: Unfold 3 to 5 multi-pointed 3D paper star lanterns in varying sizes (white, gold, dark navy).
- Insert LED Bulbs: Insert warm LED light cords or battery-operated LED puck lights inside each paper star core.
- Hang at Varied Heights: Mount ceiling hooks above a bedroom corner or headboard, suspending stars at staggered heights using clear fishing line.
- Illuminate: Turn on the lights to watch geometric light patterns project onto surrounding wall surfaces.
Tips and Variations
- Tips: Use cool-burning LED bulbs only; incandescent bulbs can overheat paper star lanterns.
- Variations: Choose velvet or metallic foil star lanterns for a rich texture even when unlit during the daytime.
Needs to Make That Thing
- 3D folded paper star lanterns
- Hanging LED light cords or puck lights
- Clear monofilament fishing line
- Ceiling hooks
17. Acrylic Deep Space Window Illusion Frame
What This Idea Means
Mounting a faux wooden window frame over a backlit, high-definition deep space galaxy print creates the illusion of looking out a spaceship or observatory window directly into outer space.
How to Make It
- Source Space Print: Get a high-resolution print of a deep space hubble galaxy photo or cosmic planet scene.
- Build Window Frame: Paint or stain a 4-pane wooden window frame (or upcycle a real vintage window frame).
- Mount Backlighting: Attach a flat LED backlight panel or light strip inside the back of the window frame.
- Assemble & Hang: Sandwich the galaxy print behind the window pane frame and mount the entire structure securely to your wall.
Tips and Variations
- Tips: Use a rustic, distressed wood finish on the frame for a cozy “cabin observatory” aesthetic.
- Variations: Use a circular round ship porthole frame instead of a square grid window frame.
Needs to Make That Thing
- HD deep space galaxy print
- 4-pane wooden window frame
- Flat LED backlight panel or light strips
- Heavy-duty wall mounting anchors
18. Floating Glowing Crystal & Agate Slice Wall Grid
What This Idea Means
Displaying natural sliced agate geodes and raw crystals on an illuminated wall grid highlights the cosmic beauty of natural minerals. Sliced agates resemble glowing miniature nebulae when backlit by soft light.
How to Make It
- Mount Metal Grid: Install a minimalist black or gold wire grid panel onto your bedroom wall.
- Attach Agate Slices: Mount colorful translucent agate slices (purple, blue, magenta) onto the grid frame using small clear clips.
- Add Backlighting: Run a soft LED light strip along the back outer edges of the wire grid panel.
- Light Up: When lit, light streams through the translucent agate slices, revealing organic mineral rings that look like cosmic clouds.
Tips and Variations
- Tips: Choose polished agate slices that are thin enough for light to pass through easily.
- Variations: Interlace small air plants and brass sun charms between the agate slices on the wire grid.
Needs to Make That Thing
- Black or gold metal wire grid panel
- Translucent sliced agate geodes
- Clear mounting clips
- Backlit LED light strip
19. DIY Cosmic Splatter Art Canvas Triptych
What This Idea Means
Creating a 3-piece (triptych) large canvas splatter art set lets you create customized abstract galaxy art. Spanning across three connected canvases, it forms a dramatic wall centerpiece above your bed.
How to Make It
- Set Up Canvases: Line up three identical large blank canvases horizontally on a protective floor tarp.
- Paint Dark Base: Paint all three canvases with matte black acrylic paint, extending strokes across canvas edges.
- Sponge Nebula: Sponge deep purple, magenta, and turquoise paint in a continuous sweeping diagonal path across all three canvases.
- Splatter Starfield: Dip a stiff brush into thinned white and silver metallic paint. Flick paint vigorously over the canvases to create dense clusters of stars and cosmic dust.
- Hang Set: Mount the three canvases side by side on your wall, keeping 2 inches of space between panels.
Tips and Variations
- Tips: Paint all three canvases simultaneously while laid side by side so nebula cloud shapes flow seamlessly across the panel gaps.
- Variations: Apply thin sheets of gold leafing onto major star spots for metallic shine.
Needs to Make That Thing
- 3 identical stretched cotton canvases
- Acrylic paints (black, purple, magenta, turquoise, white, silver)
- Natural sponges and stiff bristle brushes
- Floor tarp and tape
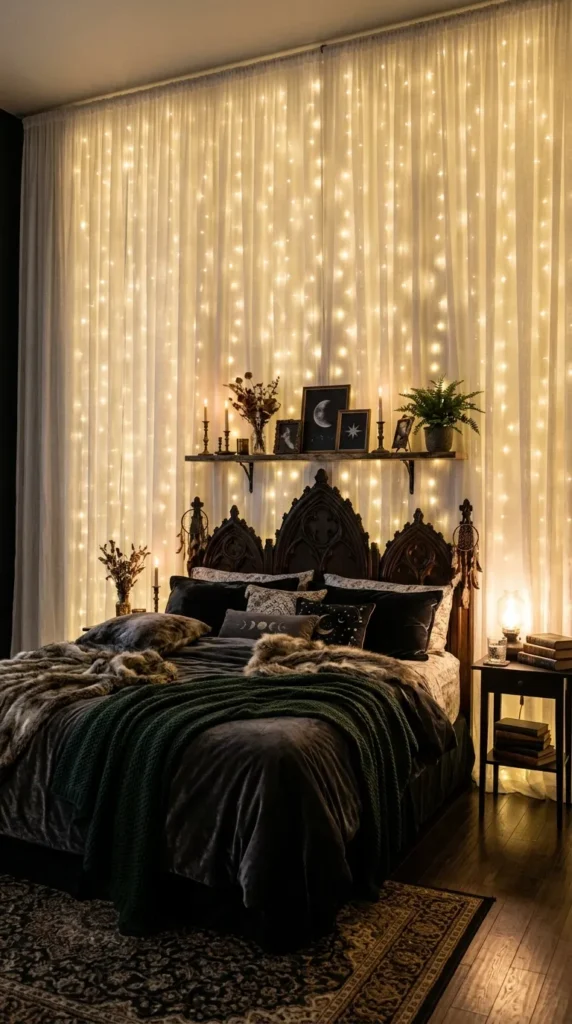
20. Starlight String Light Curtain with Sheer Canopy Wall
What This Idea Means
Draping sheer white curtains over dense vertical strings of warm LED lights against a dark wall creates a glowing starry wall canopy. It softens wall lines while casting a gentle, dreamlike celestial light across the bedroom.
How to Make It
- Mount Curtain Rod: Install a double curtain rod bracket near the ceiling line above your bed.
- Hang LED Light Curtain: Hang a dense LED fairy light curtain on the inner rod, letting light strands hang straight down the wall.
- Hang Sheer Drapes: Hang sheer white or translucent navy floor-length curtain panels on the outer rod over the lights.
- Style Canopy: Dim room lights; the sheer fabric diffuses the bright LED points into soft, glowing cosmic starlight.
Tips and Variations
- Tips: Use USB-powered LED light curtains with multiple glow modes (slow fade, twinkle, steady) for customizable mood lighting.
- Variations: Add tiny clip-on metallic gold star charms onto the sheer curtain fabric to catch ambient light reflections.
Needs to Make That Thing
- Double curtain rod and brackets
- LED fairy light curtain
- Sheer floor-length curtain panels
- Clip-on metallic star charms (optional)